While exploring the unsettling world of Silent Hill f, you’ll encounter many puzzles. Some are straightforward and easy to figure out, but others are much more challenging – like the kind of tricky riddles a particularly frustrating troll might give you.
As a Silent Hill fan, one of the first really cool puzzles I remember in Silent Hill f is the Shrine Vault. It happens right after you solve the puzzle at the Altar, and it’s all about running around a creepy, monster-filled area to find symbols. You need to collect those symbols to unlock a combination lock, which is a classic Silent Hill challenge!
This guide provides solutions to the Shrine Altar puzzle in Silent Hill f, covering all three difficulty settings: Story mode, Hard mode, and Lost in the Fog.
Silent Hill f Shrine puzzle: Story difficulty solution
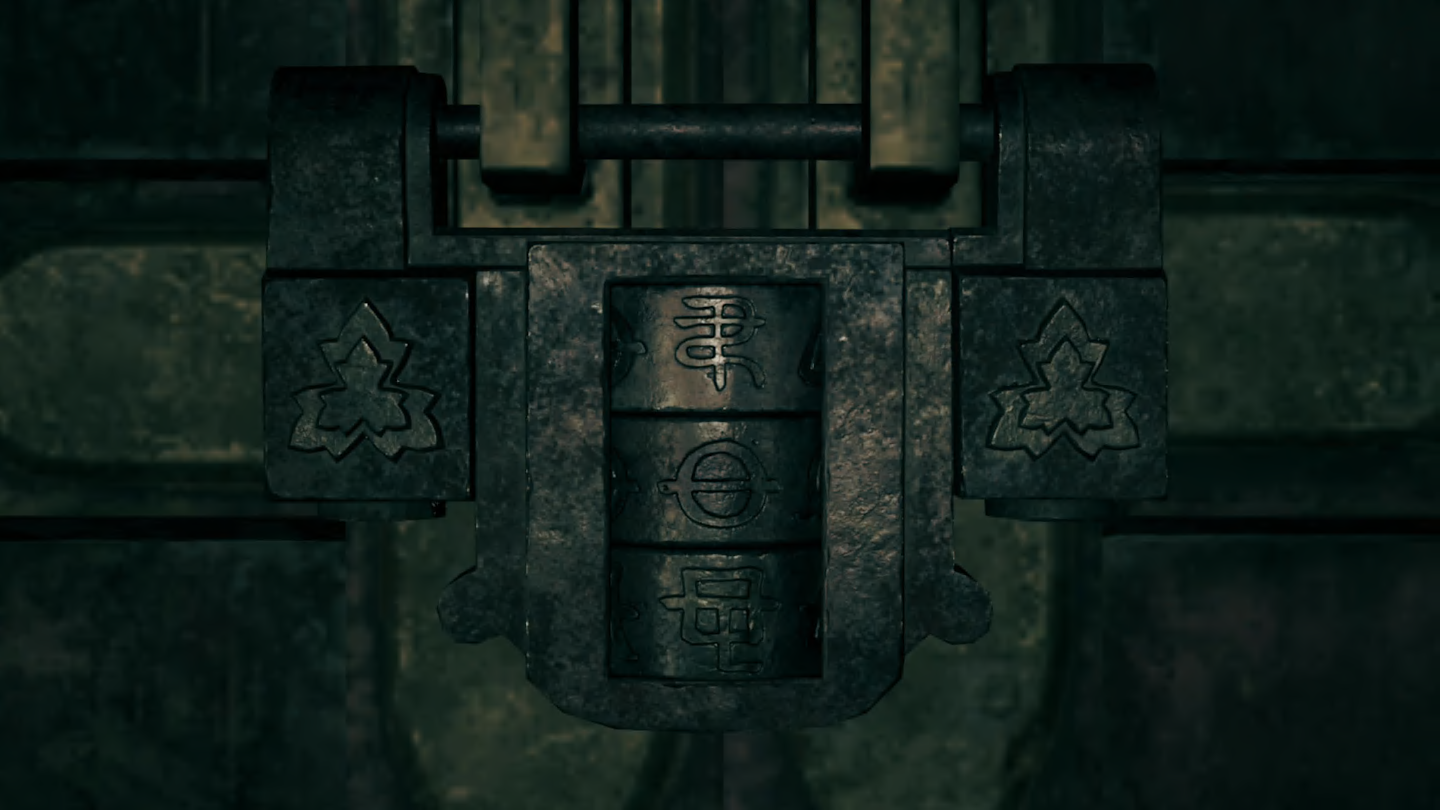
To open the shrine’s vault, you need to find a three-symbol combination for a lock. The symbols are written on small wooden plaques called ema, which are displayed around the area. You’ll have to examine specific plaques to discover the correct combination.
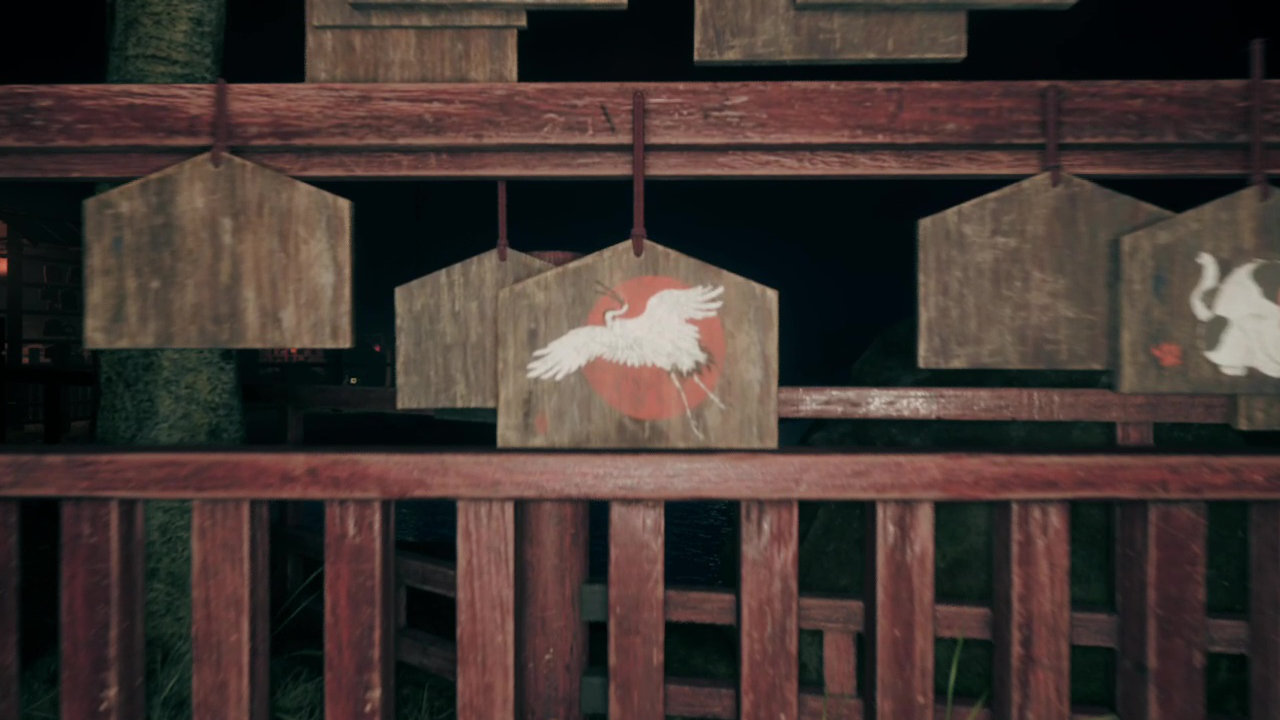
If you’re playing on Story difficulty, you’ll need to locate three special ema: the crane, the serpent, and the tortoise. You can find these ema on racks located in three different areas: south, west, and northwest.
You can find a tortoise near the ema rack at the southernmost point. Interact with the racks to find the tortoise ema, then flip it over to reveal its symbol. This symbol will be saved in your journal for future reference.
Return to the shrine with the two fox statues, and then go west until you reach the ema rack in the northwest corner. You’ll find a serpent ema there – flip it over to reveal its symbol.

Okay, so I needed to go south, all the way to the furthest ema rack on the west side, to find the crane ema. Just like before, I flipped it over and wrote down its symbol in my journal. Another one down!
After collecting all three symbols, return to the vault and enter them in the correct order: crane first, then serpent, and finally tortoise.
Silent Hill f Shrine puzzle: Hard difficulty solution
In the challenging version of this Shrine puzzle, you’ll need to find special wooden plaques, called ema, using clues provided by a spooky doll.
Lightning cast down from the heavens split asunder the decayed tree.
From the earth grows kudzu, the prophet of eternal prosperity.
Go to the ema rack furthest south. Look for the ema decorated with a dead tree – it’s easy to find because the entire thing is painted with a landscape. Turn it over to copy the symbol into your journal.

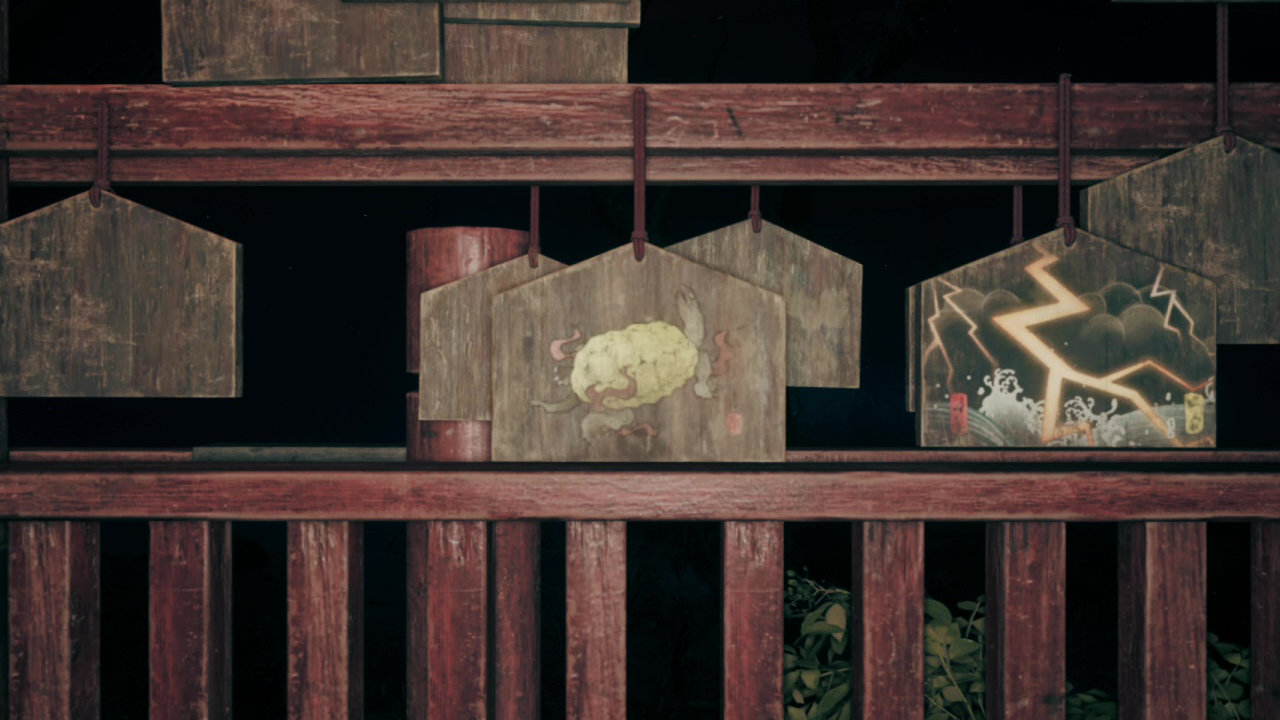
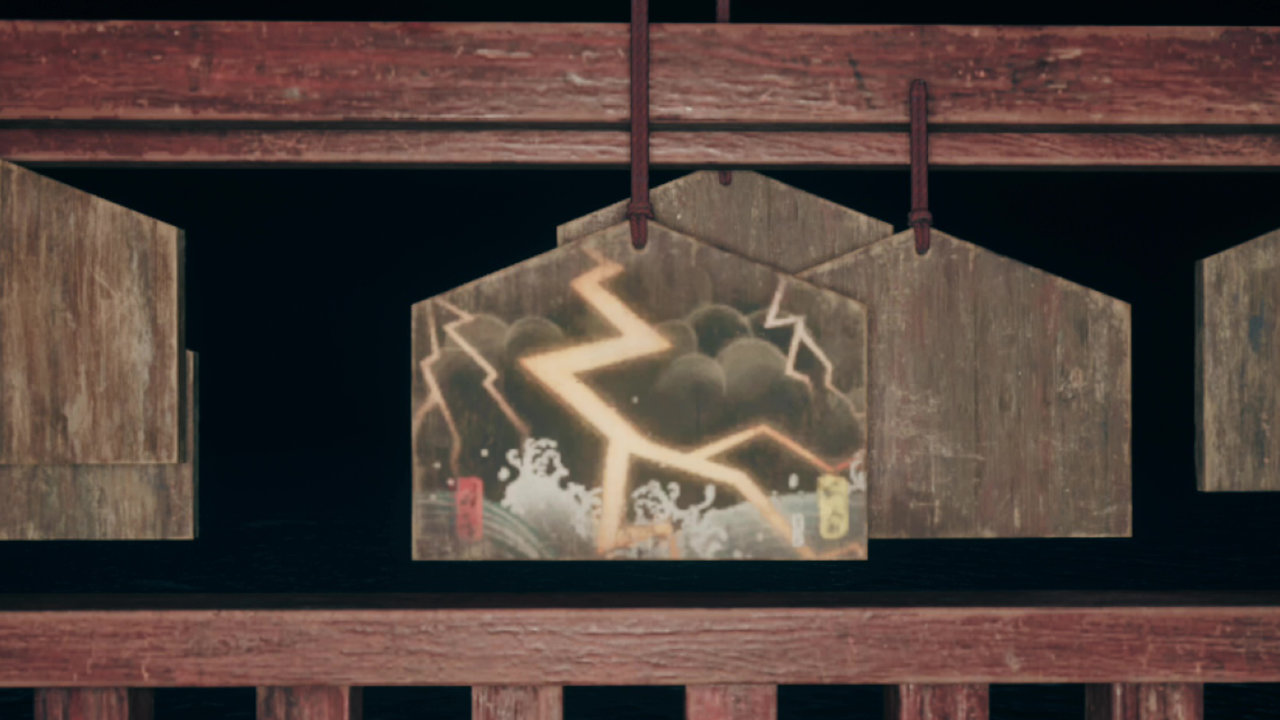
Okay, so I found this cool ema rack in the northwest area, and it has the lightning ema on it. It’s unique because the artwork completely covers the whole ema – it’s a dark cloud with lightning striking over the ocean. I made sure to copy down the symbol on the back. Plus, I snagged the dial for the combination lock from it, which I’ll need to figure out the full code!
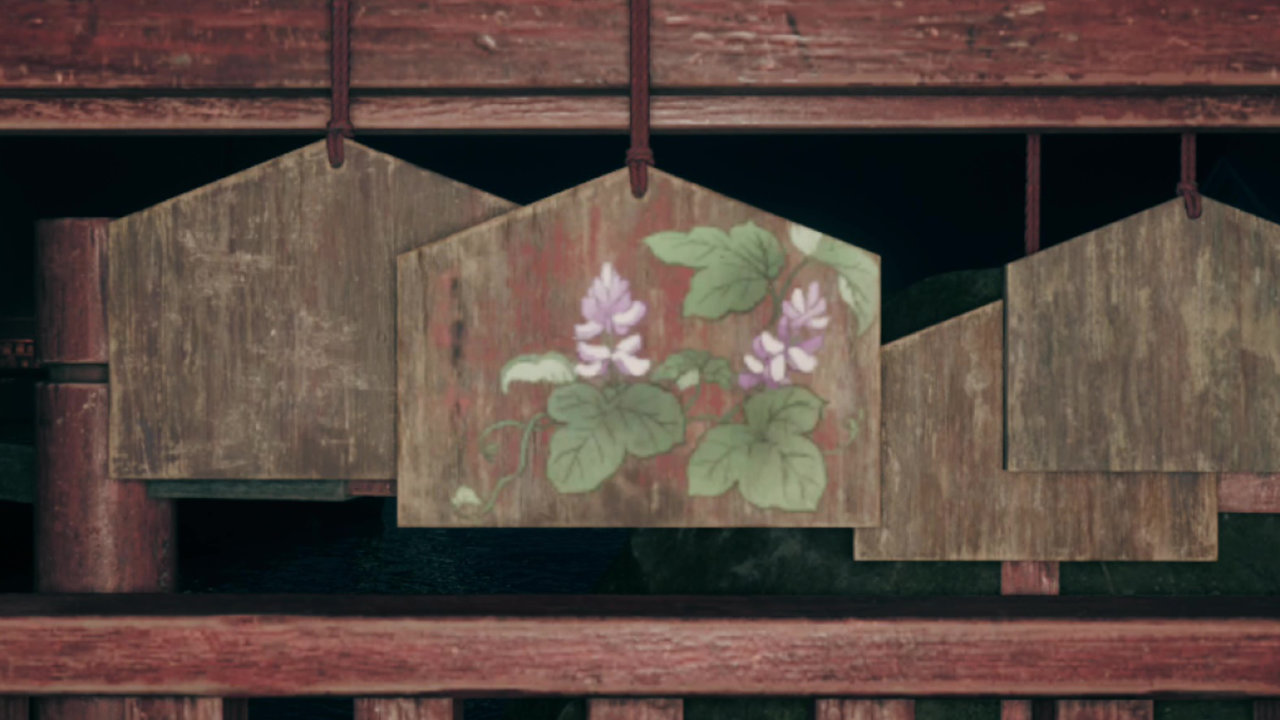
The furthest ema rack on the left holds the kudzu ema, decorated with two lavender flowers that have wide leaves. Be sure to copy its symbol into your journal. While you’re there, you’ll also find a clue about a special omamori hidden behind the ema featuring a large orange cat in the same spot.
After collecting all three symbols, return to the vault and enter them in the correct order: lightning first, then the decayed tree, and finally the kudzu.
Silent Hill f Shrine puzzle: Lost in the Fog difficulty solution
Similar to the hard difficulty, the ‘Lost in the Fog’ version of this puzzle requires you to solve it using a clue provided by the unsettling doll. Here’s the key part of that clue:
The Yokai of the Carriage had their heads removed.
The Yokai of the Umberella, their arms.
And the Yokai of the Kettle, their legs.
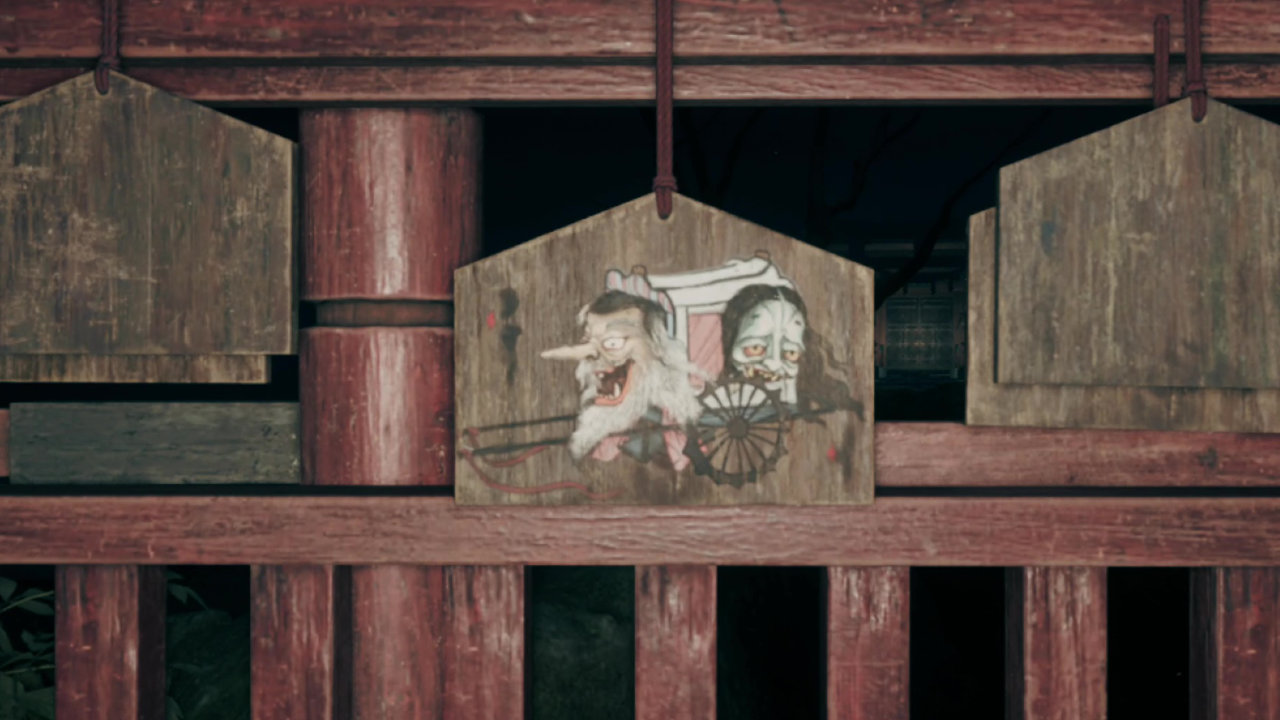
Go south to the ema rack you passed on your way to the shrine. Find the Yokai of the Carriage – it looks like a two-headed caravan. Turn it over to reveal four symbols, which will automatically be saved in your journal under the ‘Yokai of the Carriage’ section.
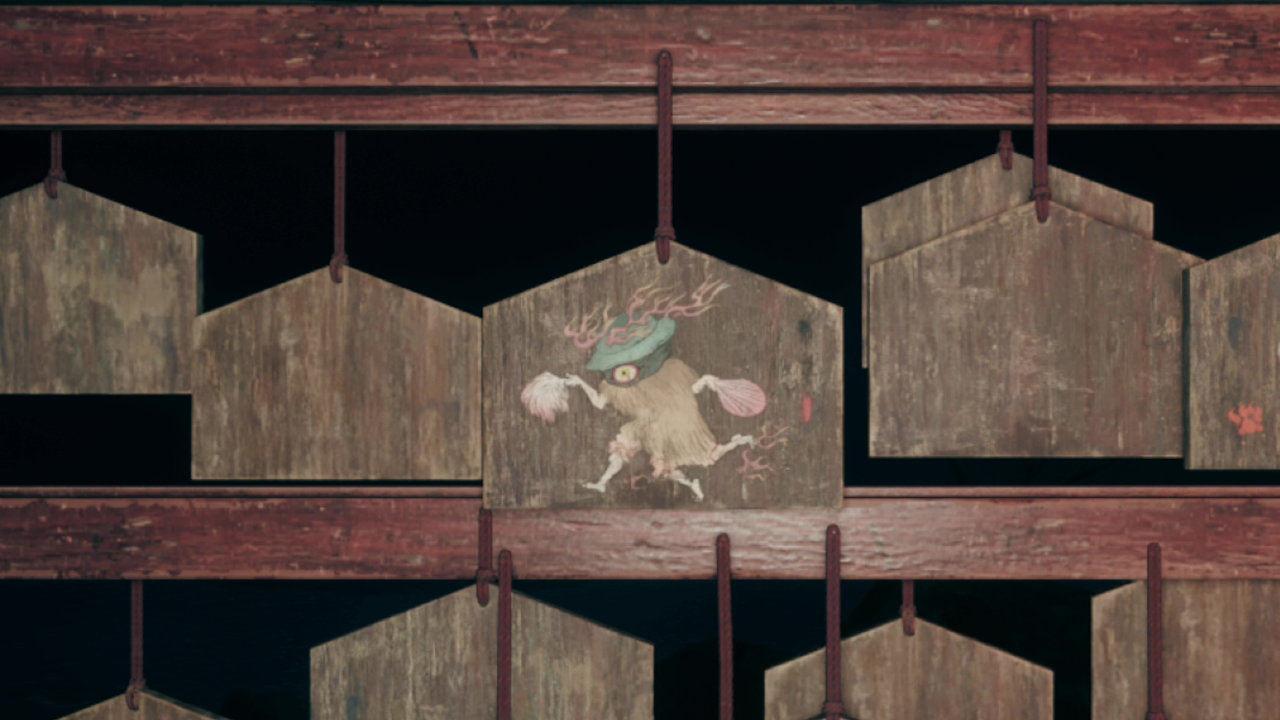
Go to the shrine, then look for the ema rack in the northwest corner. You’re searching for the Yokai of the Kettle – it’s a figure of a running man with three legs and glowing trails coming from its head and feet. Once you find it, flip it over to reveal four new symbols to add to your journal.
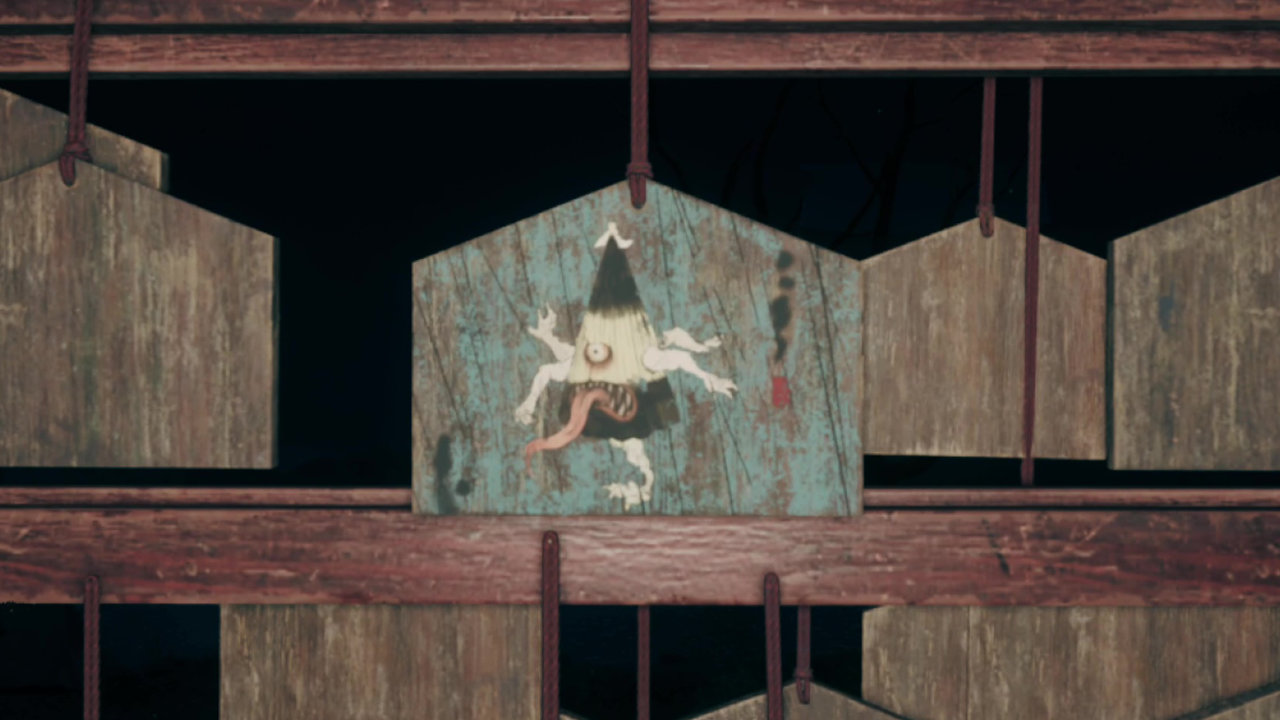
Lastly, go south to the furthest shrine on the west. There, you’ll find a peculiar, triangular Yokai with four arms and a disturbingly long tongue-it looks like an umbrella-shaped prayer tablet. Turn it over to uncover the last four symbols, and they’ll automatically be added to your journal.
Return to the Shrine Vault, located east of the main shrine, and use the combination lock. Check your journal to see the symbols you’ve gathered – you’ll find four symbols for each Yokai.
Okay, so I figured out the puzzle! You have to go back and really look at what the creepy doll wrote. It basically says each Yokai is missing a body part. You need to count how many of *that* body part the Yokai in the puzzle actually has, then pick the symbol that matches that number in the order they gave you. That’s the code you need to enter into the lock!
- The Yokai of the Carriage had its heads removed, and it has two heads, so the second symbol in its sequence is the correct one.
- The Yokai of the Umbrella had its arms removed, and it has four arms, so the fourth symbol in its sequence is the correct one.
- Finally, the Yokai of the Kettle had its legs removed, and it has three legs, so the third symbol in its sequence is the correct one.
Type the symbols into the combination lock, reading from top to bottom, and then confirm to unlock it and continue playing.
Read More
- Silver Rate Forecast
- Gold Rate Forecast
- 22 Films Where the White Protagonist Is Canonically the Sidekick to a Black Lead
- Brent Oil Forecast
- 15 Films That Were Shot Entirely on Phones
- Unveiling the Schwab U.S. Dividend Equity ETF: A Portent of Financial Growth
- How to Do Sculptor Without a Future in KCD2 – Get 3 Sculptor’s Things
- 14 Movies Where the Black Character Refuses to Save the White Protagonist
- 20 Movies Where the Black Villain Was Secretly the Most Popular Character
- Games That Faced Bans in Countries Over Political Themes
2025-09-24 15:47