
In the game Avowed, bounties play a crucial role and are an effective means to upgrade your equipment. While not all bounties provide top-tier gear directly, they all reward you generously with coins suitable for your current location. This allows you to purchase enhanced versions of your preferred weapons or armor, thus easing the challenge posed by enemies. As you complete more bounties, the number of skulls next to enemy names gradually diminishes, making combat less difficult.
In the game called “Avowed,” there are formidable foes that you’ll come across. The rewards may task you with vanquishing numerous enemies. It’s beneficial to know their locations before venturing into the wilderness, as this helps you avoid stumbling upon one unprepared. In this case, knowledge proves powerful, and given the challenge some of these bounties present, having all the information at your disposal will be crucial for facing them effectively.
Where To Find All Bounties & Their Rewards
Every Bounty Broken Down By Region

In the game Avowed, there are four prosperous regions where a total of 20 bounties can be found. Most of these bounties do not offer additional perks, but they all provide Experience Points (XP) and Gold based on their specific region.
For each region, you will find its location on the provided maps, along with any additional bonuses or comments that may apply.
In this way, the text is more conversational and easier to understand for a wider audience.
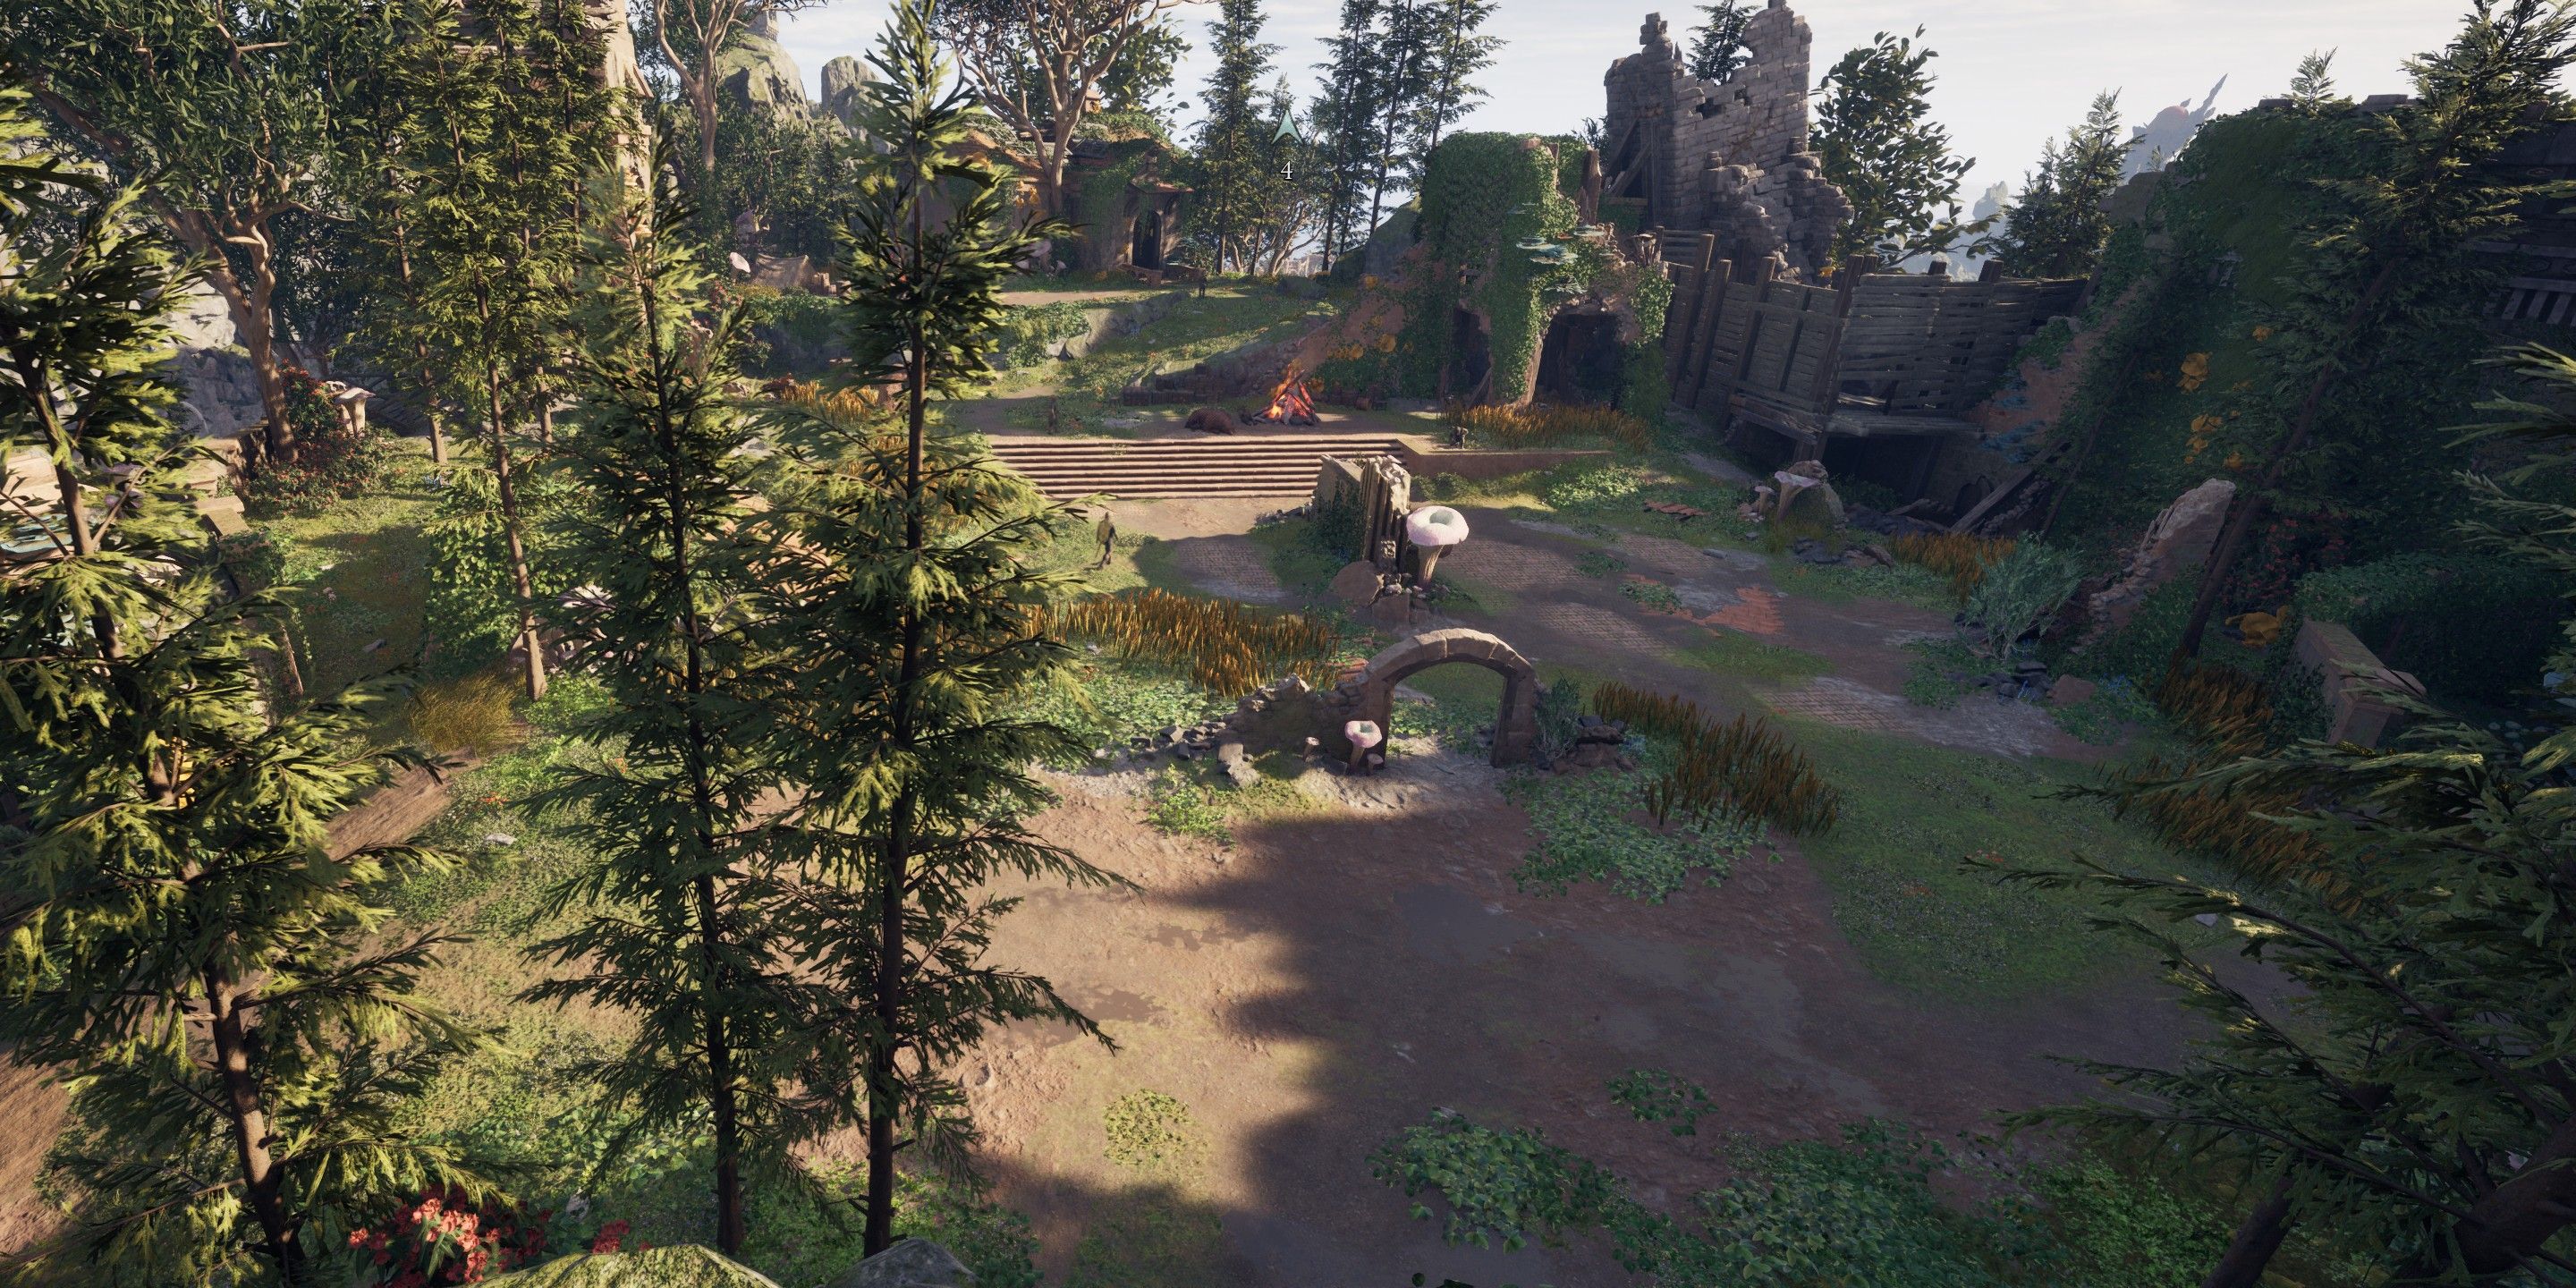
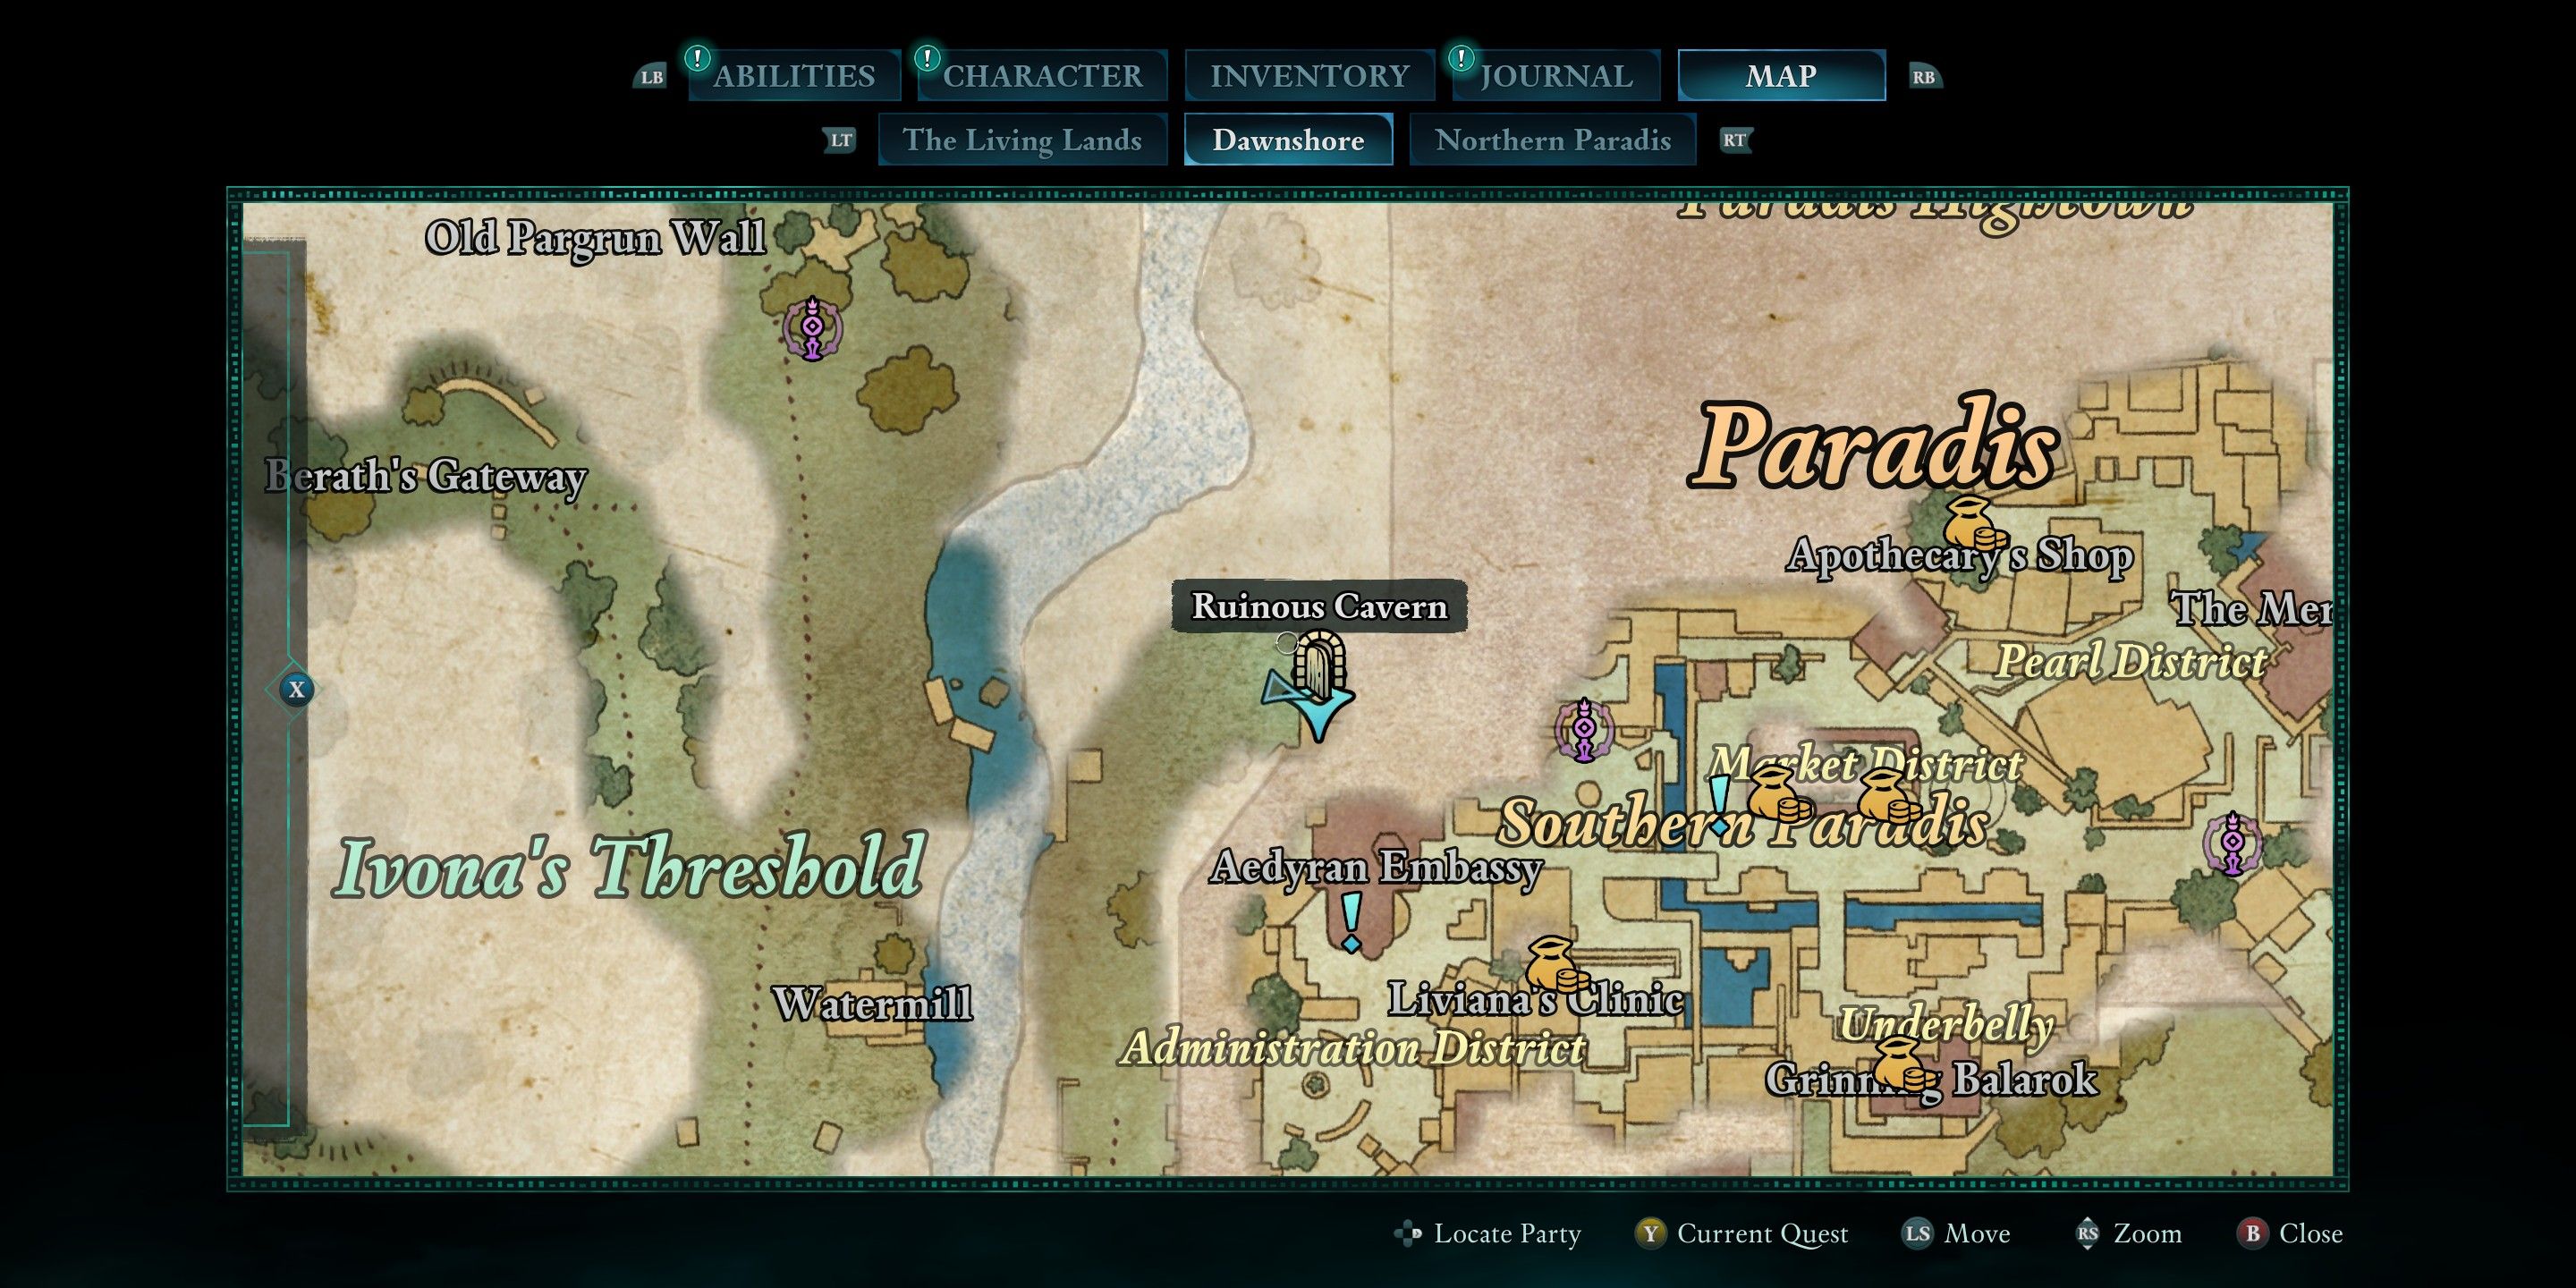
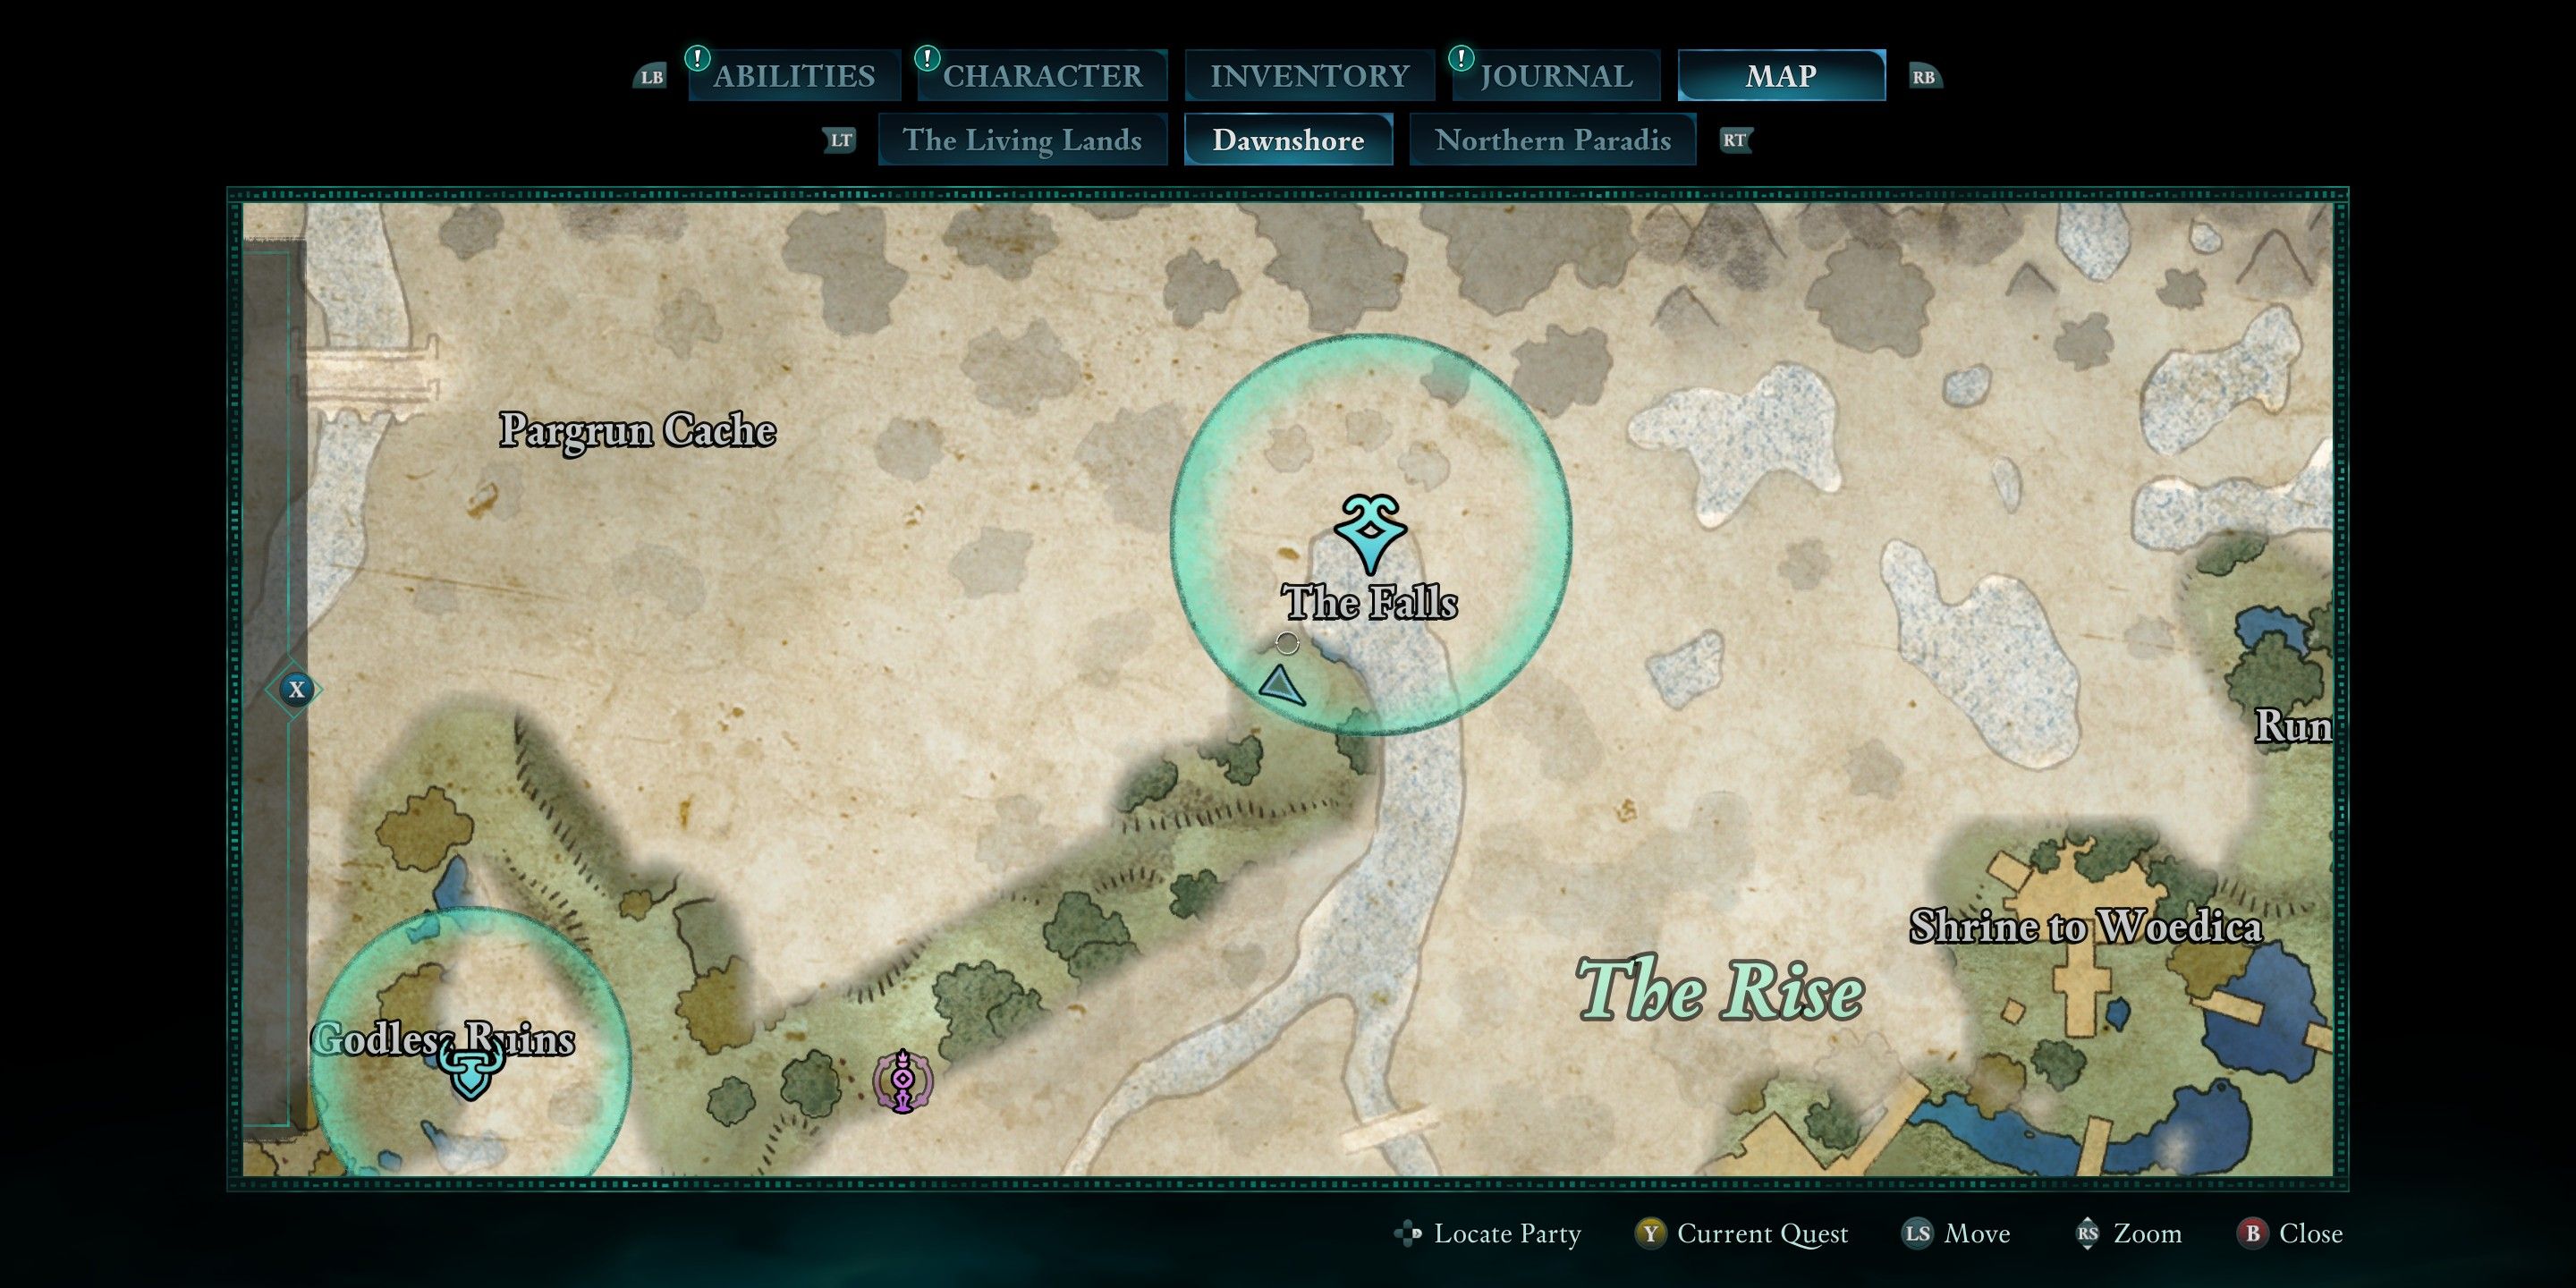
Dawnshore Bounties
In the Dawnshore area, there’s an unexpectedly challenging set of tasks to accomplish early on in the game. You can find the exact location of each task in the table provided below, along with any additional details required for their completion. Each bounty you complete in Dawnshore will net you 500 gold.
| Bounty | Location | Rewards (If Any) | Notes |
|---|---|---|---|
| Nacib |
 |
|
This one is particularly hard to find. The marker will make you think it’s in Paradis proper, but it’s not. You will have to leave Paradis and then follow the marker around the city to a cave that is surrounded by spiders. Nacib is inside that cave underground. |
| Octav the Firebrand |
 |
|
He’s not too difficult but he does have an encampment of allies. Try to take out the ranged enemies first, as they will be the most annoying to deal with. |
| Ralga |
 |
|
This one seemed like an easier one to me, especially if you have faced Thalla the Taskmaster already. They have a very similar style of attack and Ralga has a lot fewer allies. |
| Tempestuous Luandi |
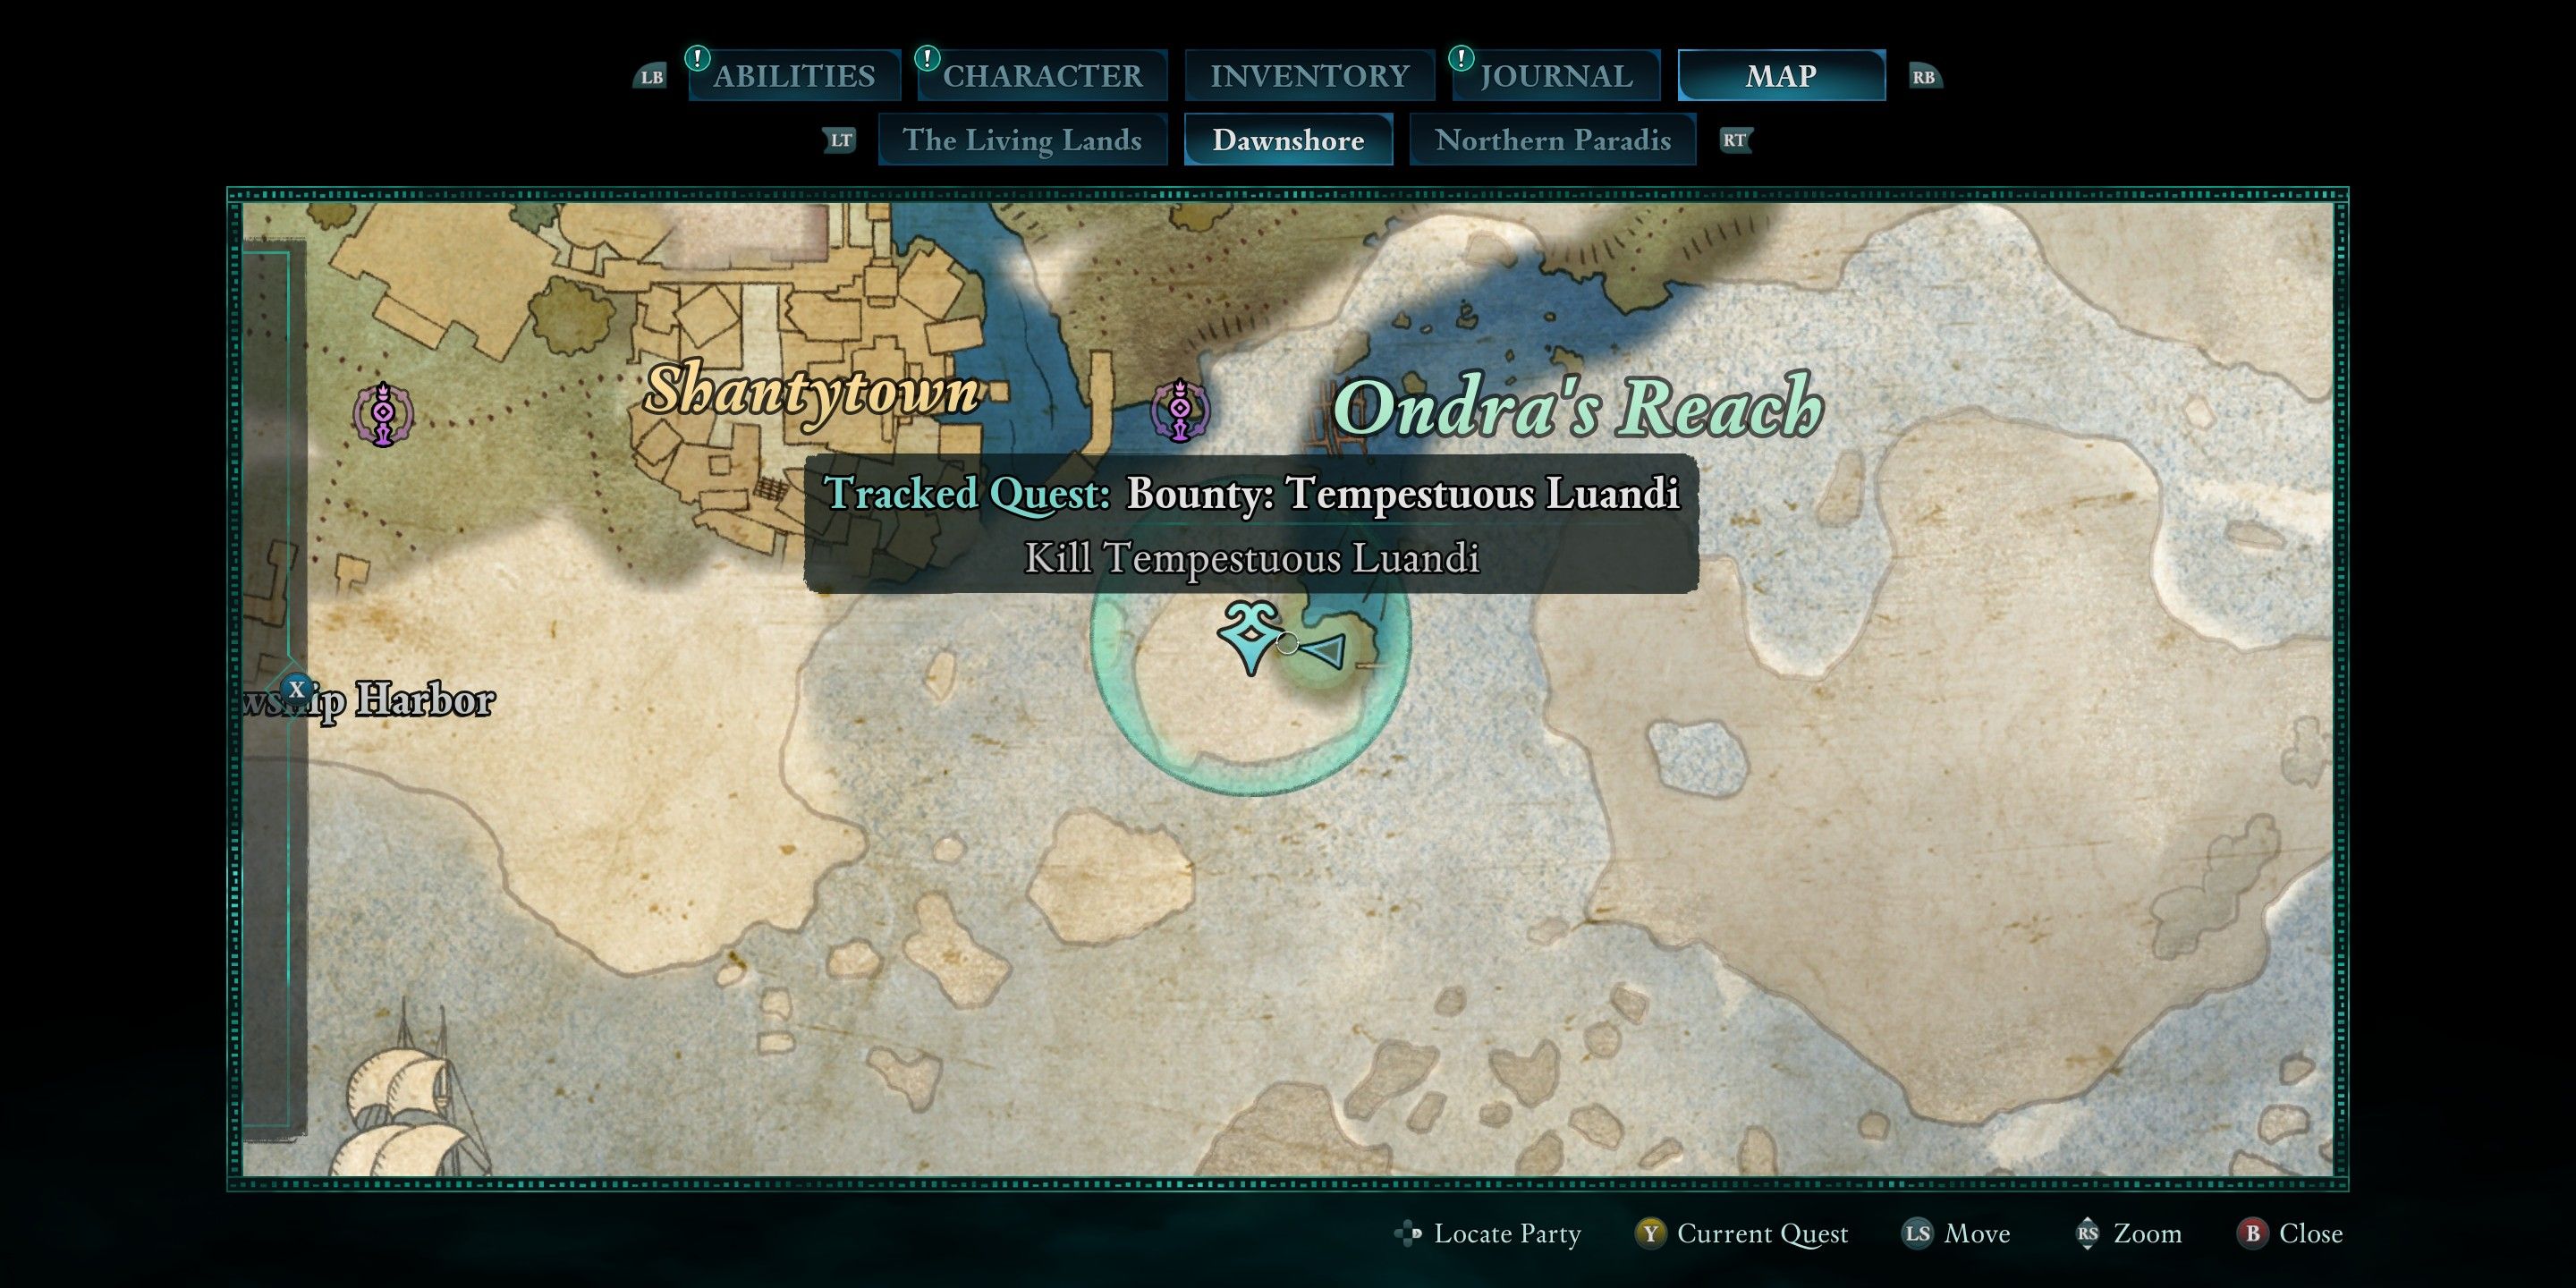 |
|
Depending on how early you find this one, it could go either way. I stumbled across it out of curiosity before I found the bounties and was immediately in over my head. However, when I came back later with slightly better gear, it was easy. I’d recommend an arquebus for this fight. |
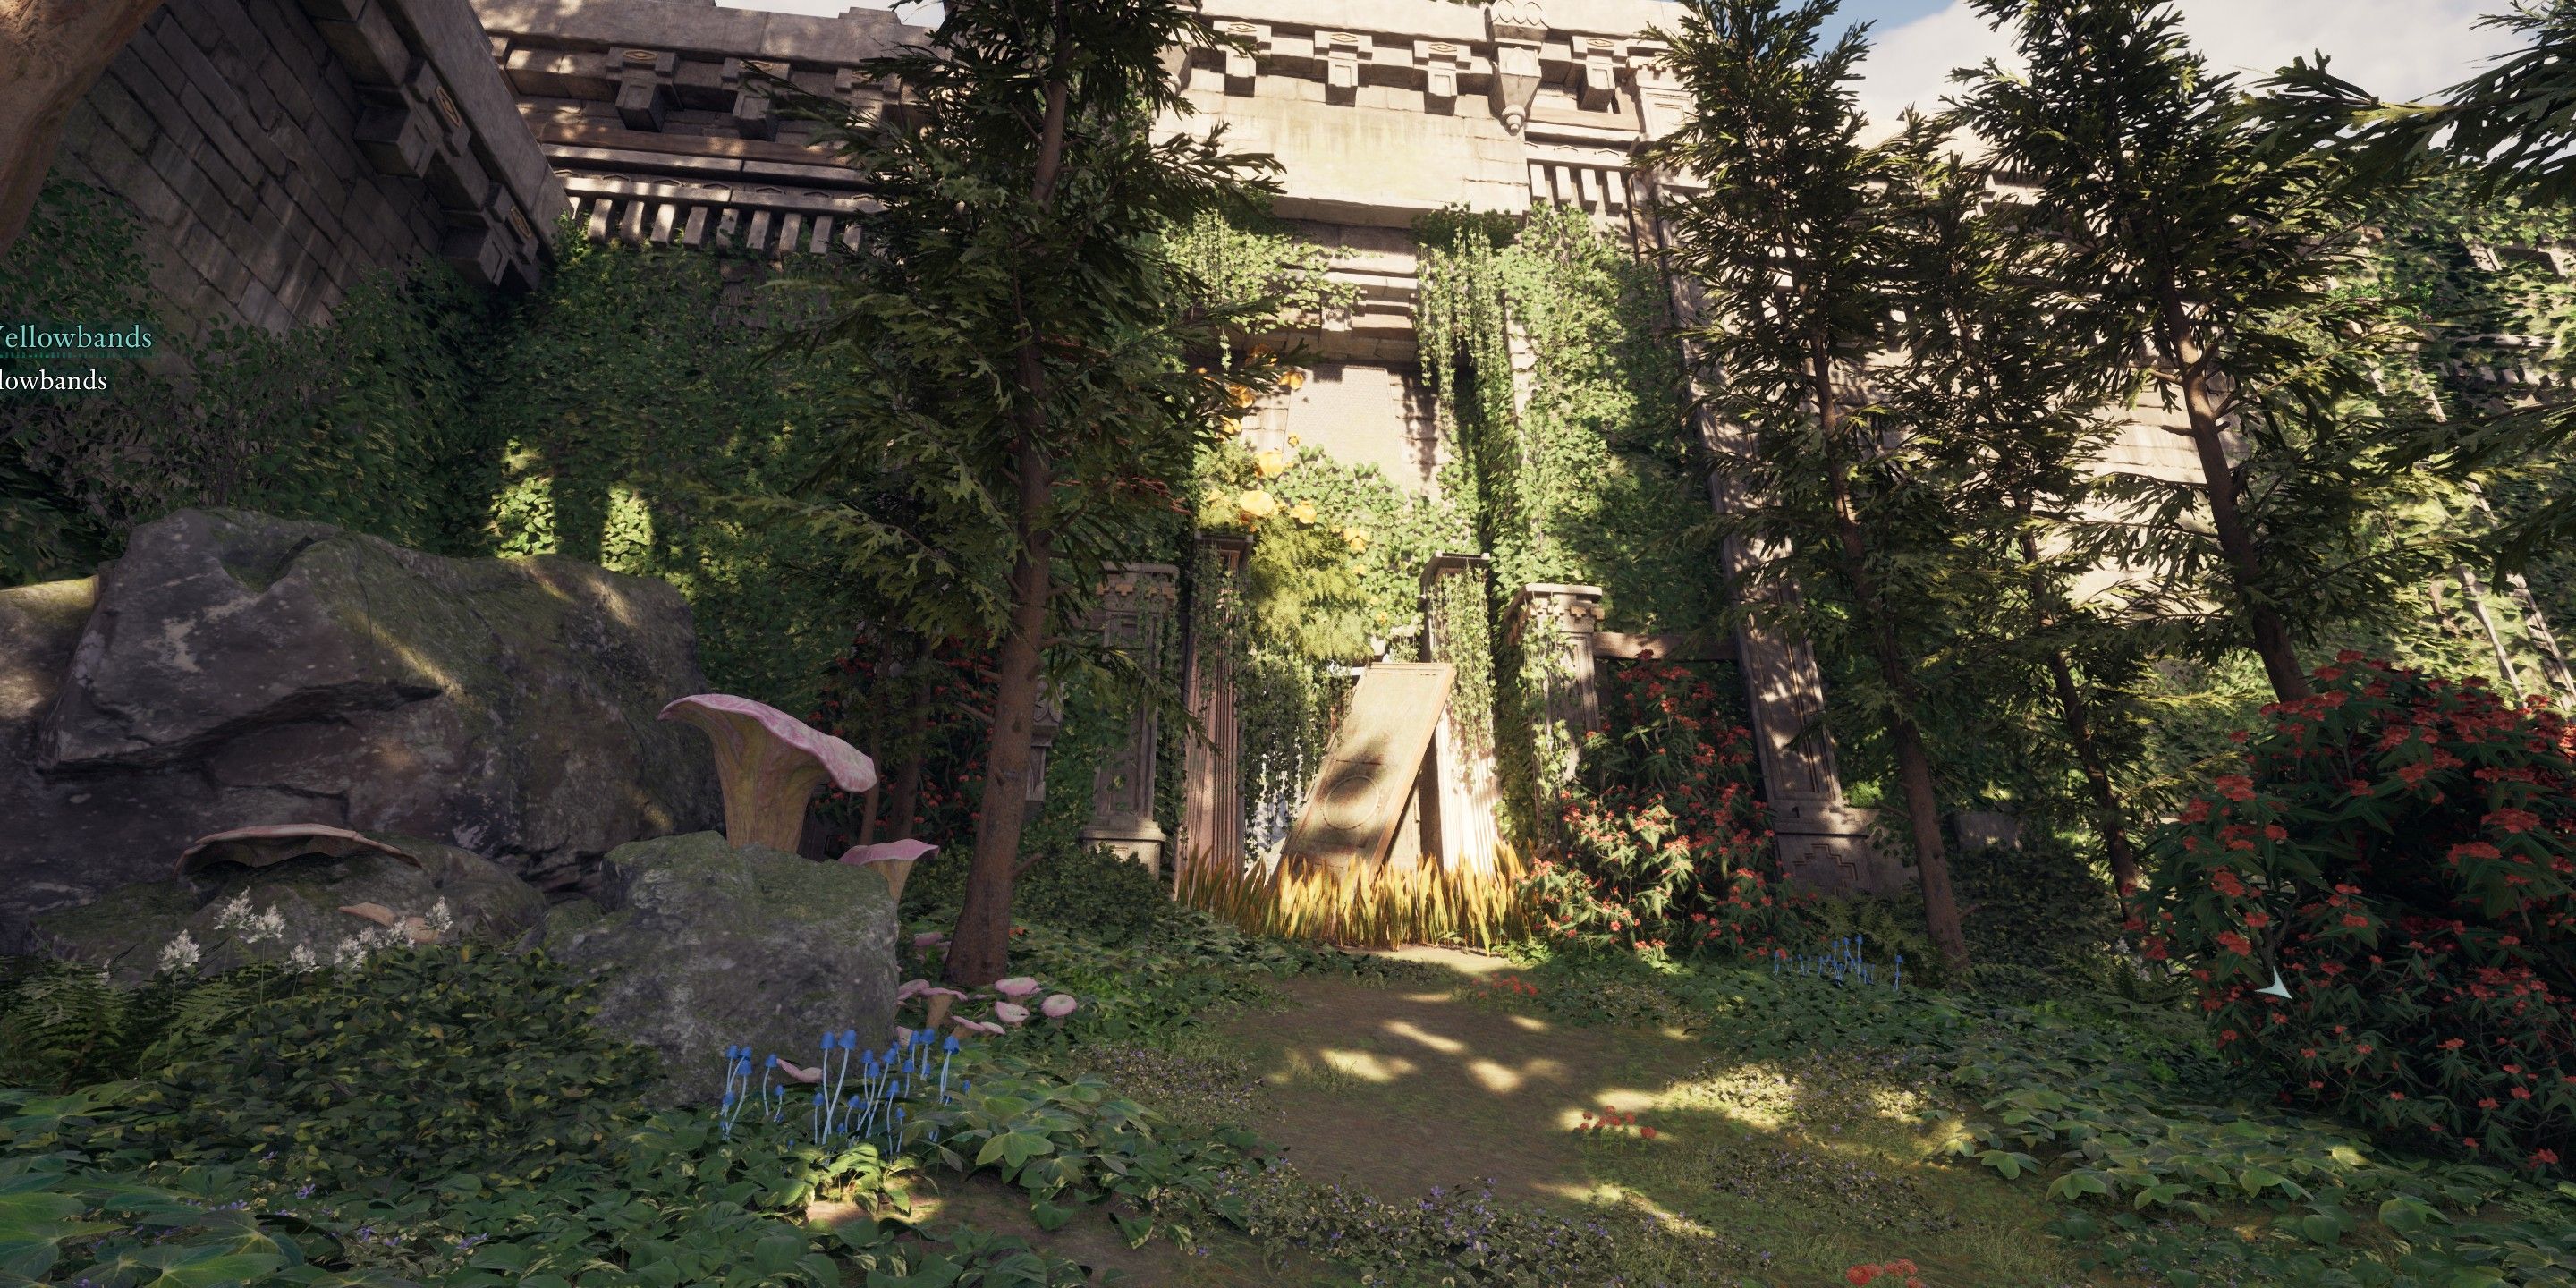
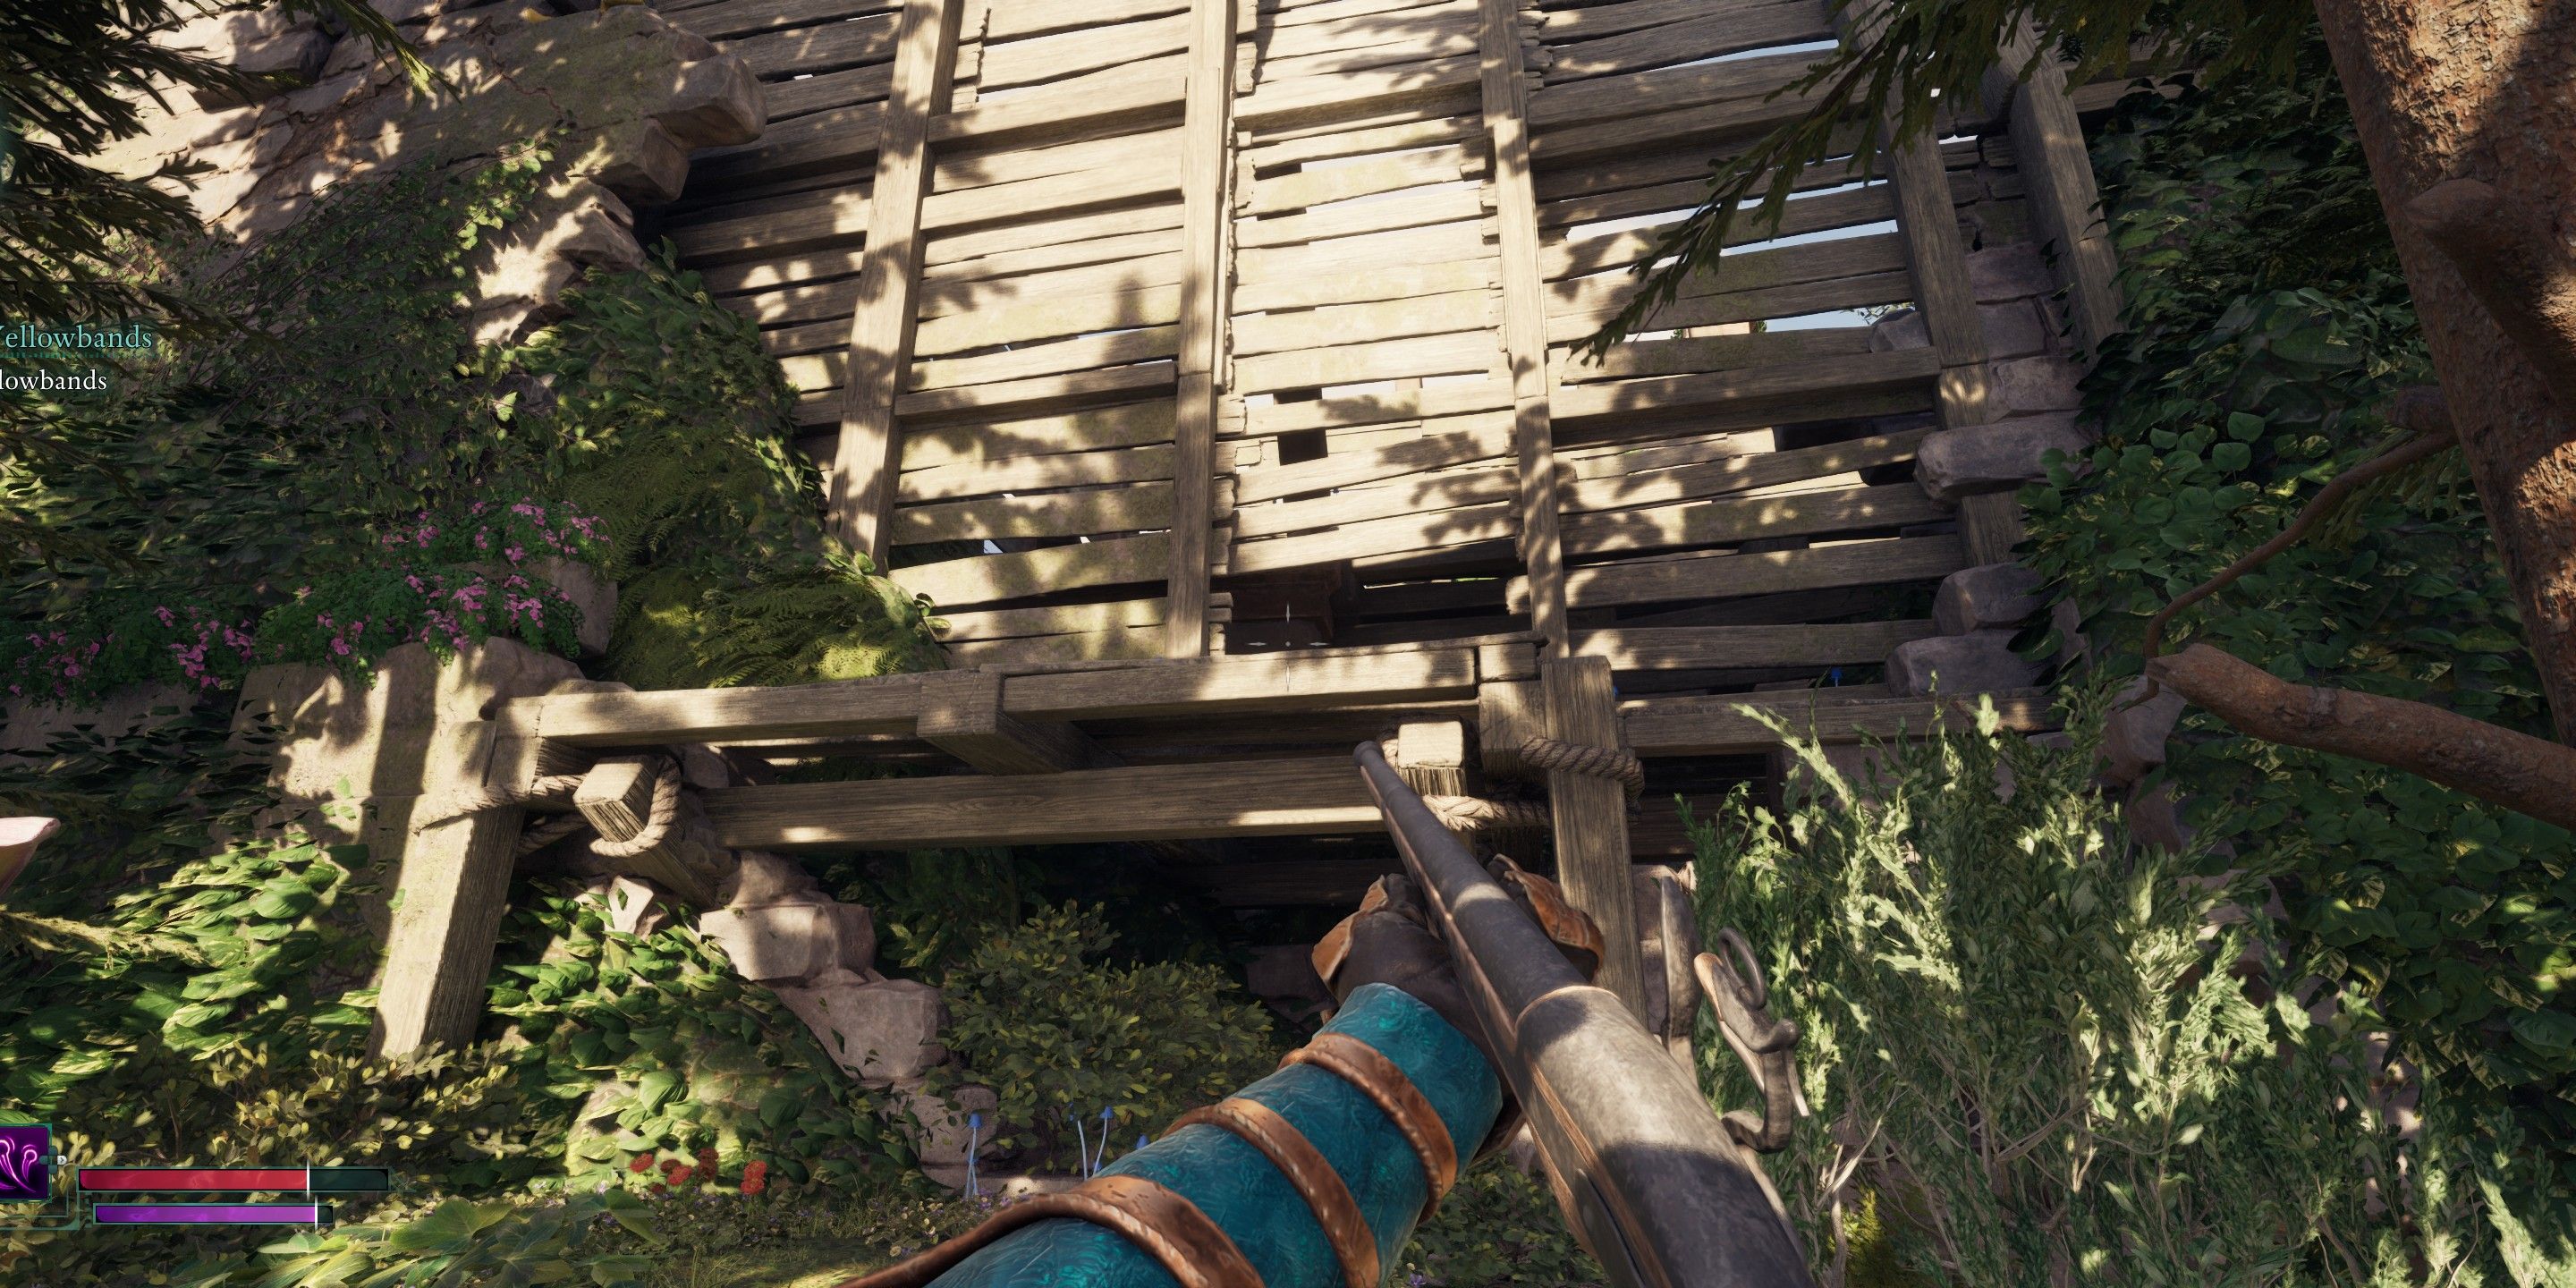
| Yellowband Camp |
 |
Misc. drops from the different enemies. | This one is hard to get into and hard to fight. Although I had upgraded gear, the sheer number of enemies is overwhelming. The stealth in this game is also disappointing, and you will, at best, get one enemy before the whole camp notices. I ended up standing in one of the house sniping enemies as they came close, which was the only way I could finish this fight. There are multiple ways into the camp, which you can see in the images below. I went through the gate, as it was no better or worse than any other route.
   |
Among all, Nacib proved the most elusive to find, while the Yellowband camp offered the greatest challenge to eliminate. By this stage, I was as well-equipped as possible, and both my comrades were by my side. However, it was a formidable battle. Fortunately, some exceptional unique weapons can be obtained from these bounties in Dawnshore within Avowed.
Emerald Stair Bounties
Whenever you traverse Fior mes Iverno, there are typically 5 opportunities to collect bounties. I stumbled upon quite a few of them unintentionally as I wandered about searching for hidden riches; it would have been advantageous to claim the bounties so I could keep track of their locations.
| Bounty | Location | Extra Rewards (If Any) | Notes |
|---|---|---|---|
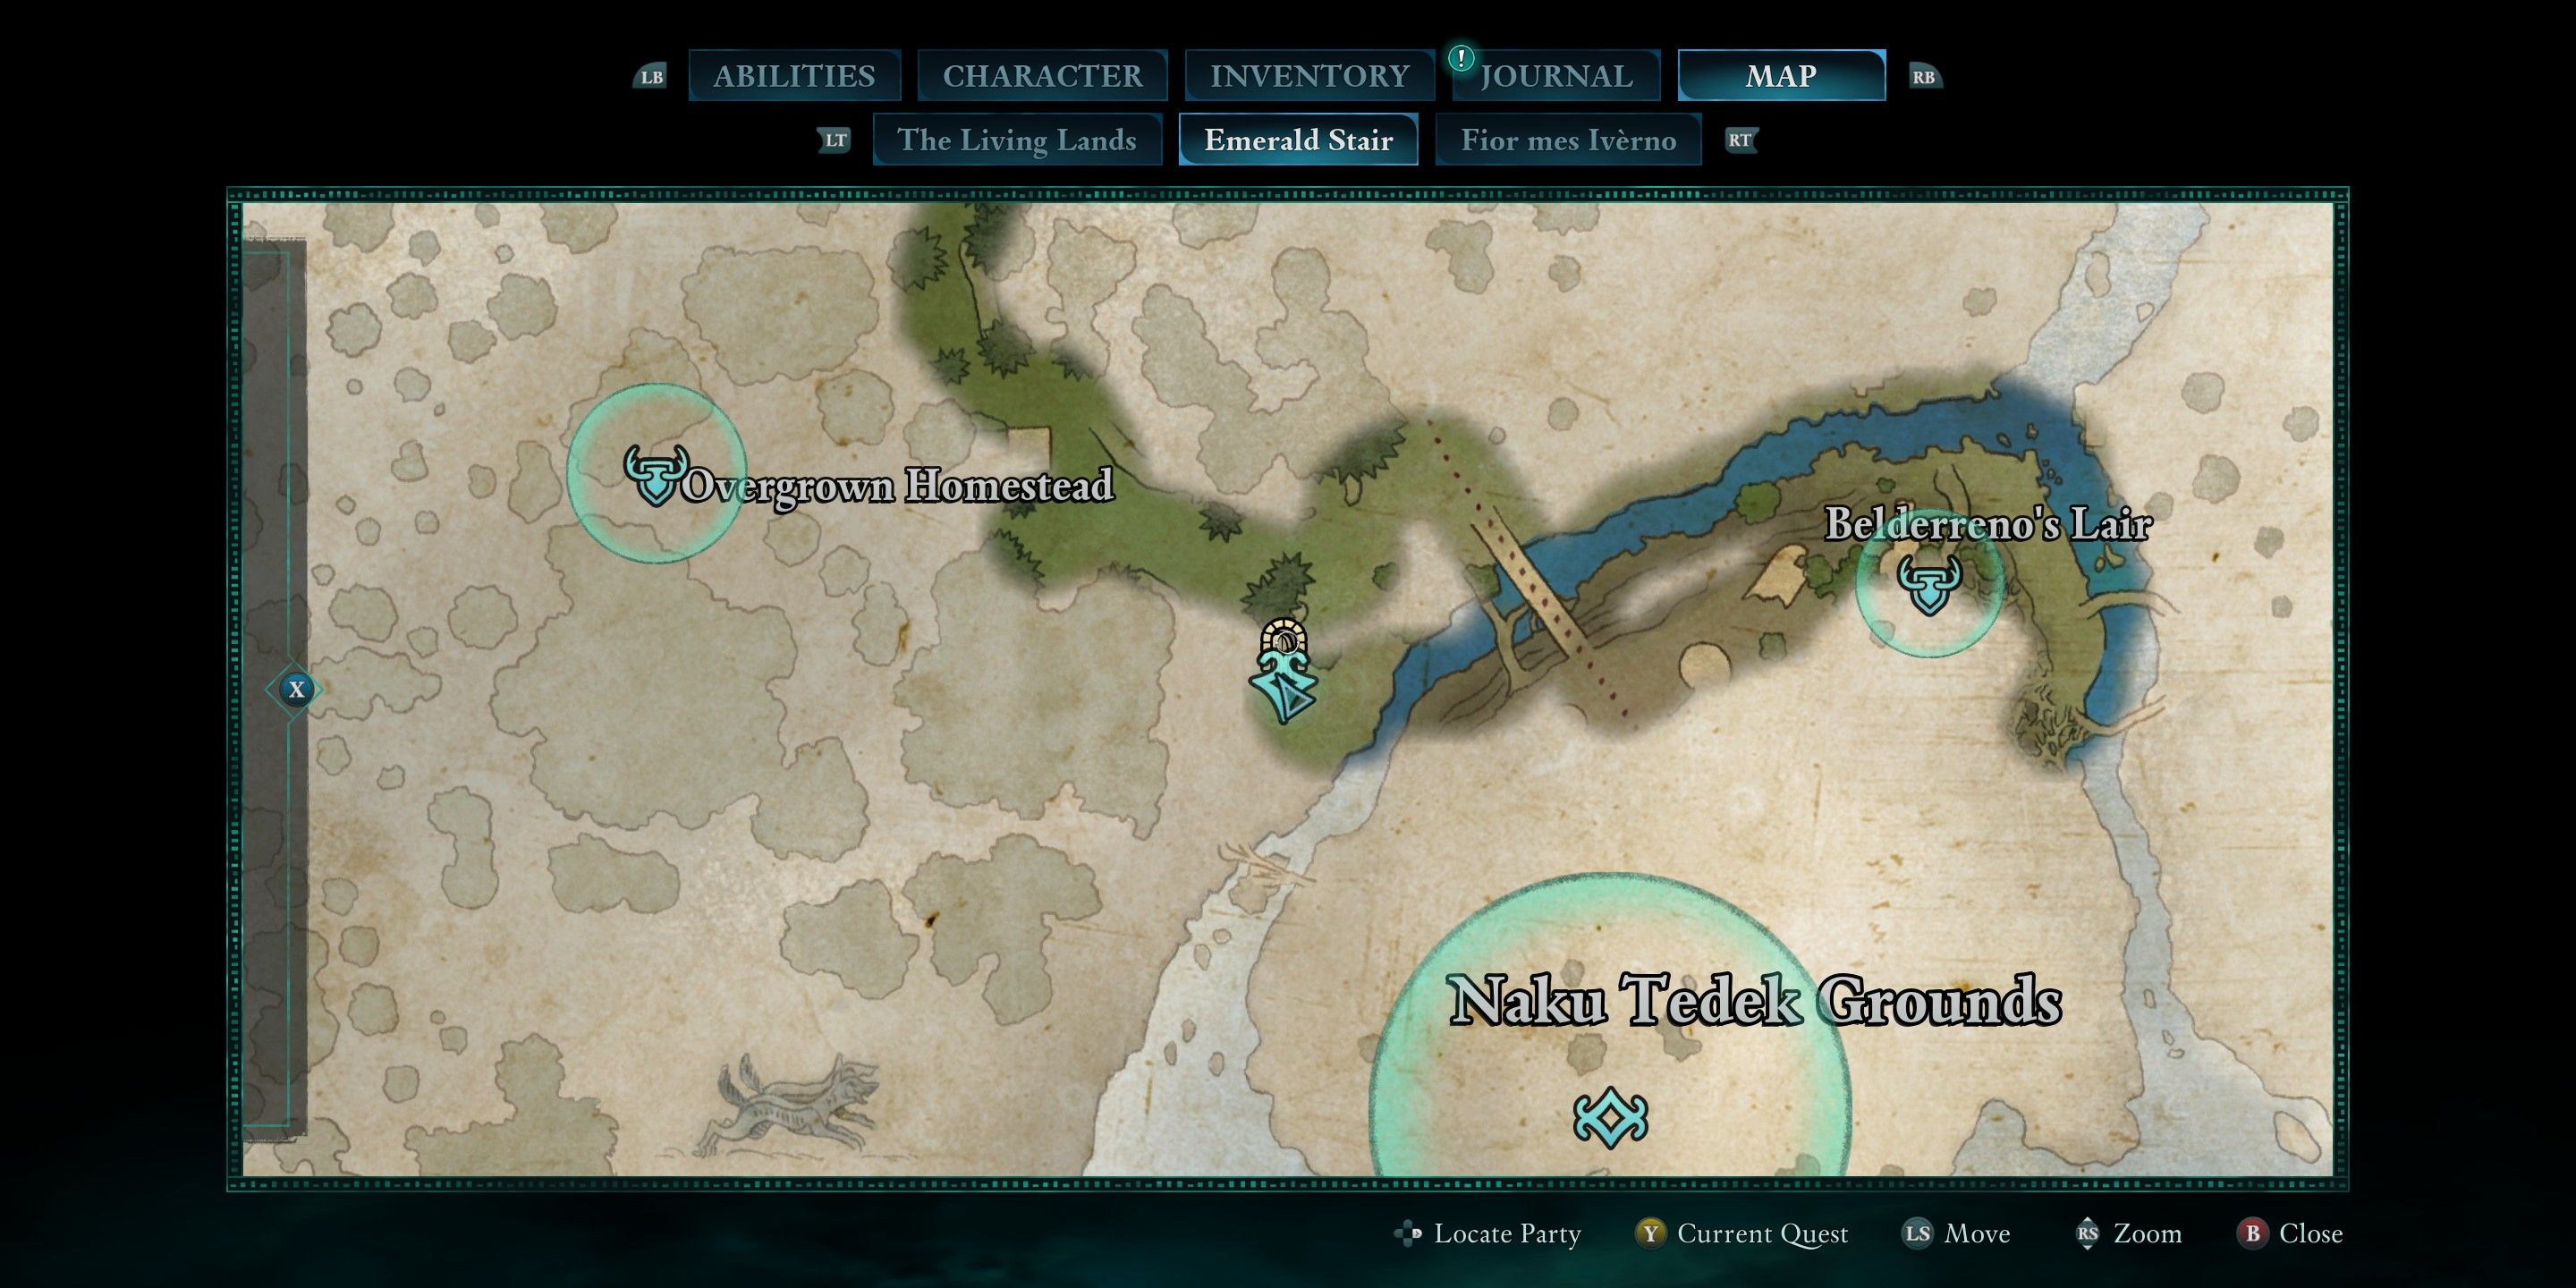
| Belderreno |
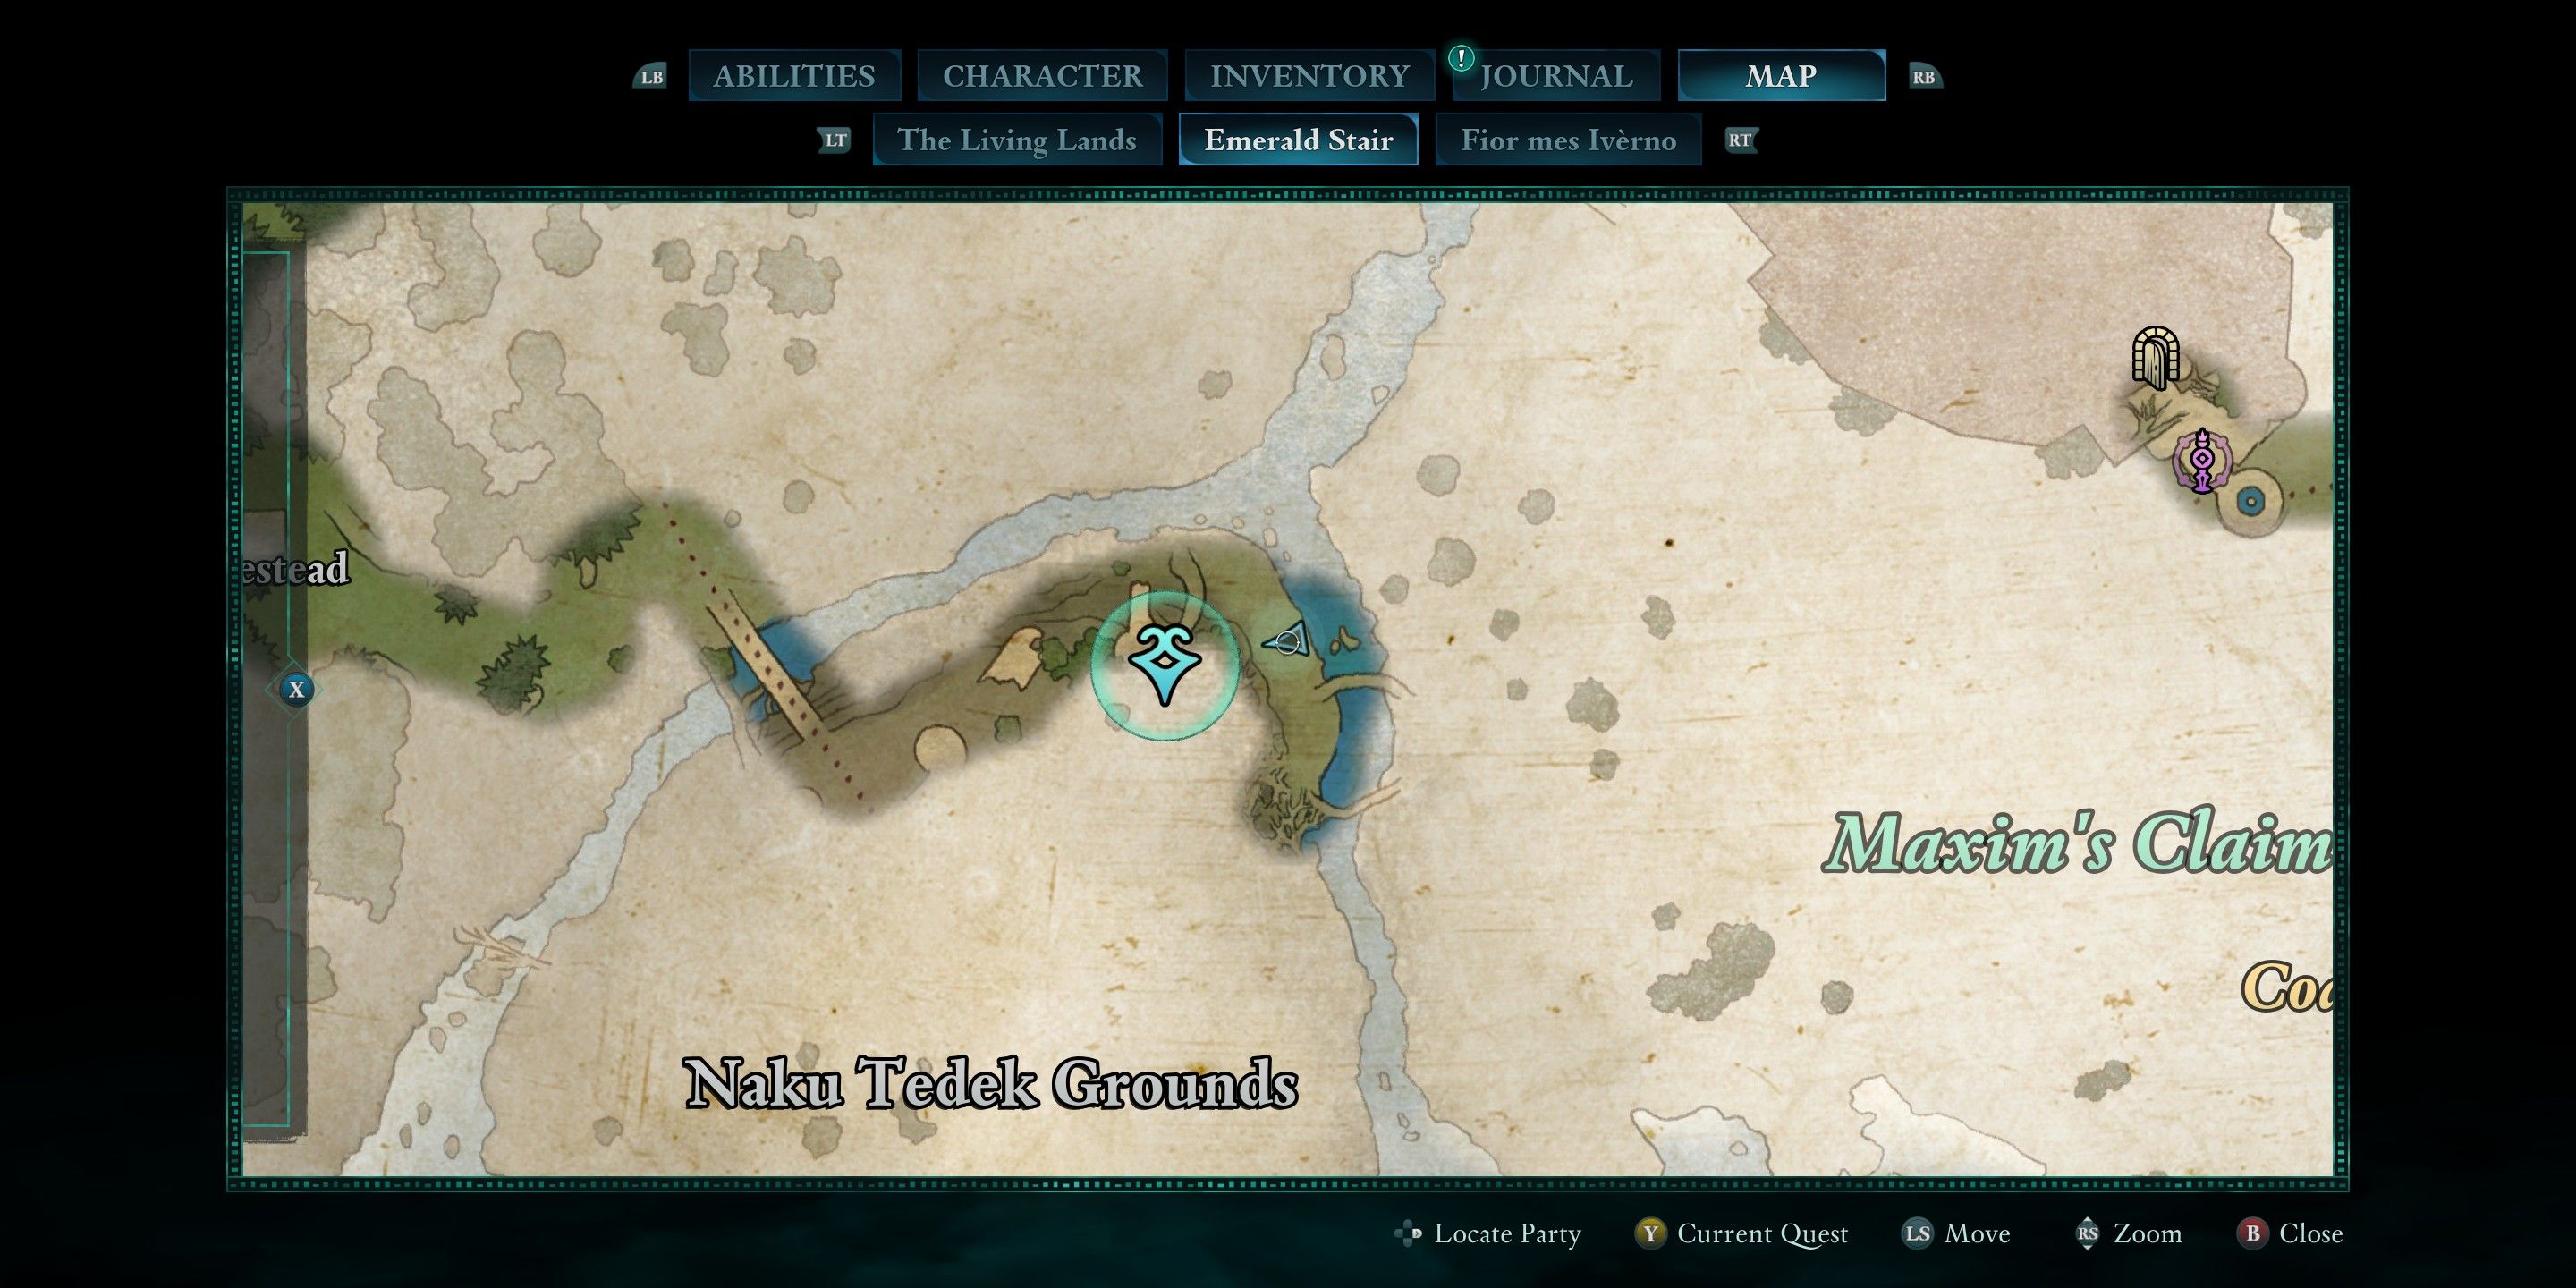 |
None | This one can be hard to find. You will want to be at the surface level of the river. There is a lot of scaffolding and enemy camps along the river, but you will want to look specifically for a cave. The quest marker makes it look like it will be higher up, but it is on ground level.
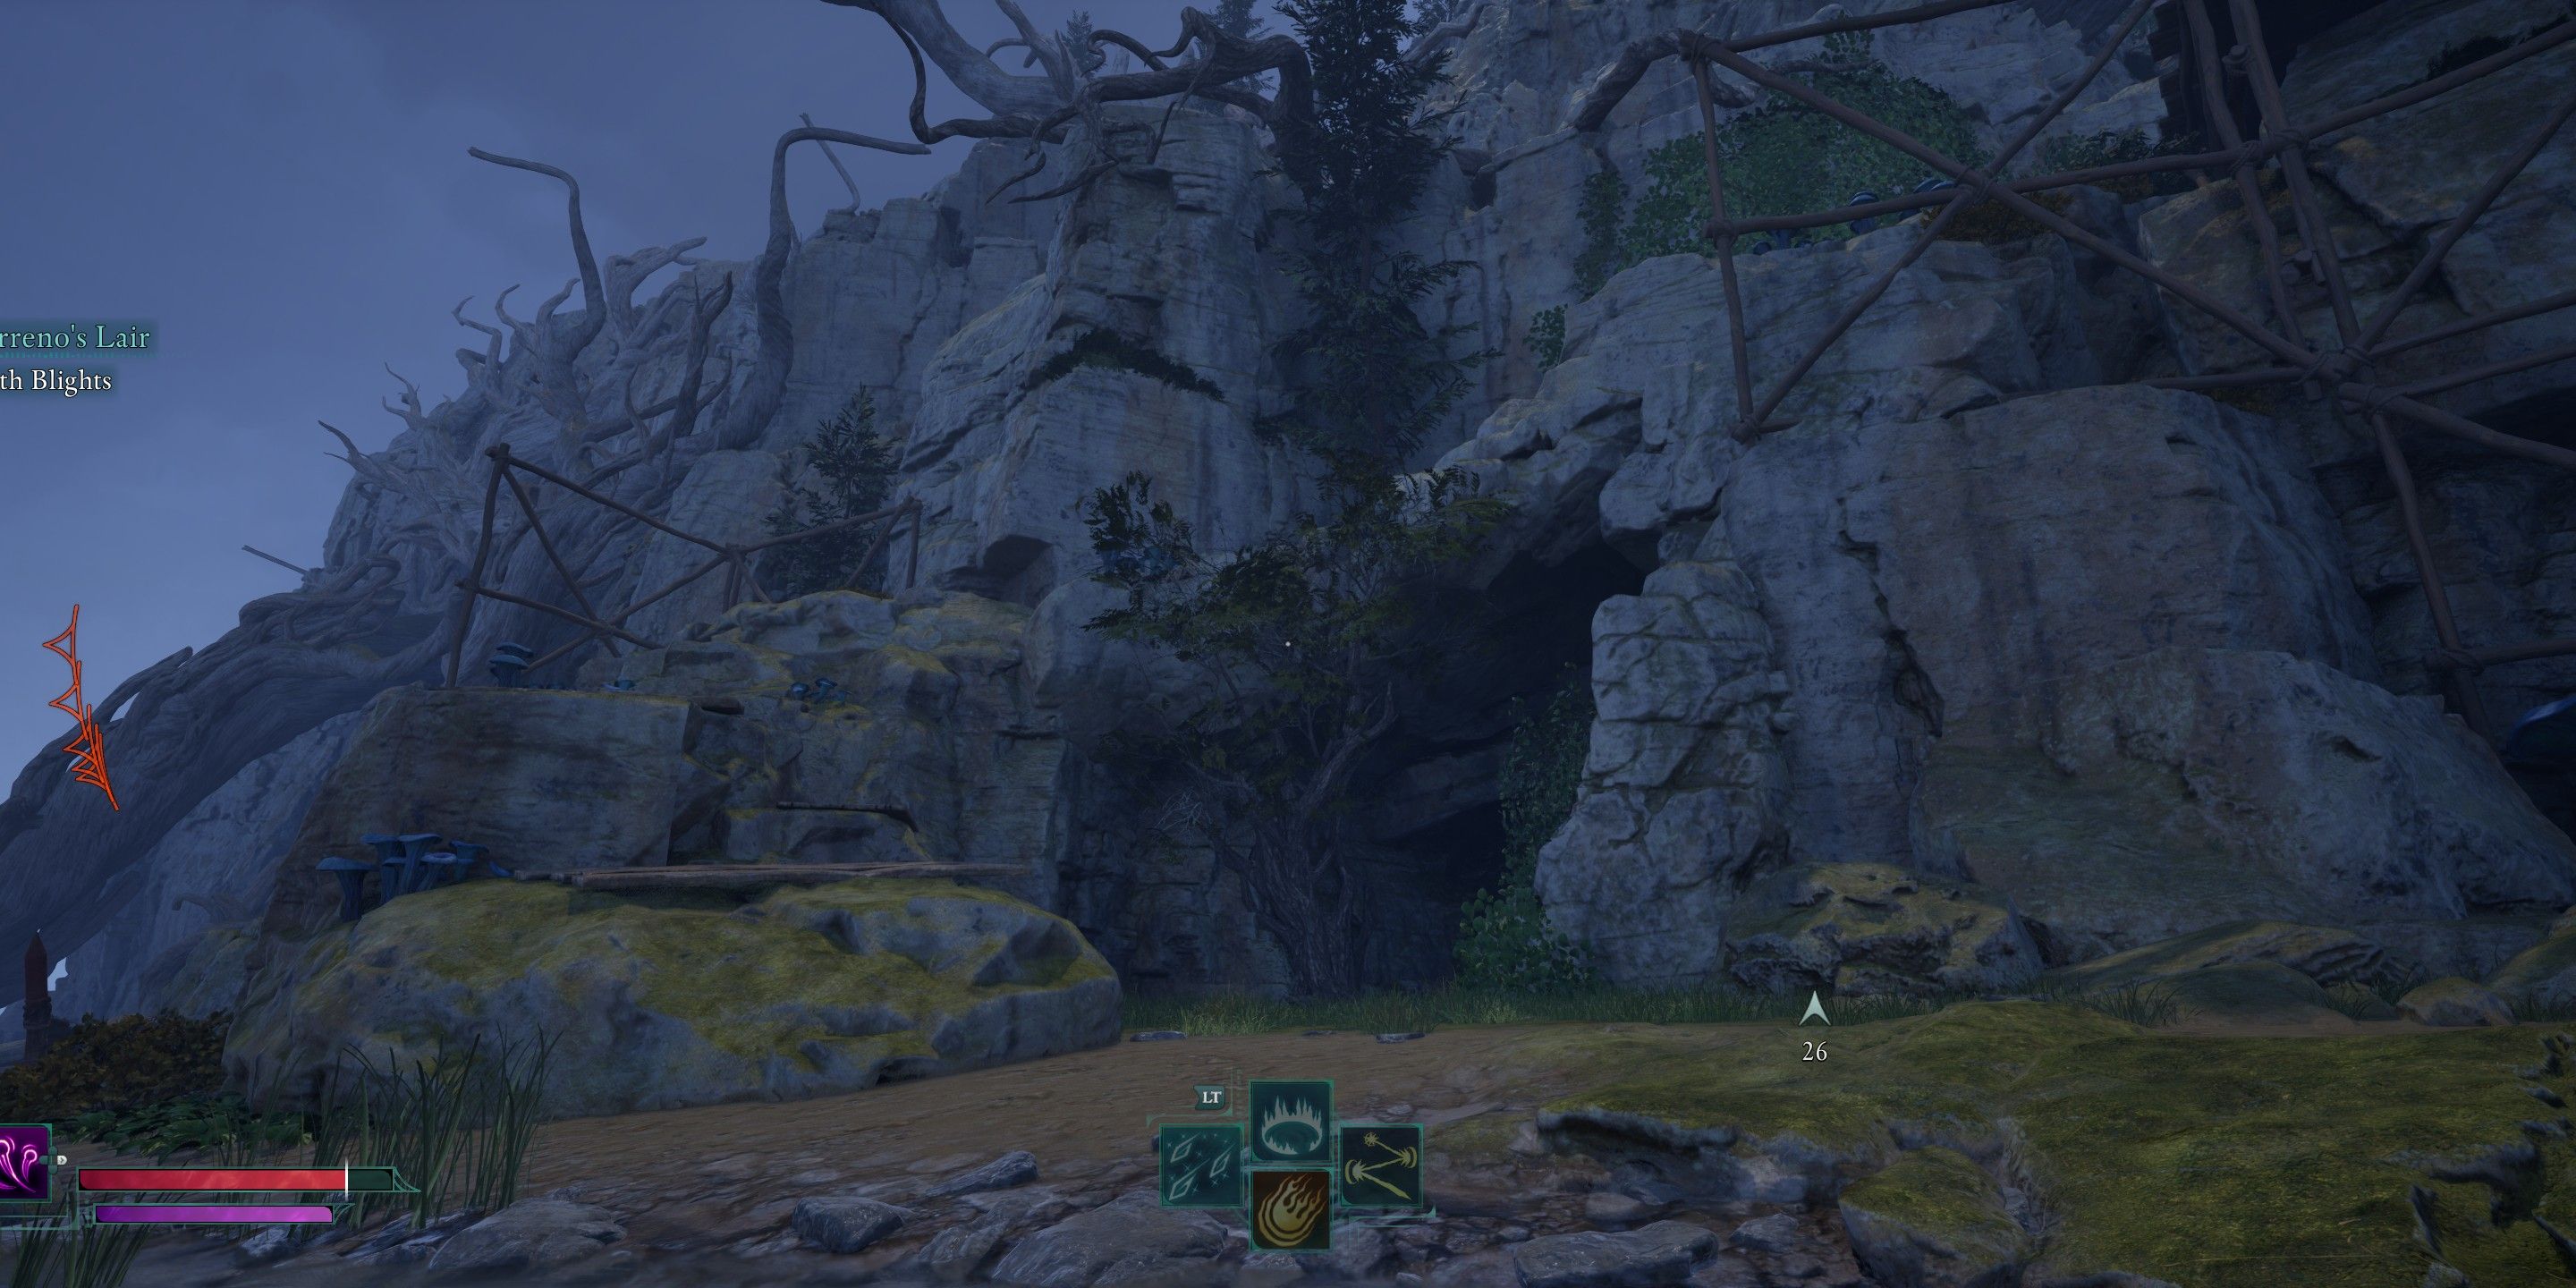 |
| The Trantons |
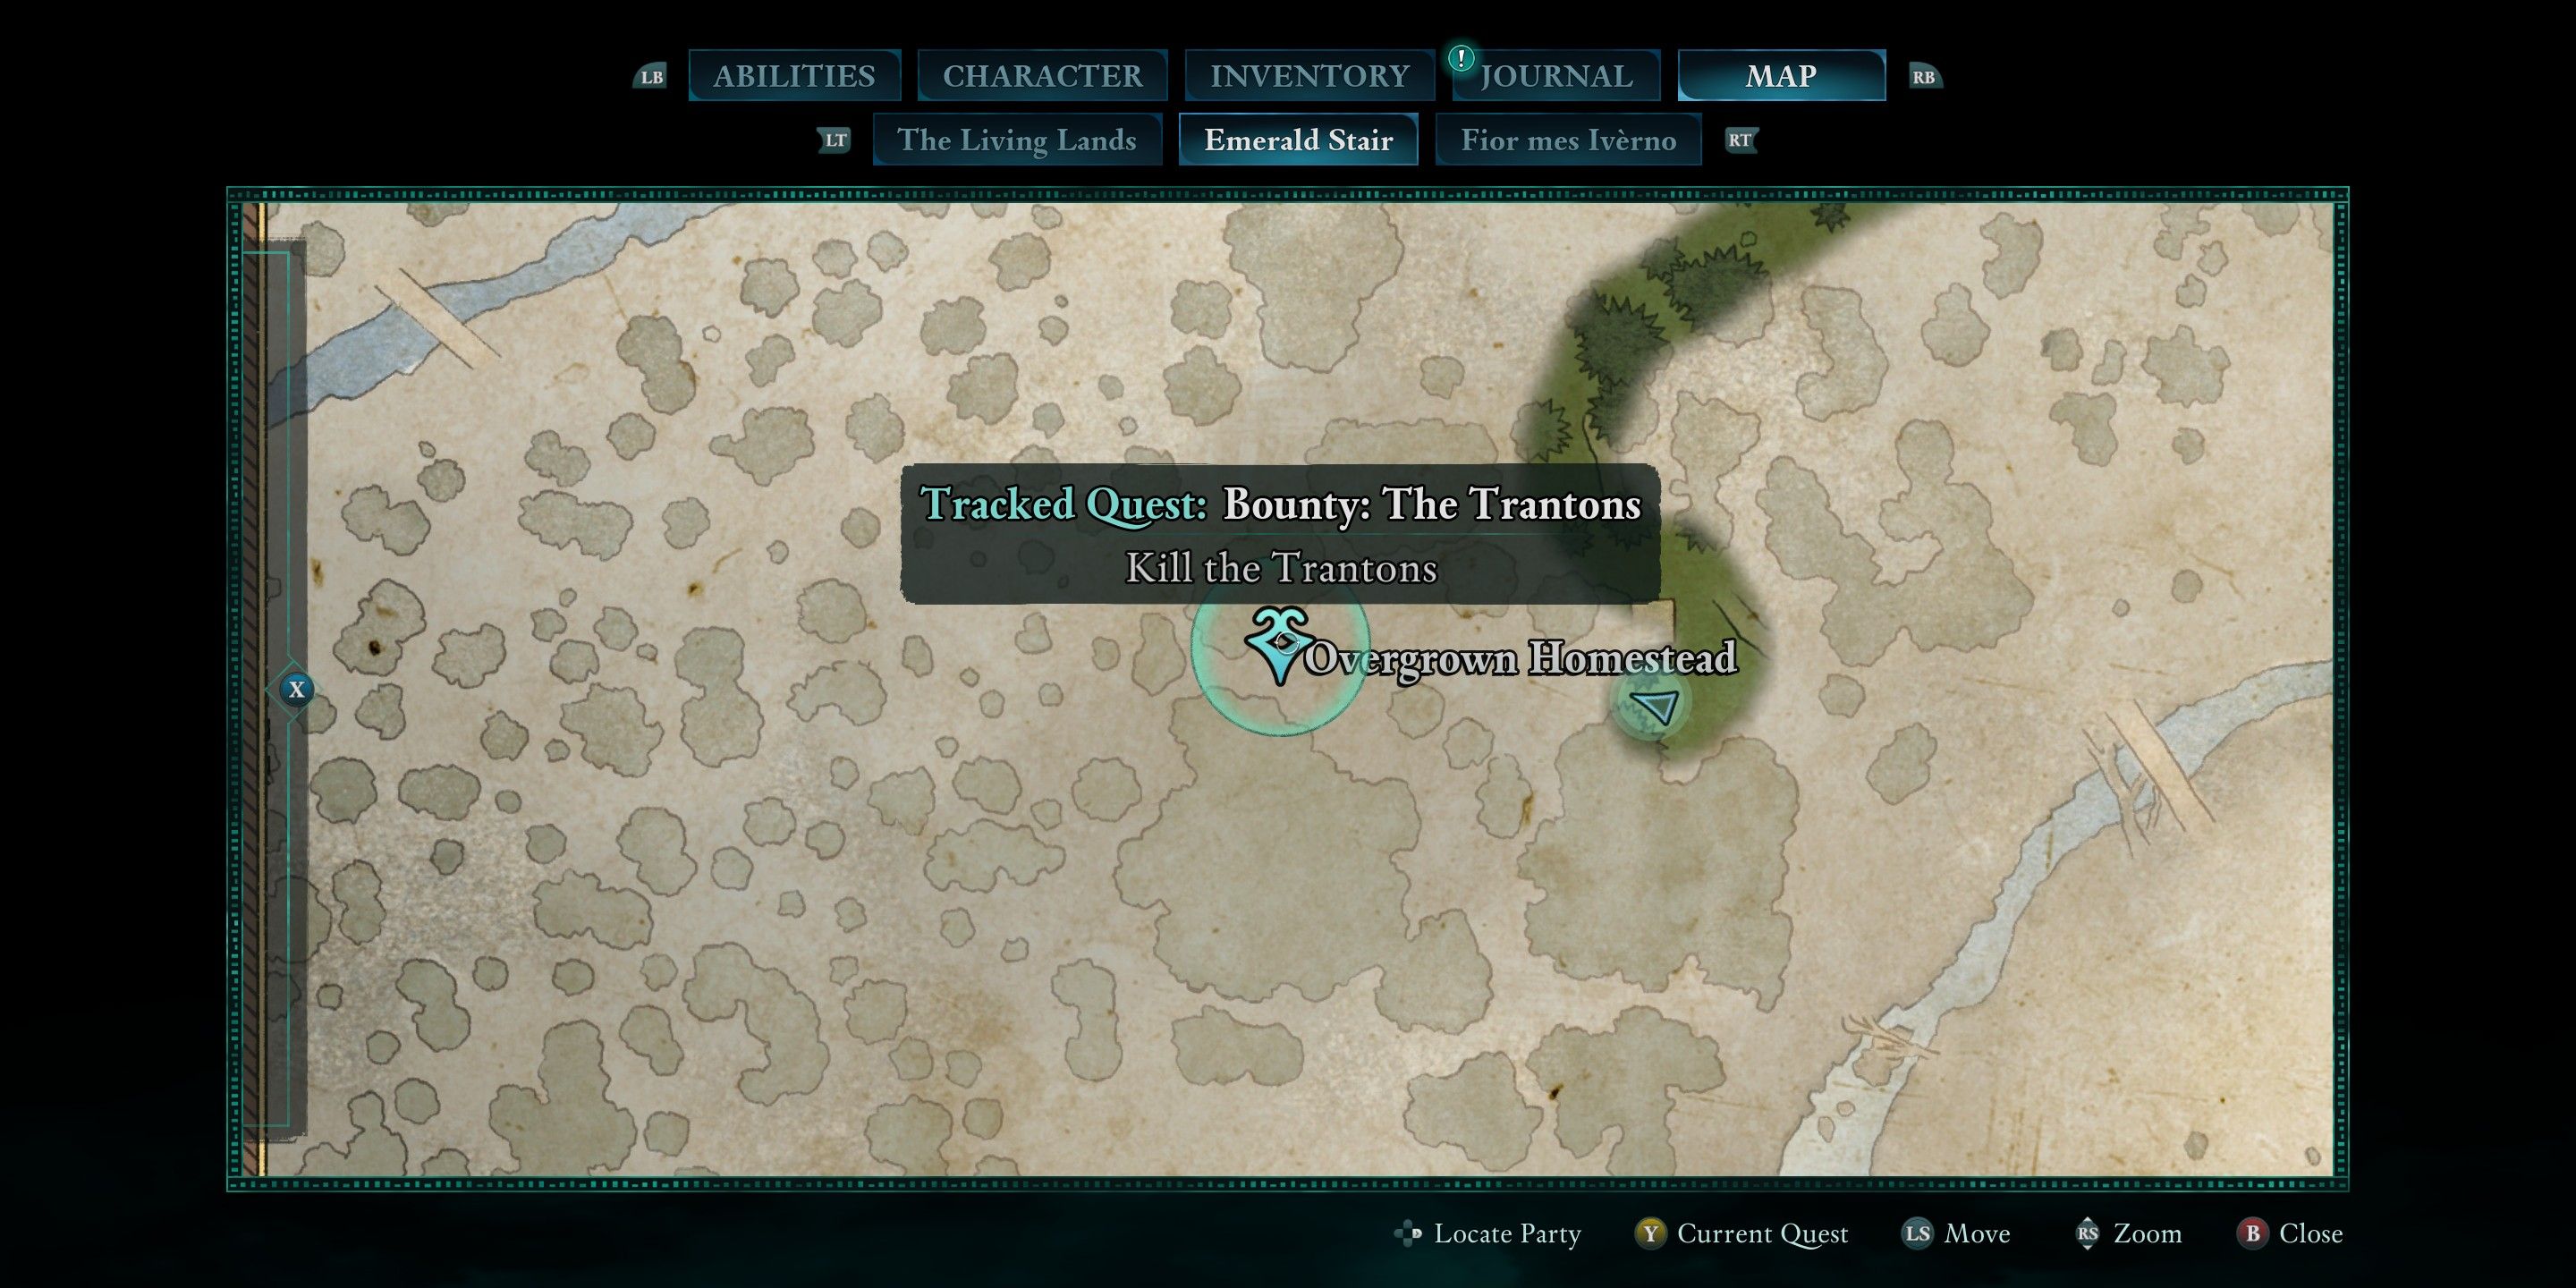 |
Tranton Family Unique Gear:
|
This one isn’t that hard of a fight but it is a bit of a crawl. As you can see in the map, the location where you start fighting is quite sooner. You will pass an abandoned building which you can open with a key sitting on a chest, after which you will start making your way through a slog of enemies a little bit at a time until you reach the bounty. The enemies heard and noticed me before I got that far, so I didn’t even reach the location before I started fighting them. |
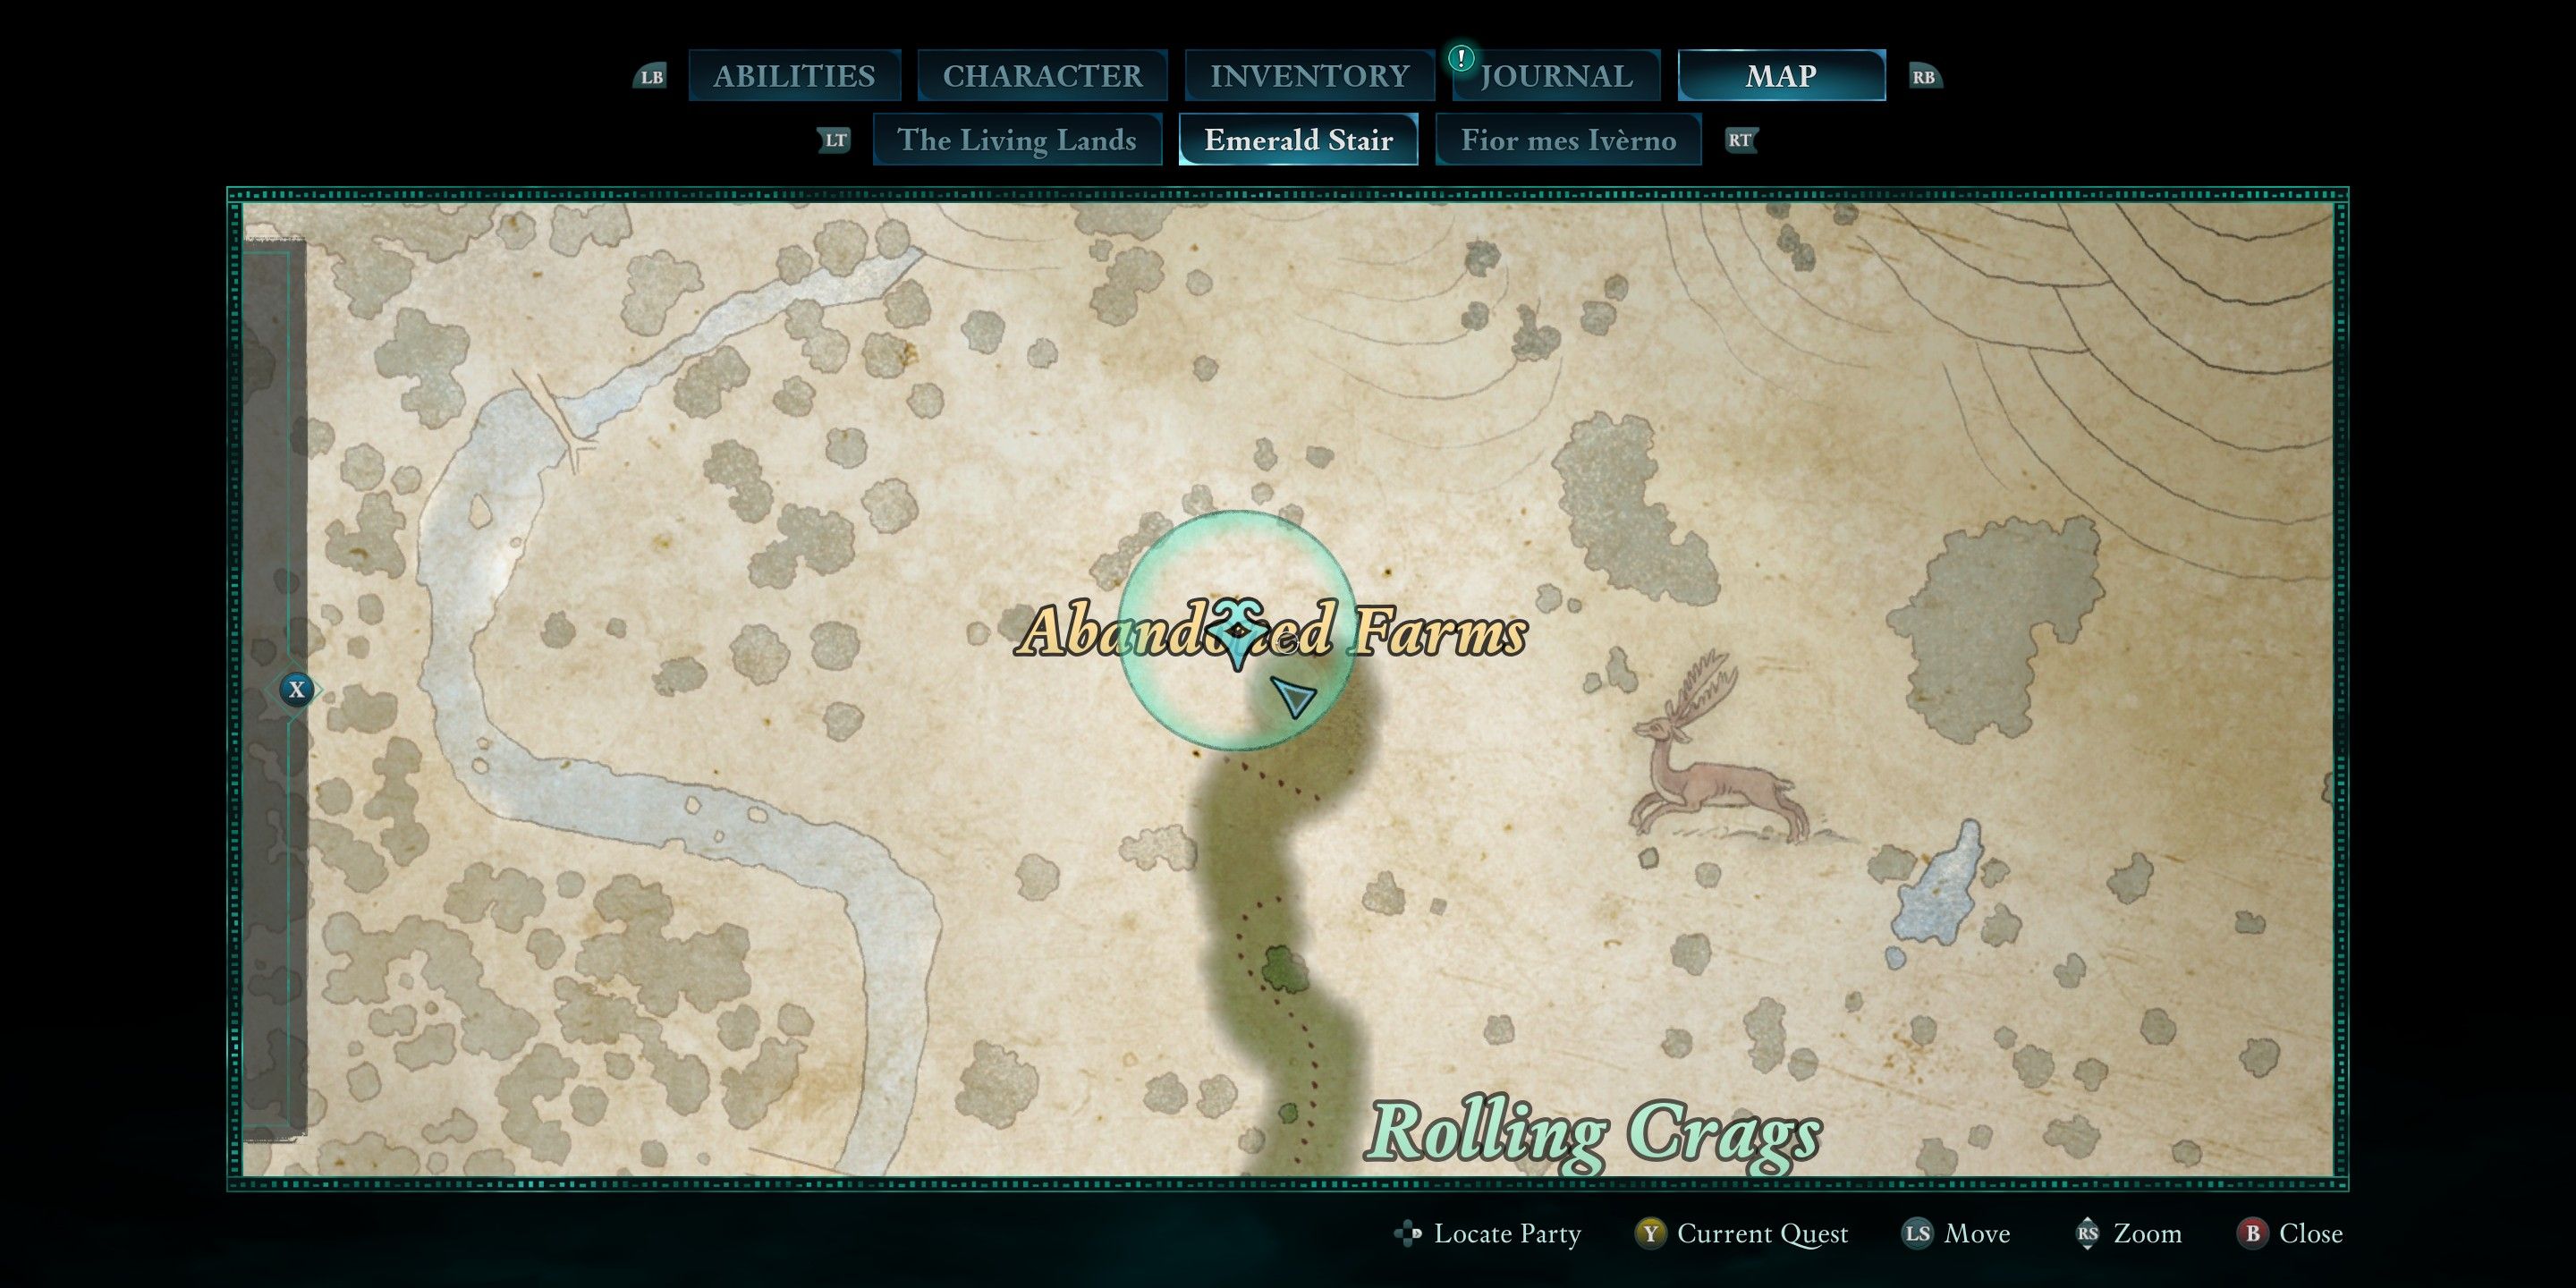
| Old Nuna |
 |
None | The bounties that are within areas you have to travel to often don’t have a big circle on the map like you can see around Naku Tedek. Instead, it is just a single marker when you get close. Old Nuna is quite easy to get to, just follow the marker and enter the cave. |
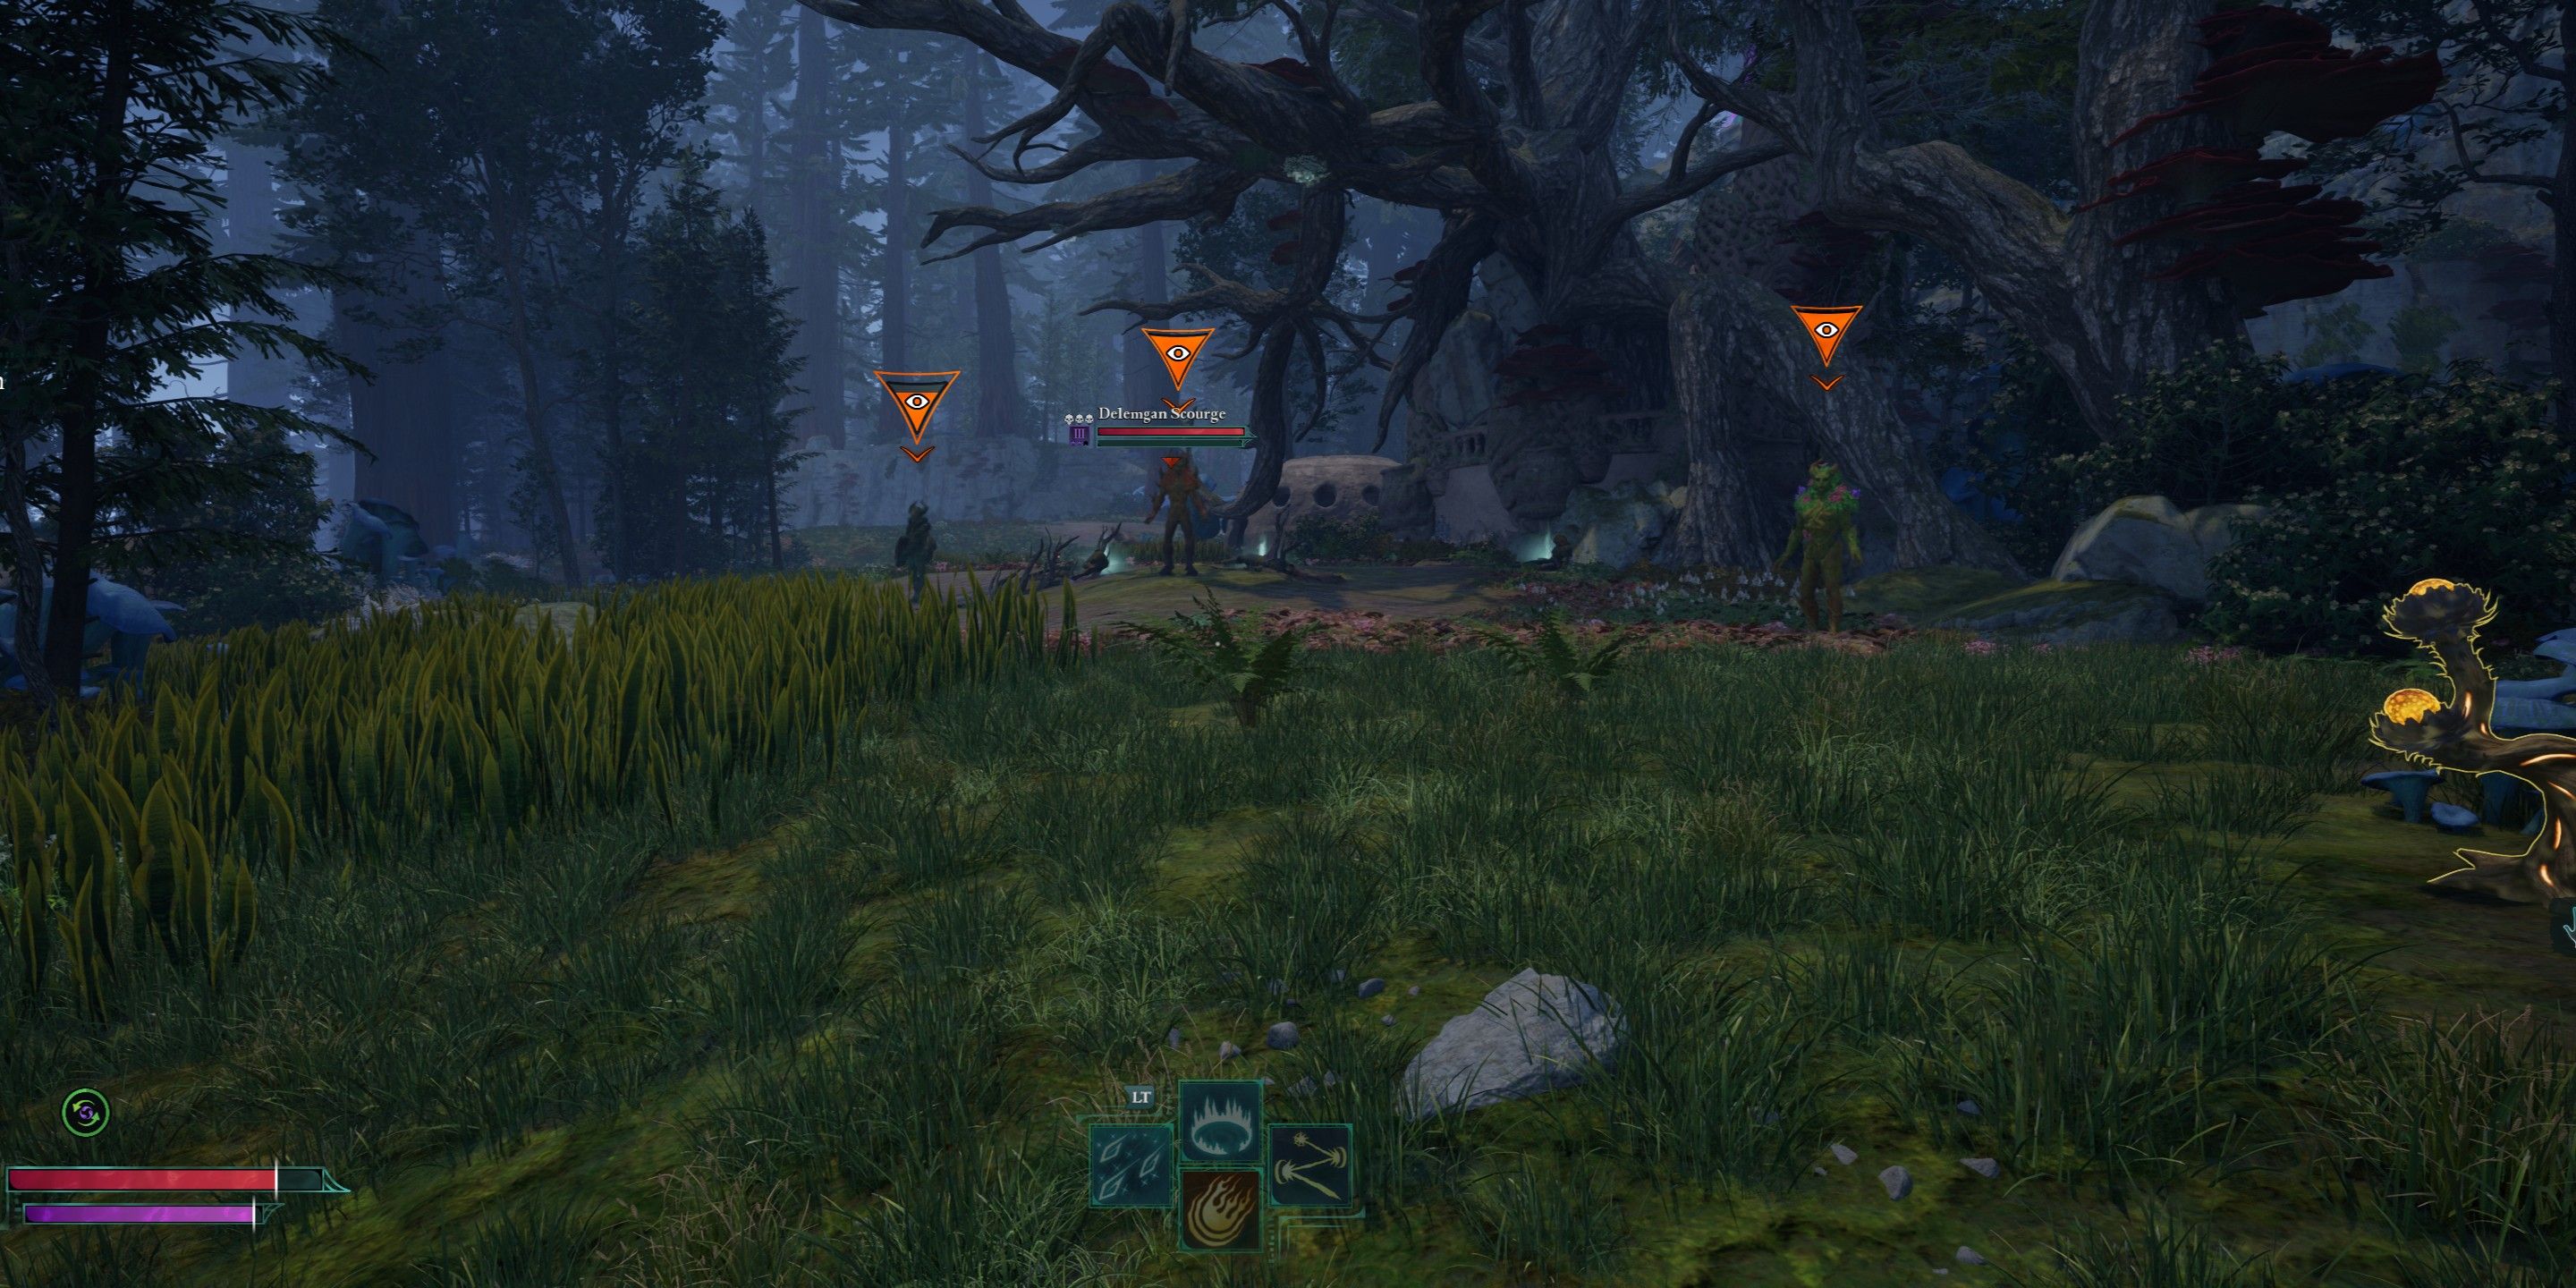
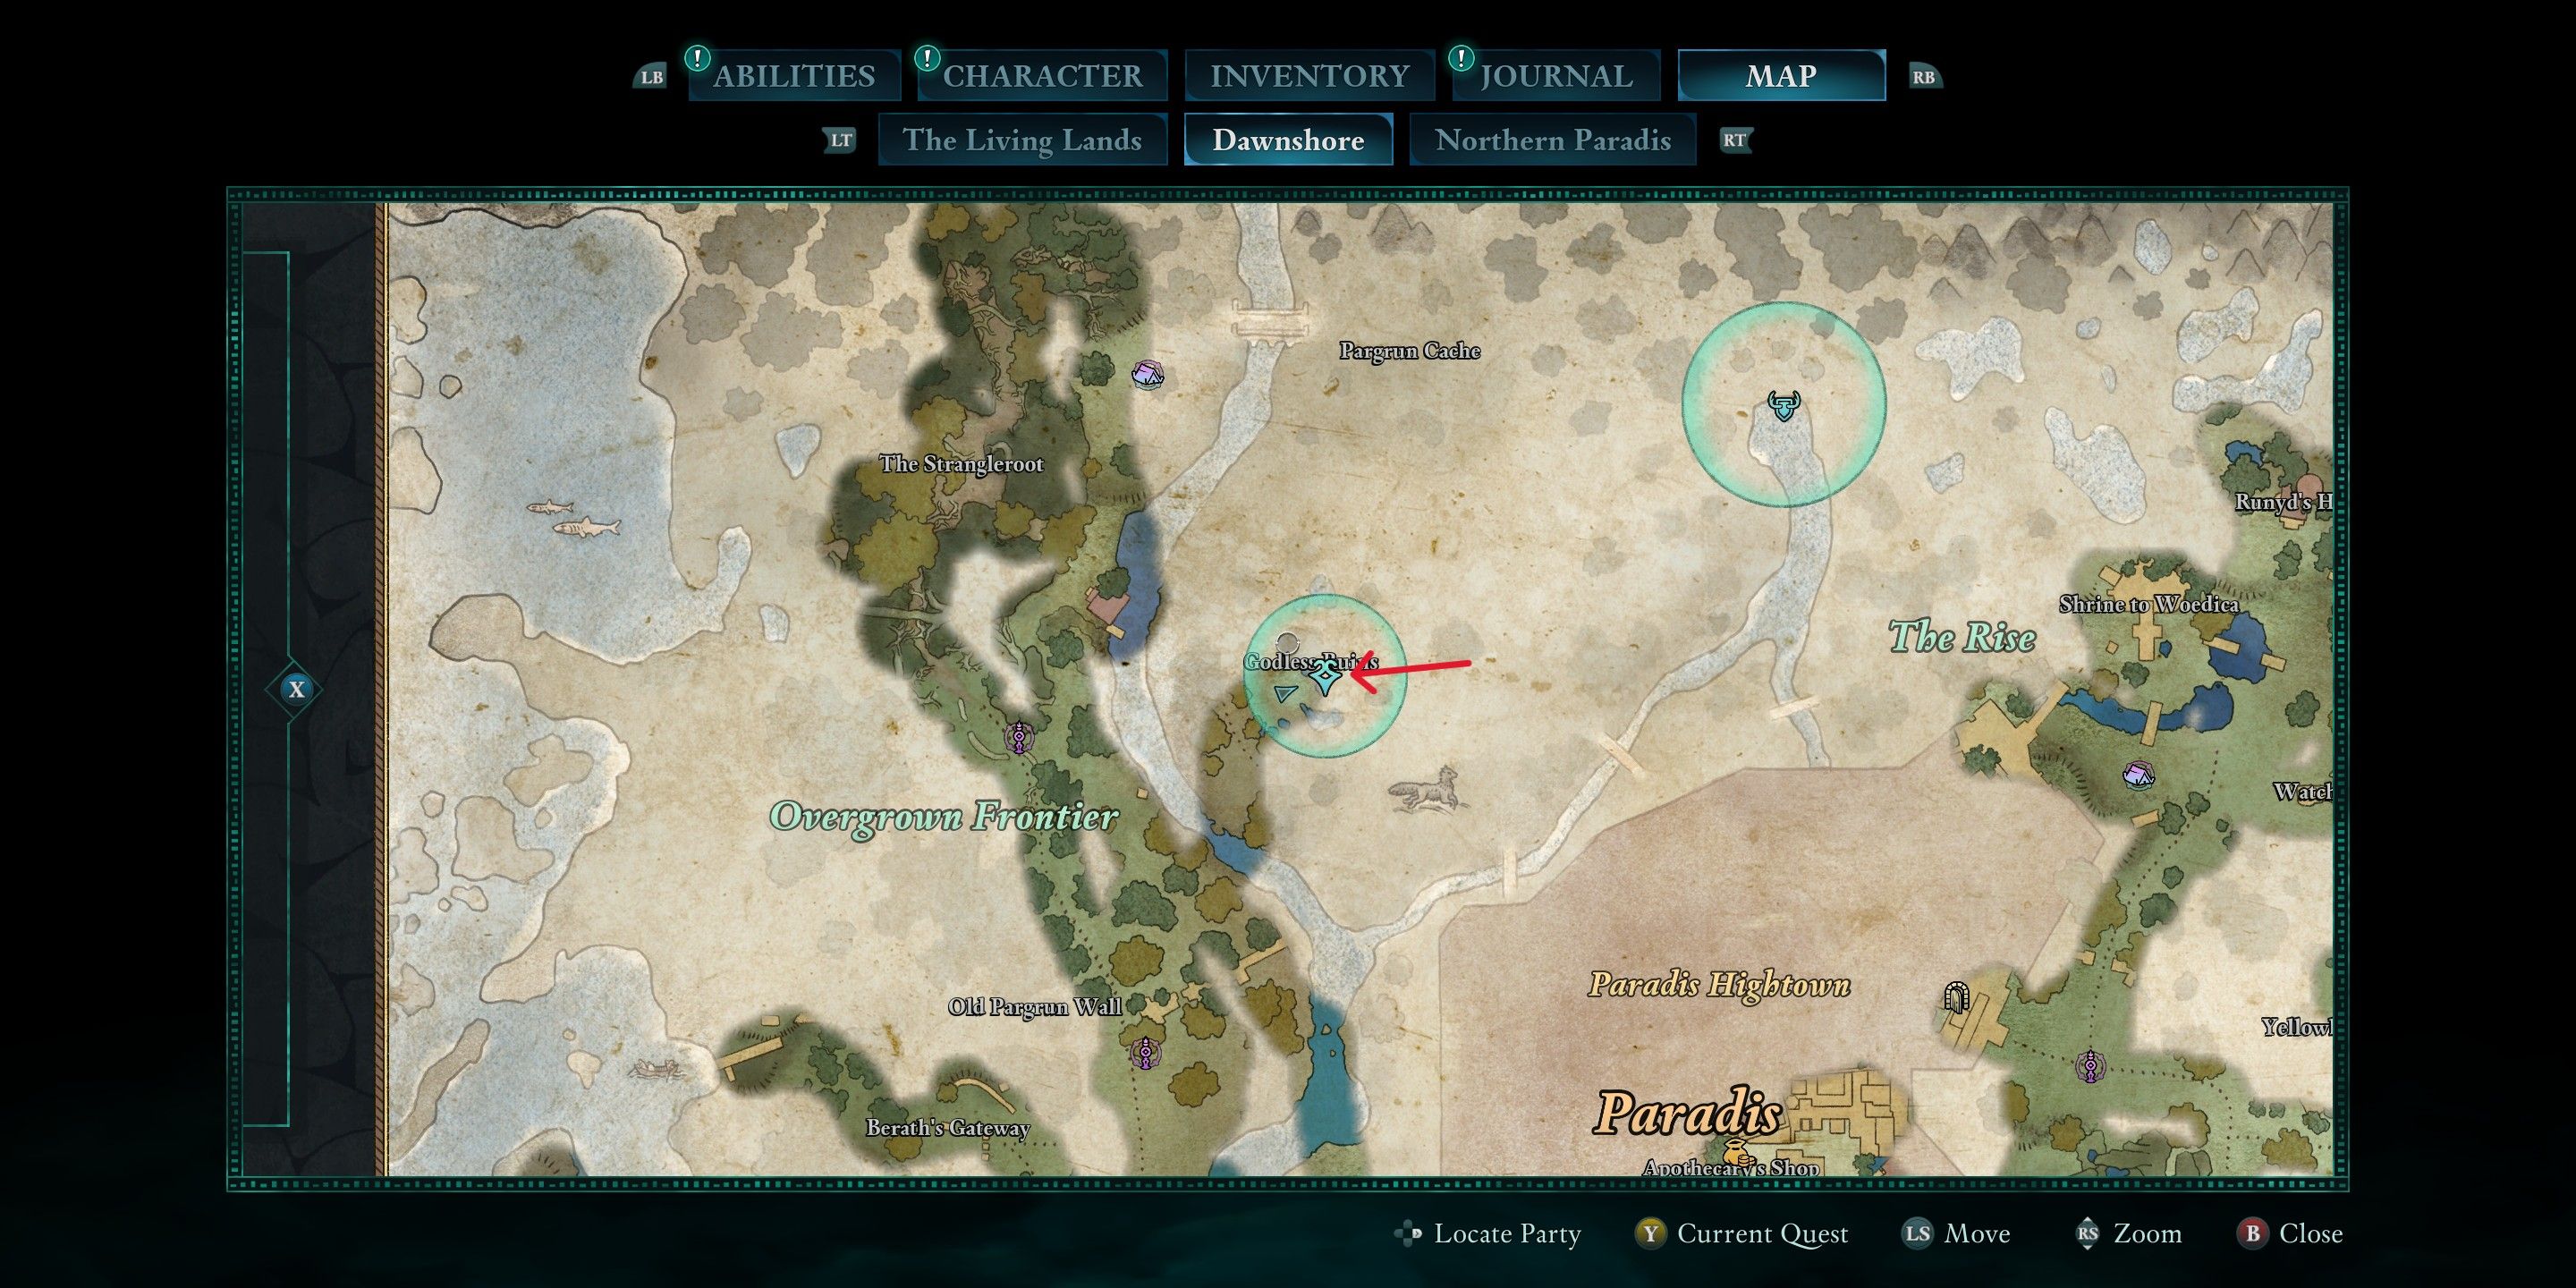
| Delemgan |
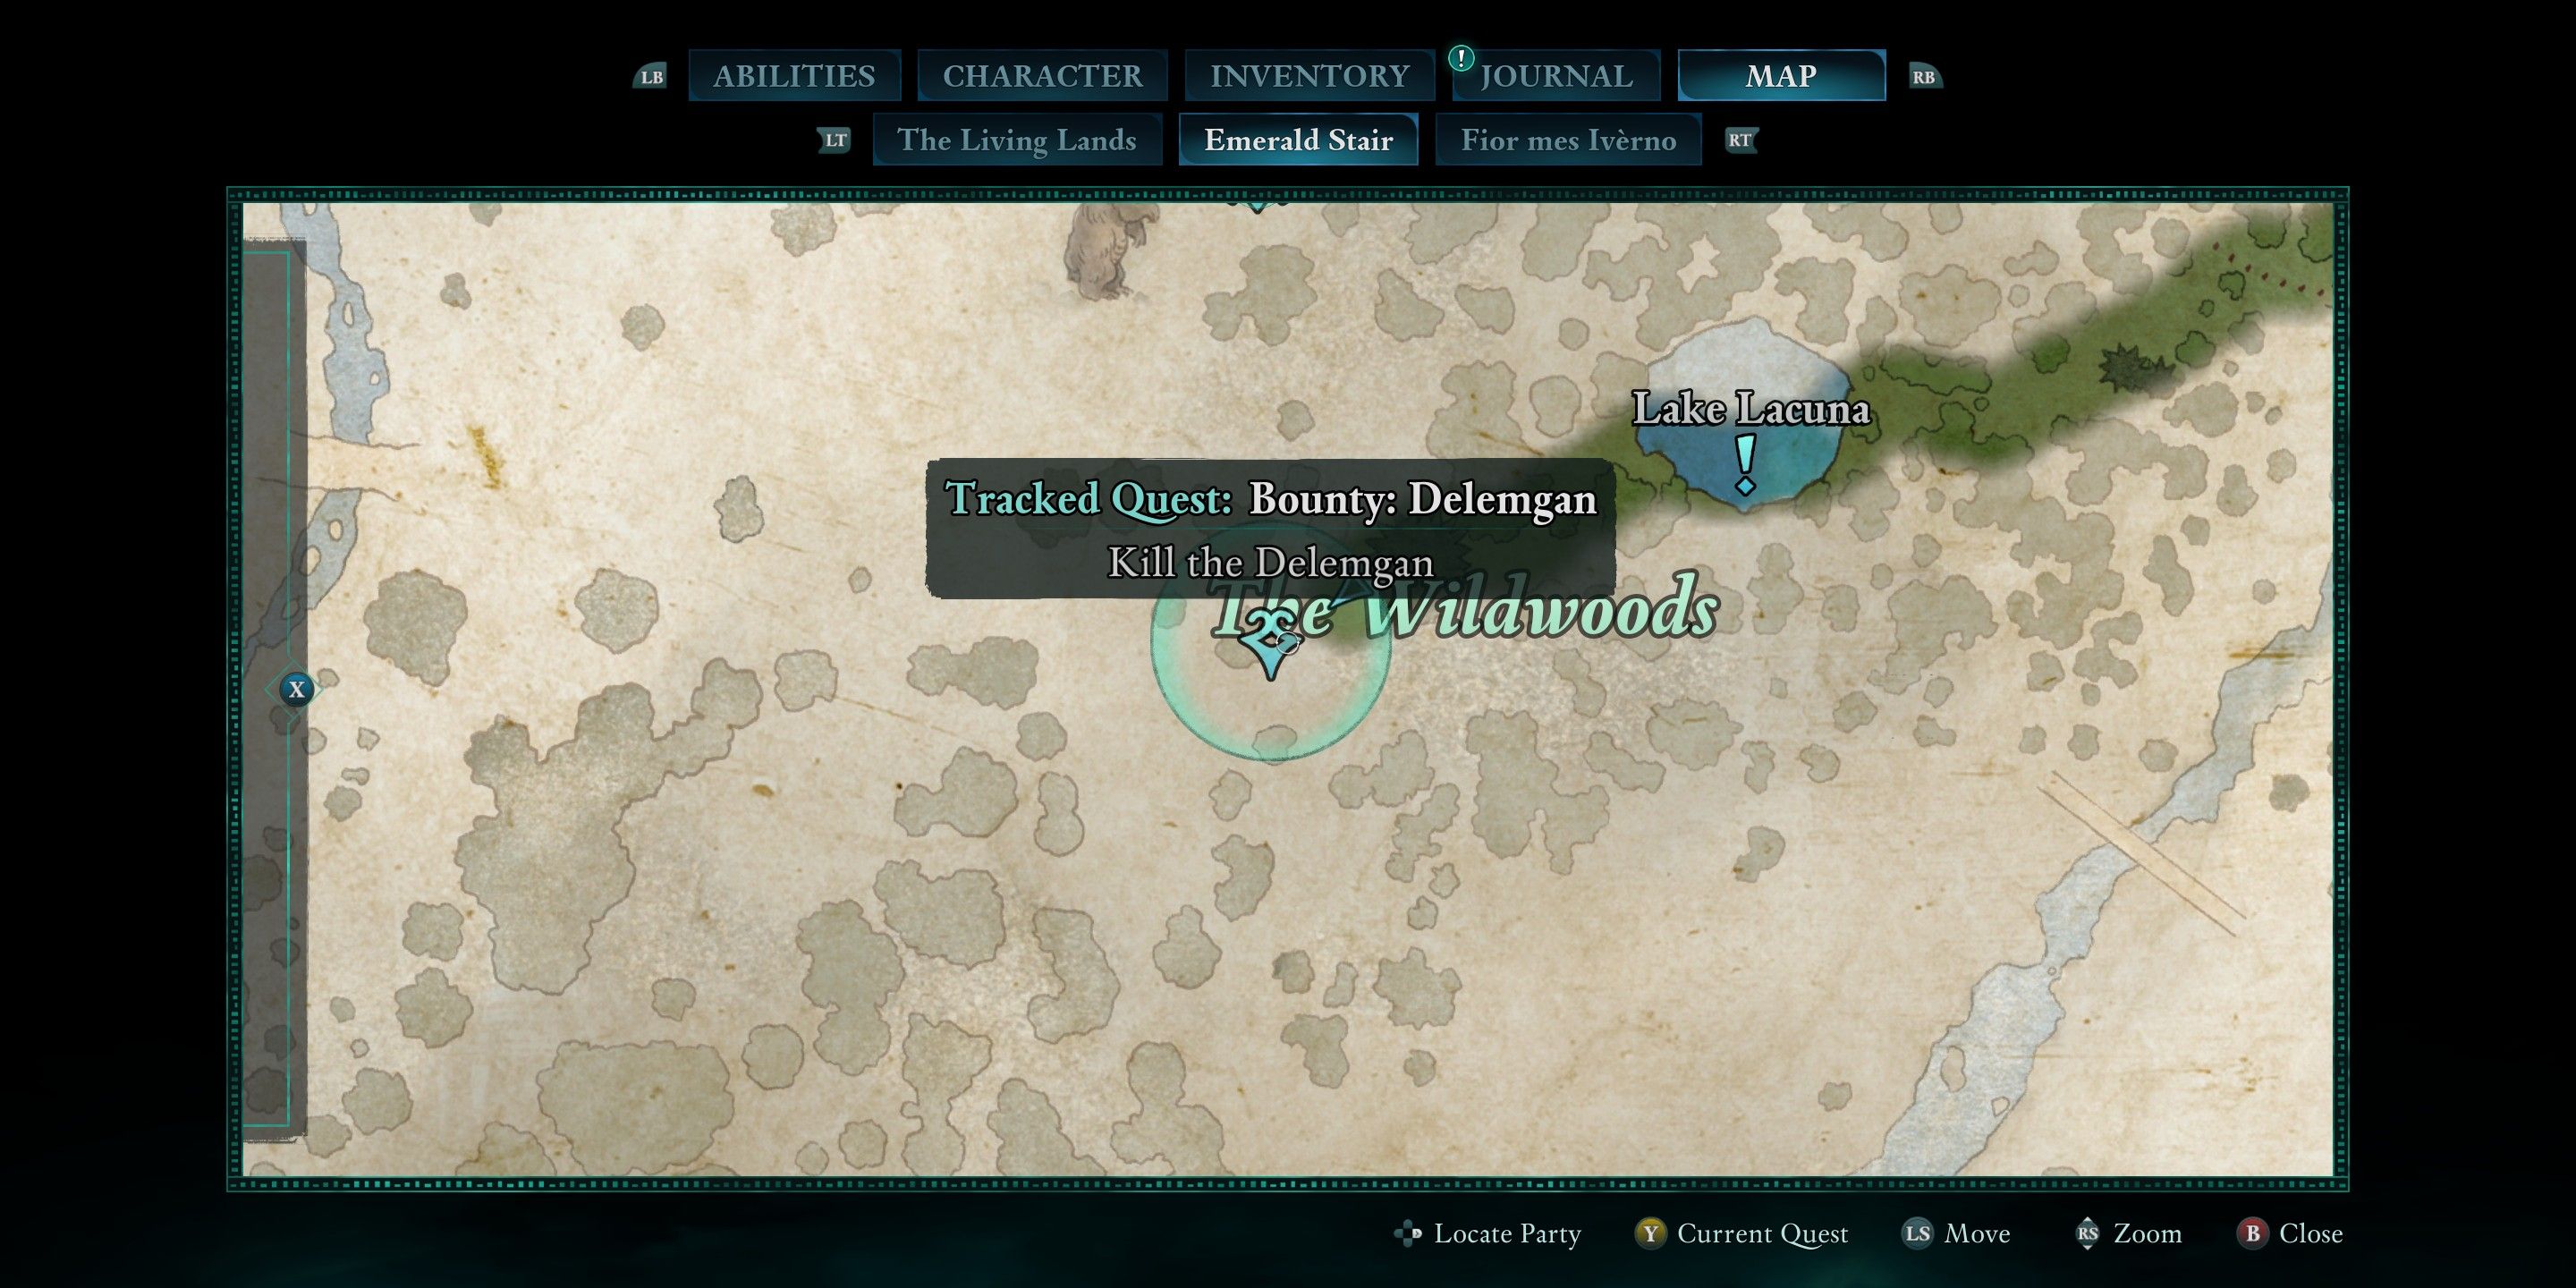 |
None | This one is out in the middle of the Wildwoods and you are likely to stumble across it while traveling. The Delegman enemies are difficult at times, but I’d recommend using fire damage if you have a way to do so. |
| Xaurips |
 |
None | This is near the starting area in Emerald Stair and is one of the easier bounties. Do this one first if you are going to pick one. |
All bounties in Emerald Stair will net you 750 gold.
The vast majority of these rewards don’t provide additional incentives, yet the monetary compensation alone makes it valuable. Moreover, quite a few of them conceal a treasure chest or prize within close proximity, once you’ve eliminated the adversaries.
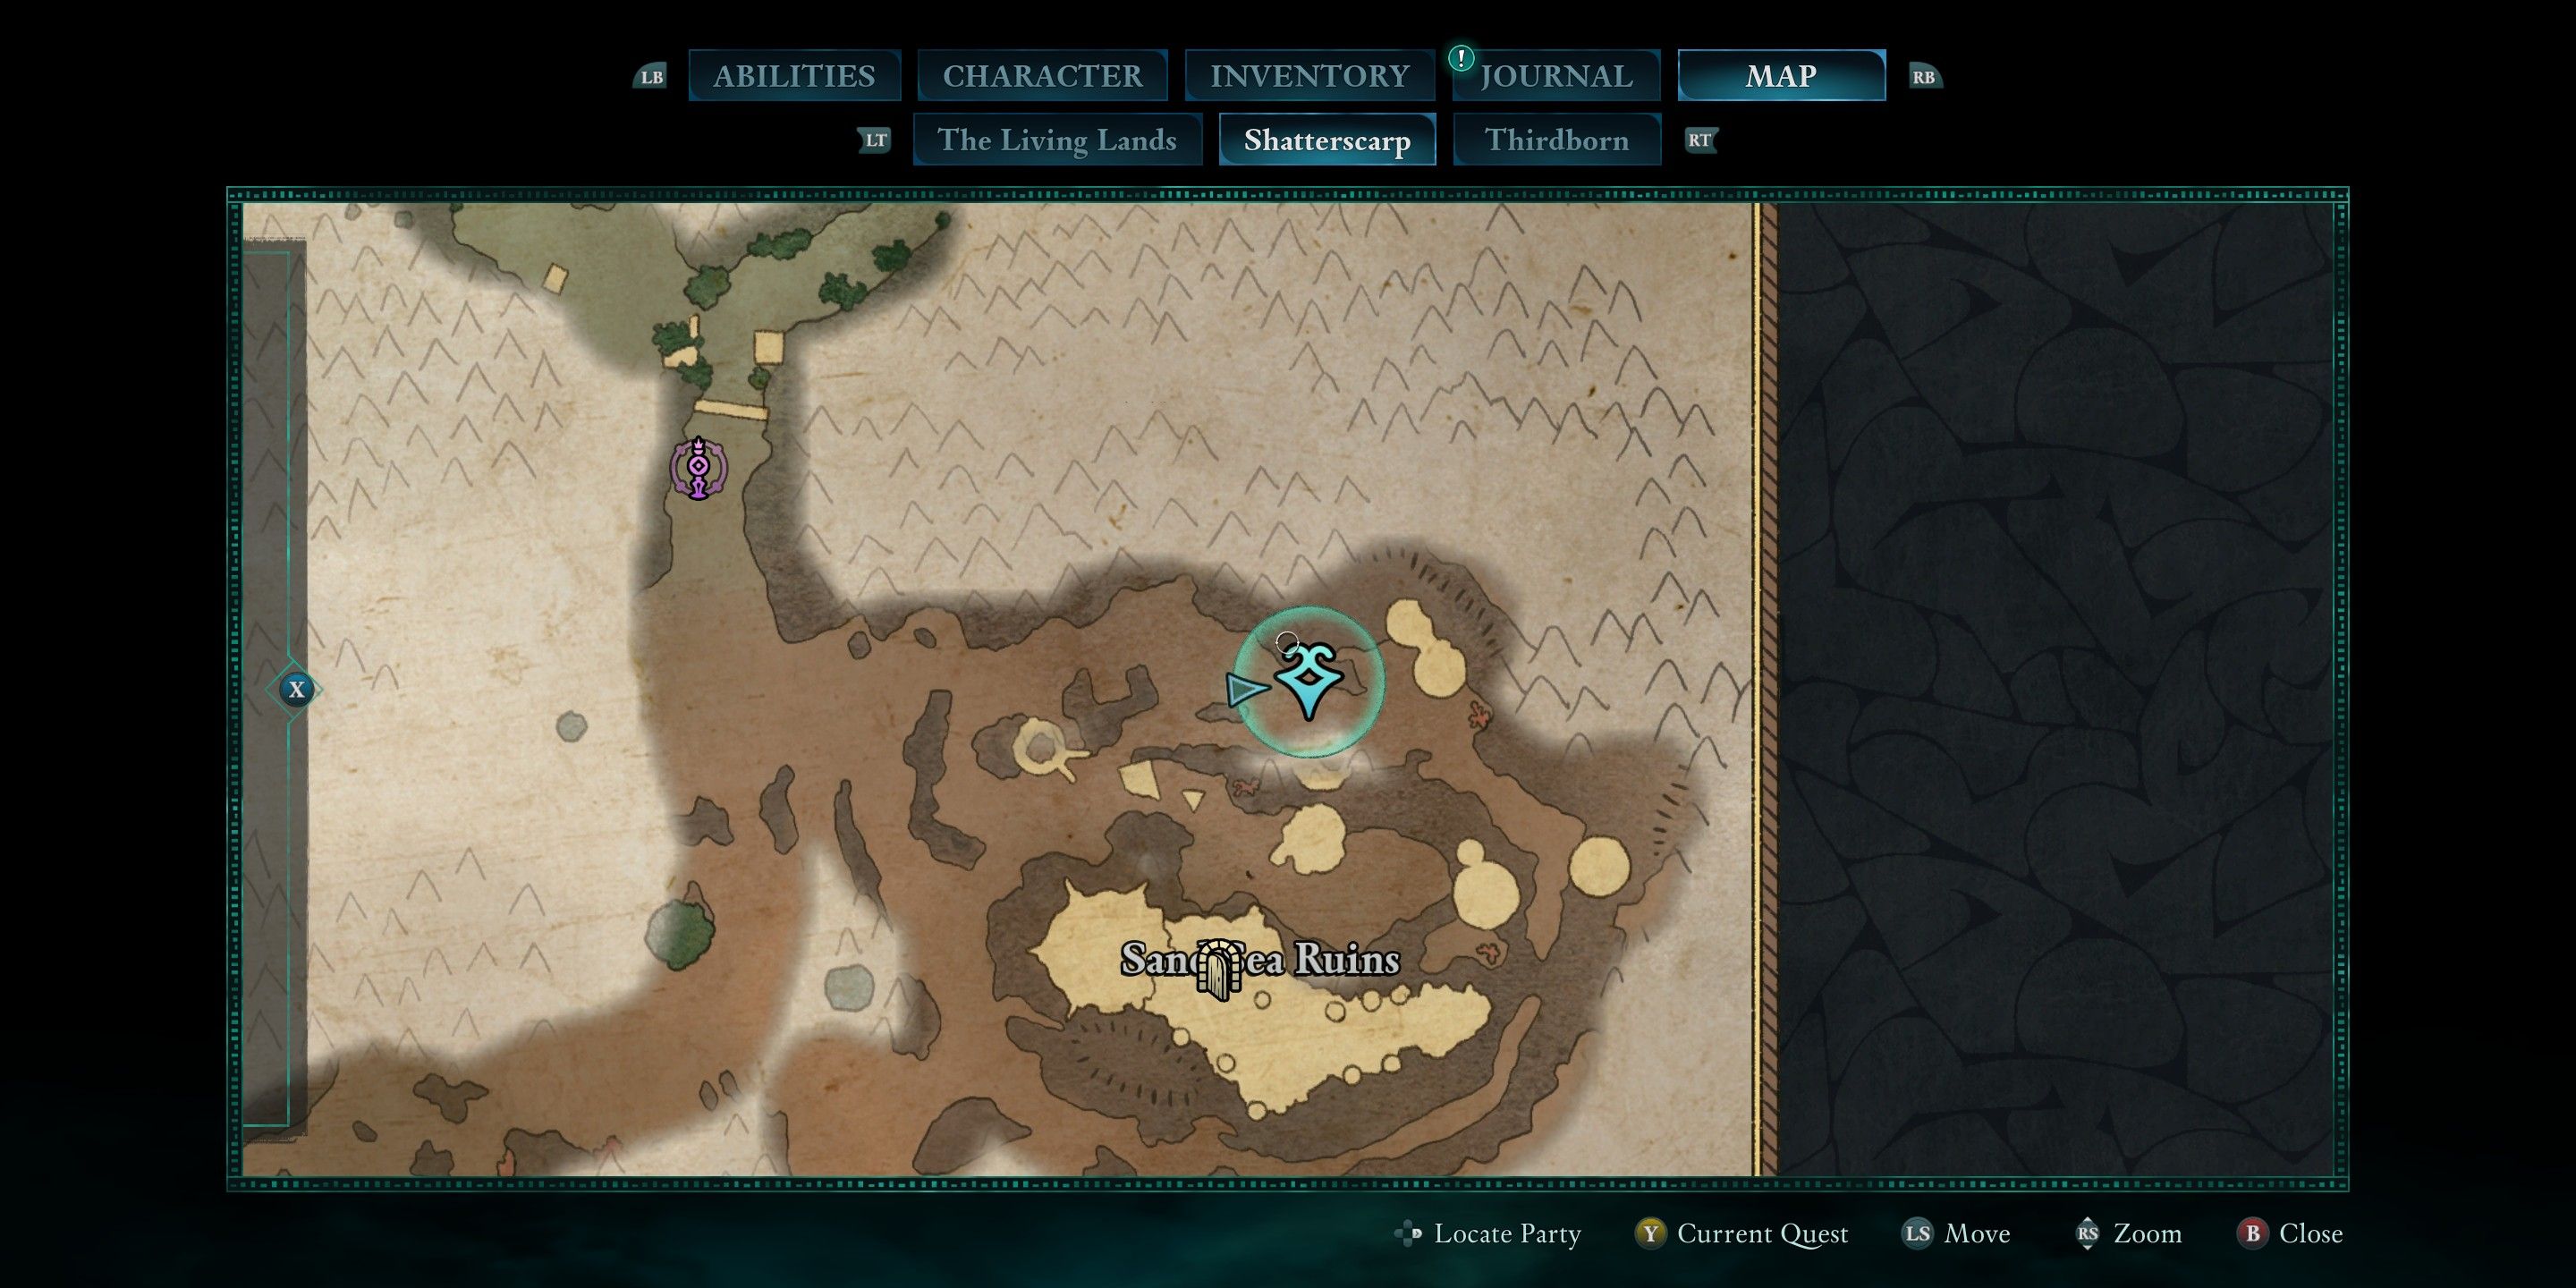
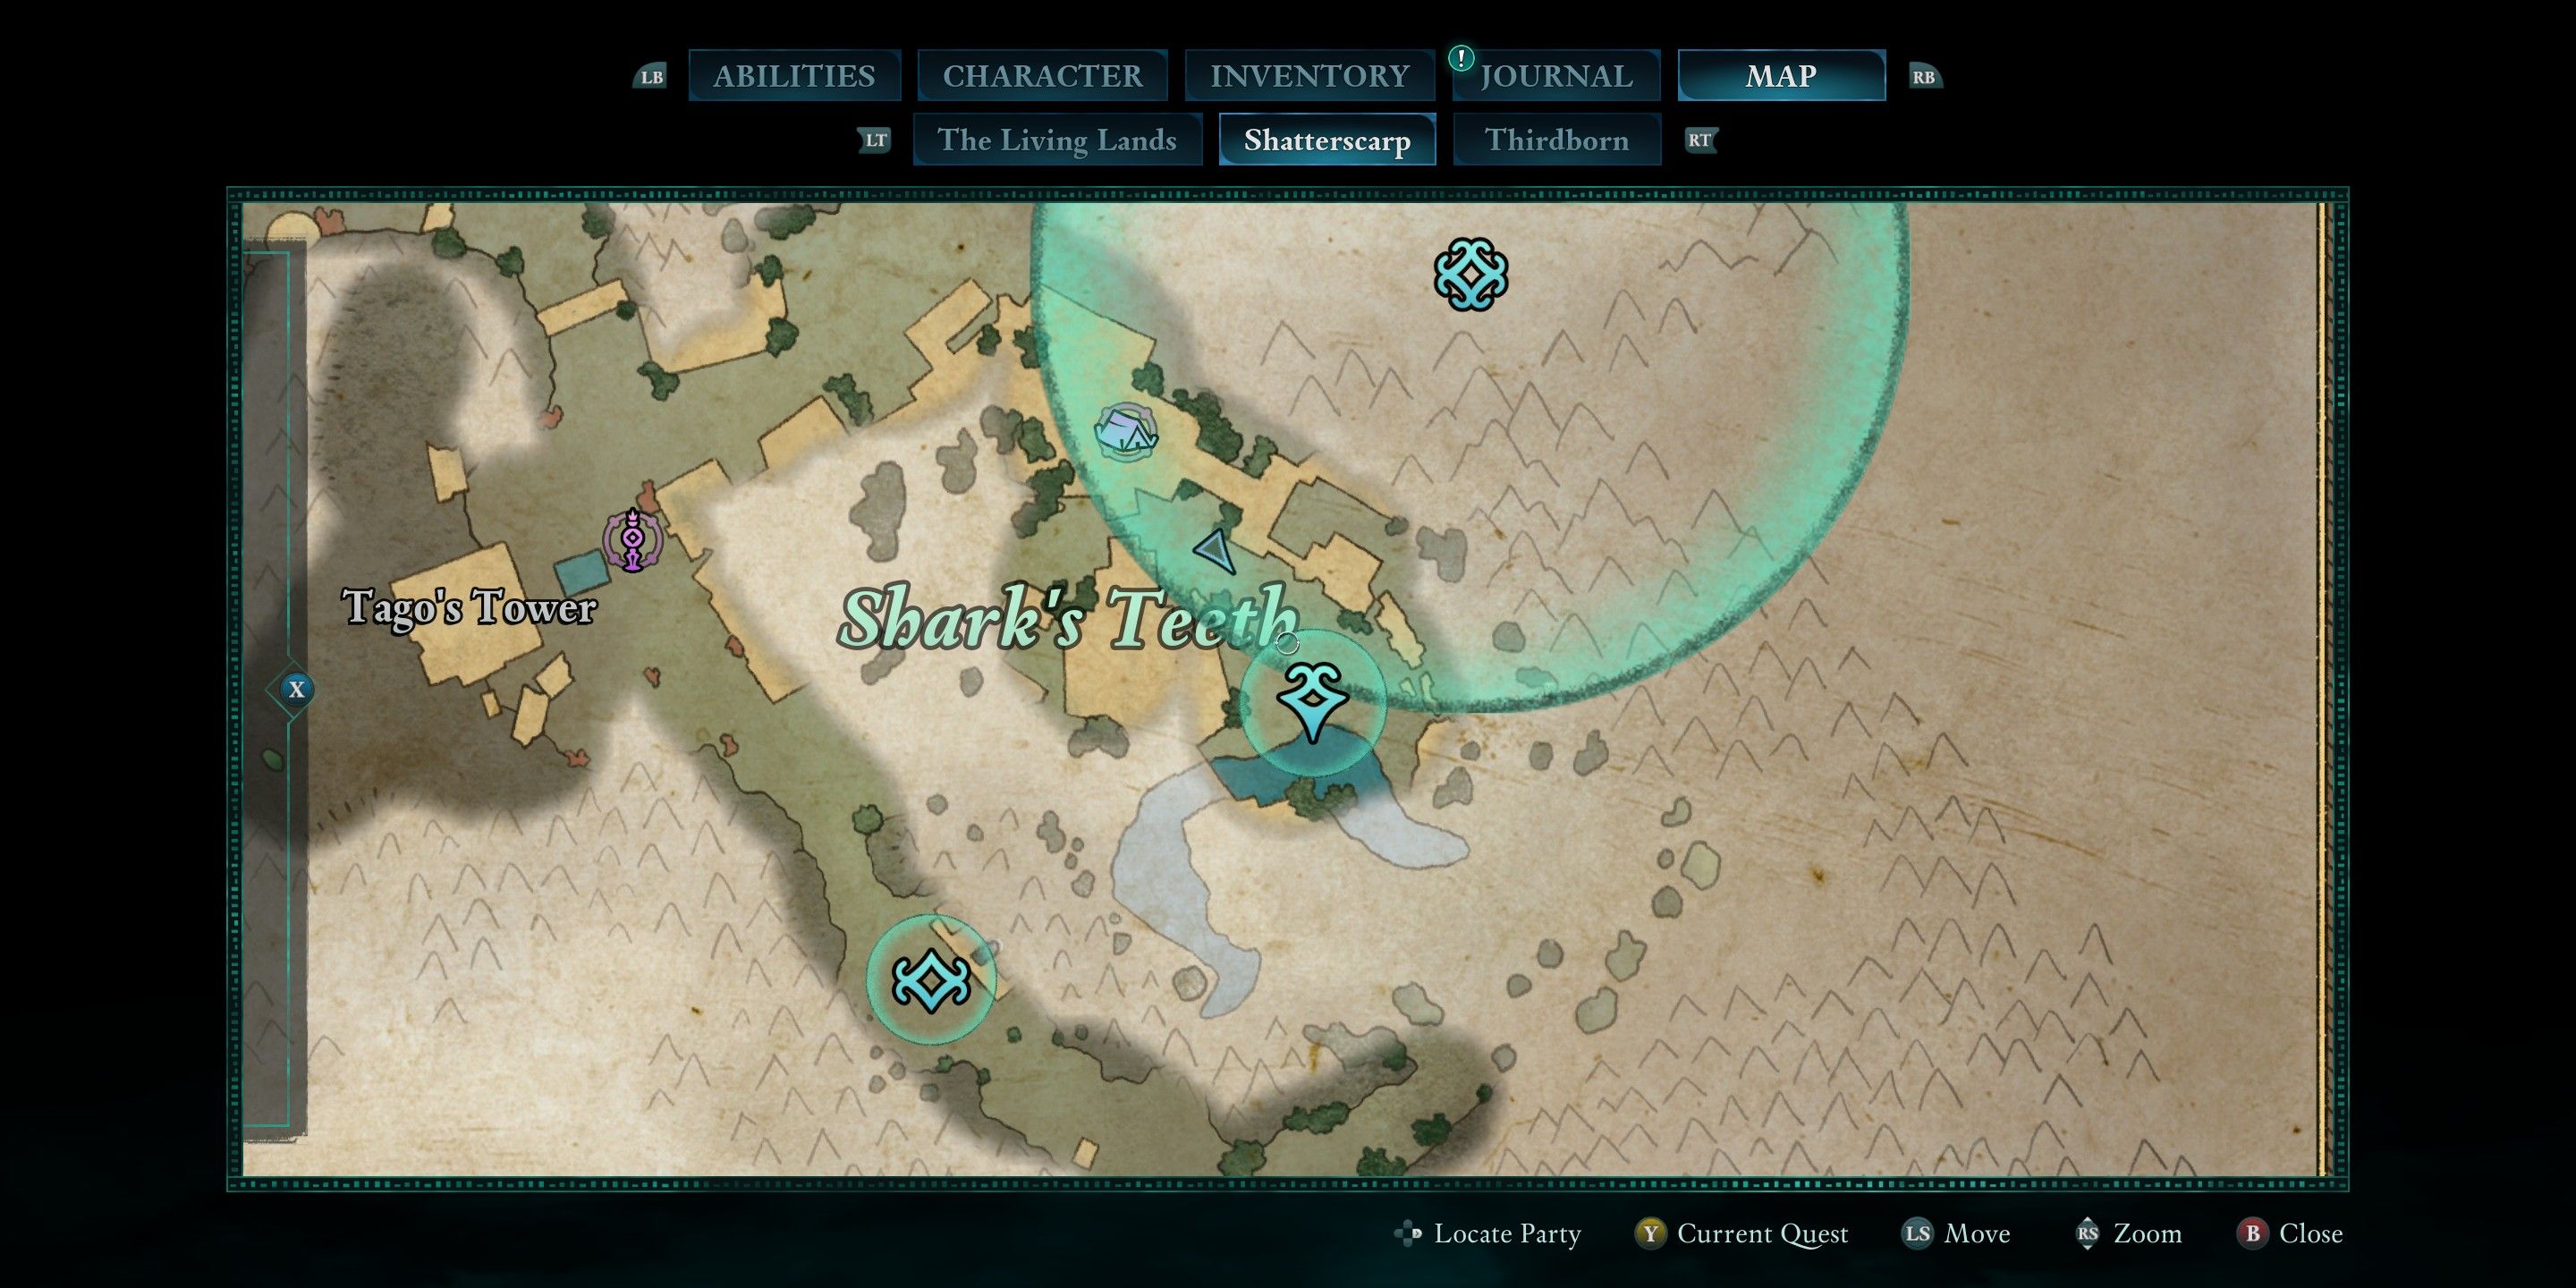
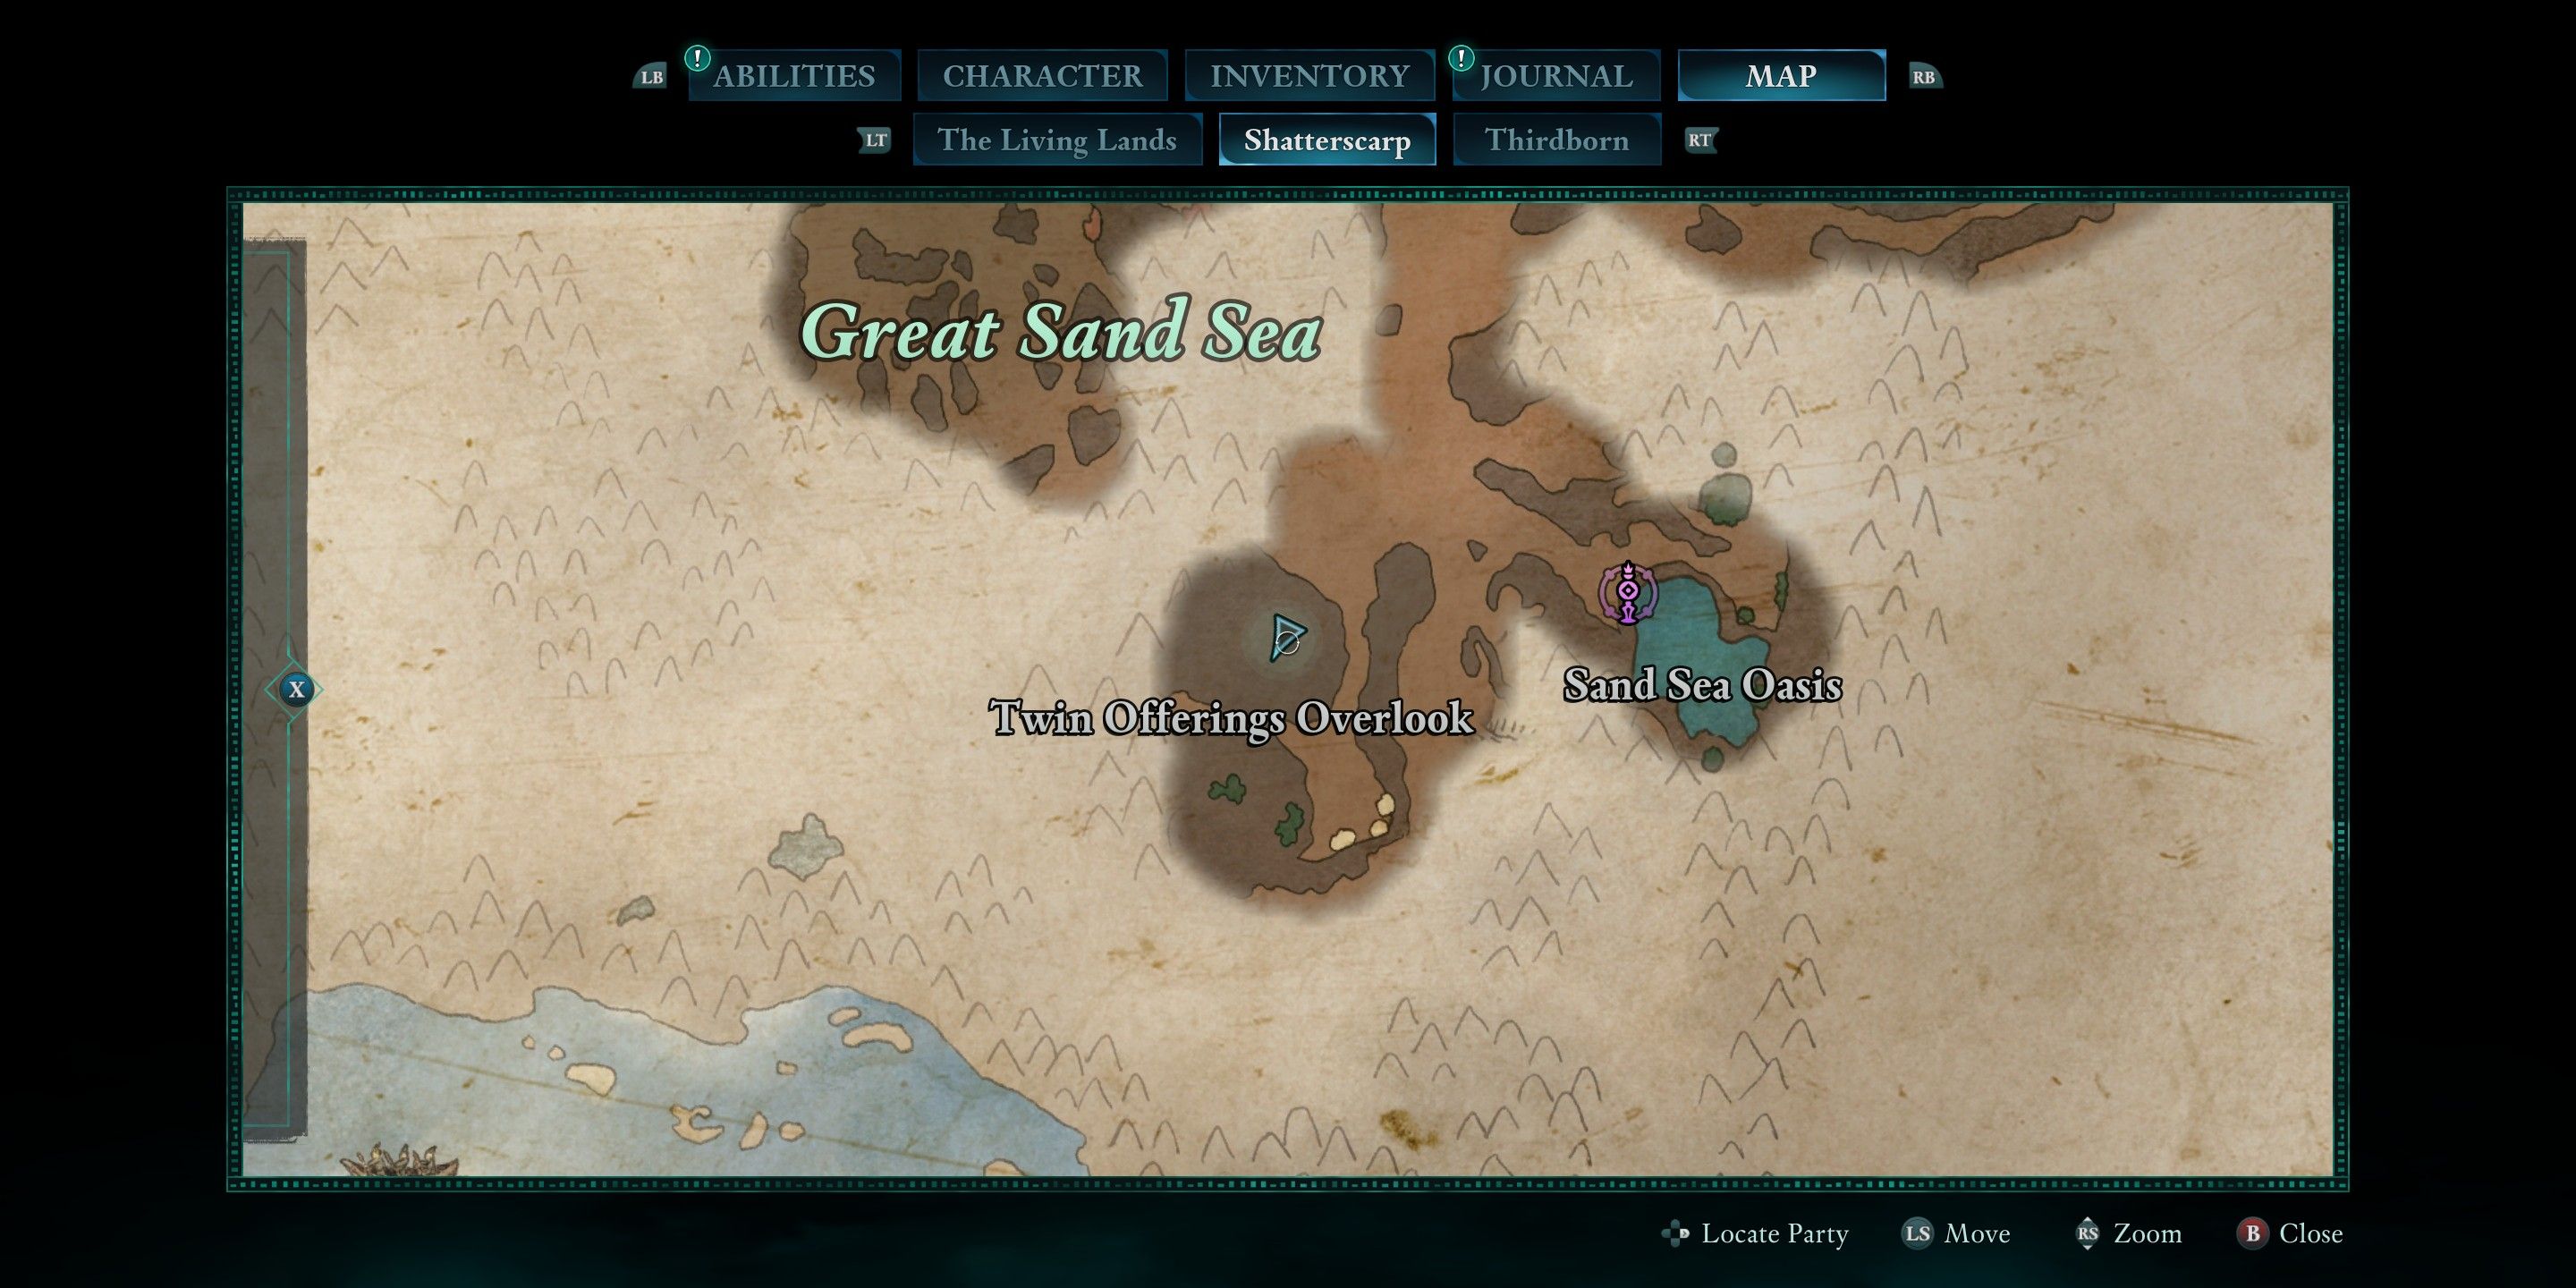
Shatterscarp Bounties
In this area, battles were challenging, but the side quest battle for the lost group of warriors proved even more difficult. To be honest, the initial one I conquered was rather laborious, and it’s a battle you might stumble upon when venturing to Thirdborn for the first time. Fights in Shatterscarp will reward you with 1200 gold.
The fights in this region were tough, but I found the side quest battle for the lost warrior party particularly grueling. To be fair, the first one I defeated was a bit of a struggle, and it’s a fight that could easily catch you off guard when you’re heading to Thirdborn for the first time. Battles in Shatterscarp will earn you 1200 gold.
| Bounty | Location | Extra Rewards (If Any) | Notes |
|---|---|---|---|
| Kukae Maka |
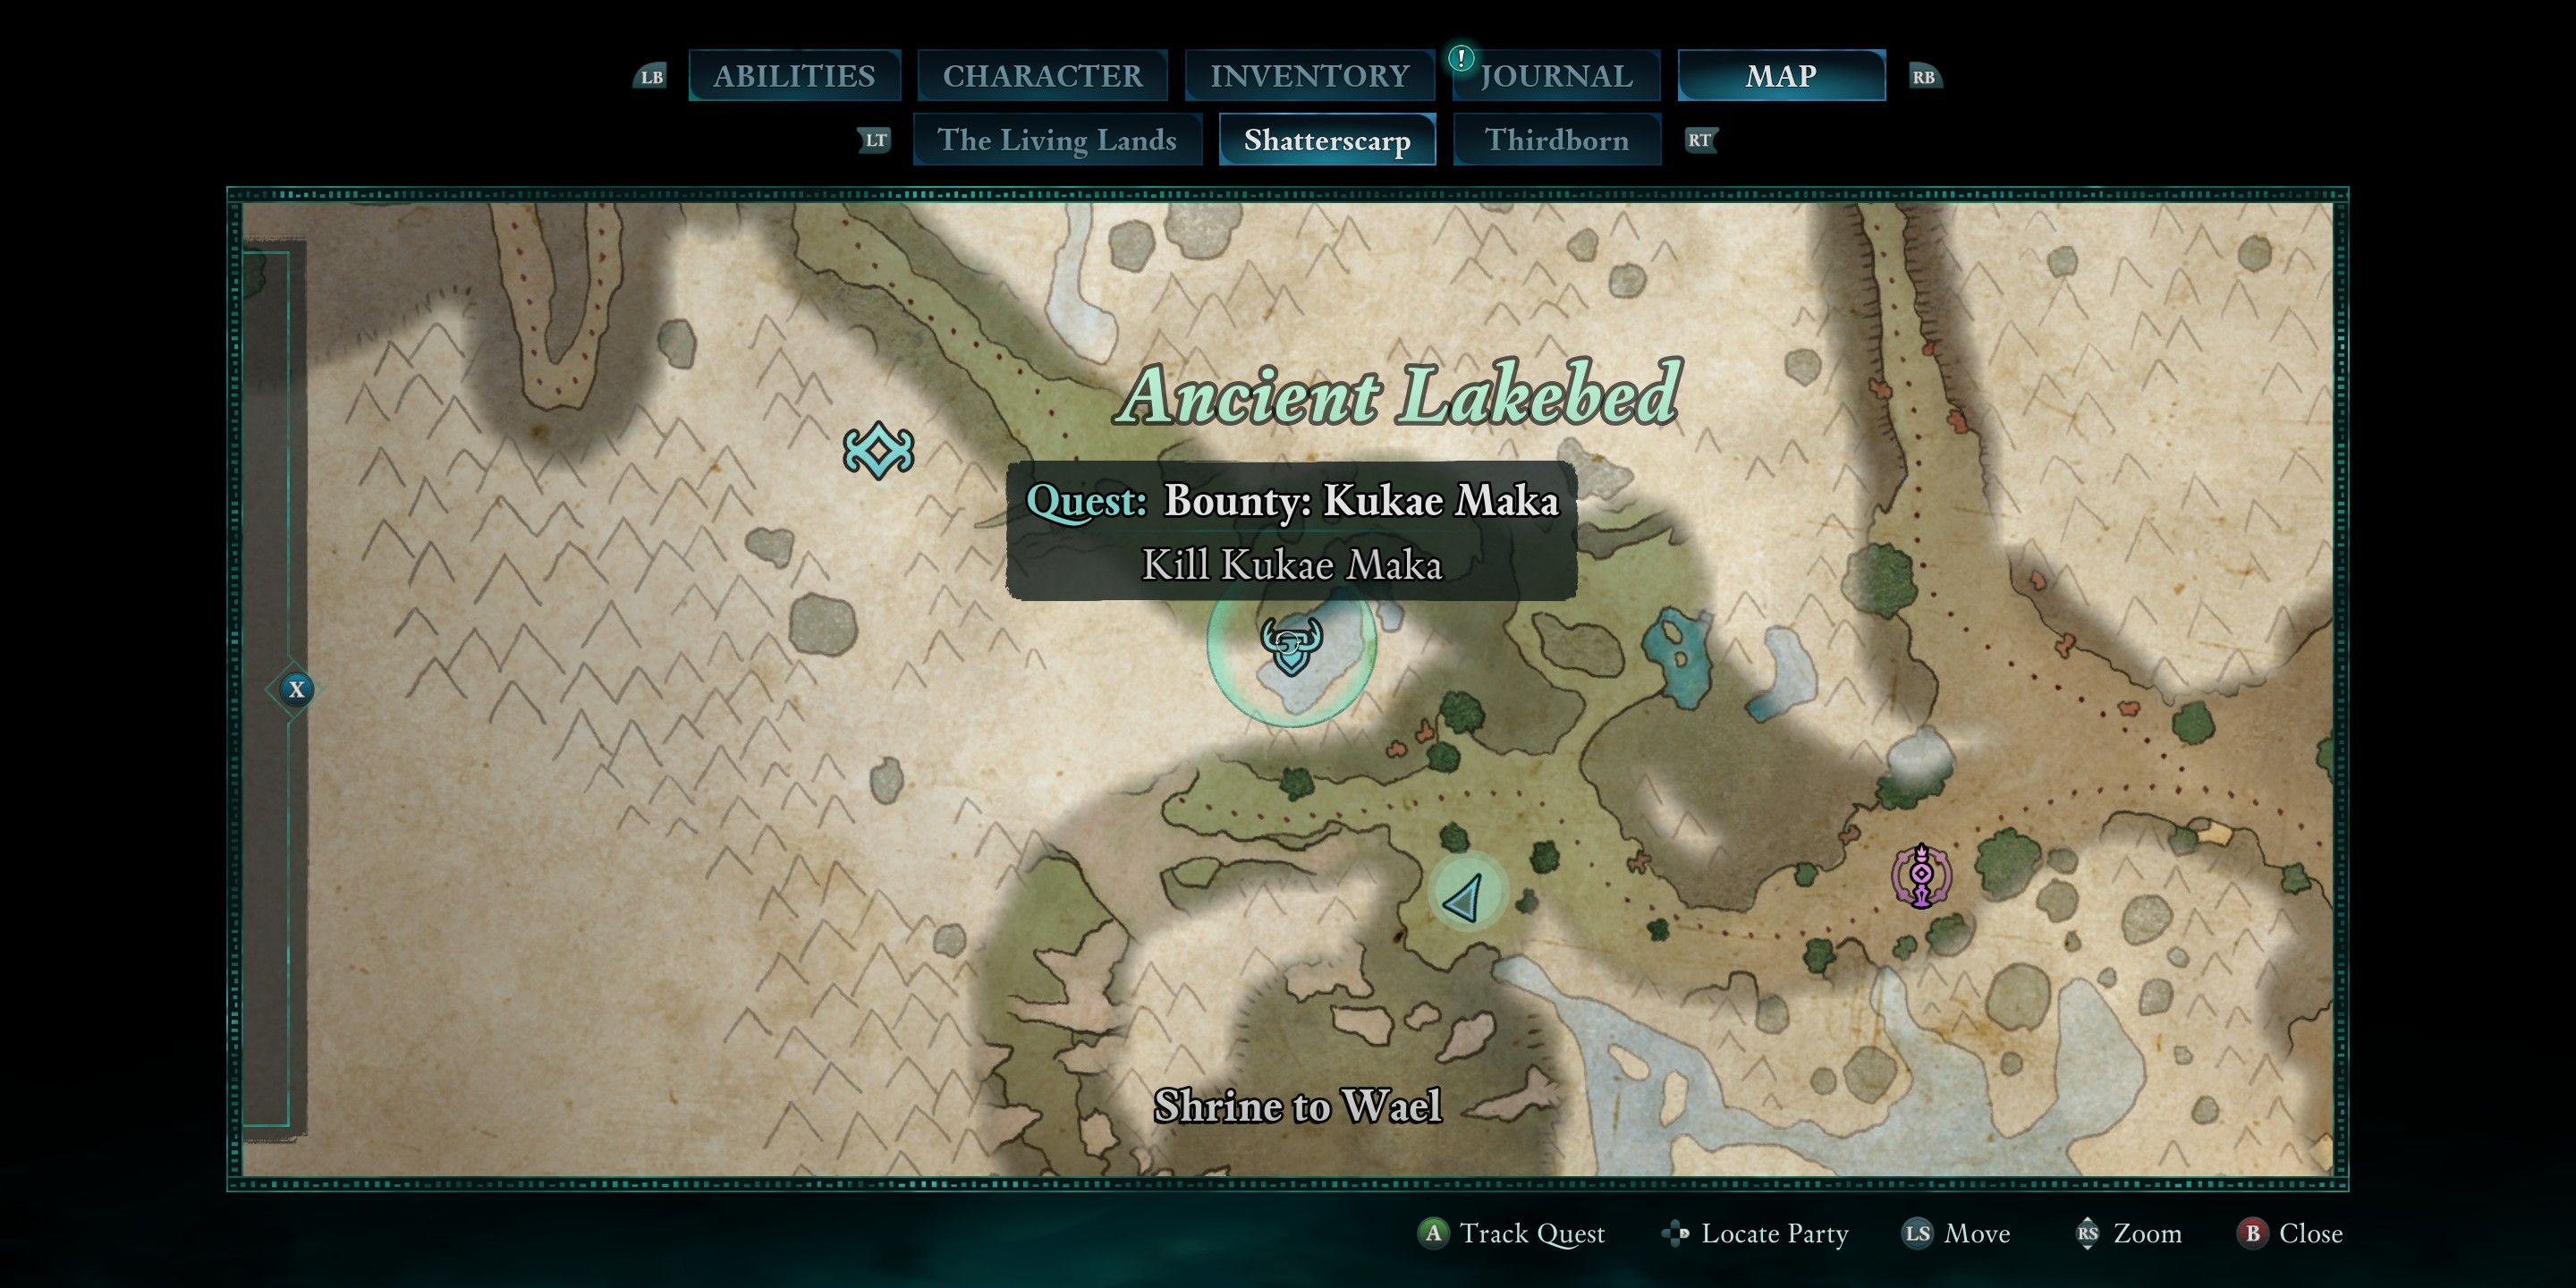 |
Misc. | This one is a little too easy to run into. The initial fight is difficult, but the hardest part is when you think you have whittled down the enemies to just Kukae, a new wave of enemies will appear and some of them are quite tough. My recommendation would be to take out the ranged enemies first. |
| Captain Tago |
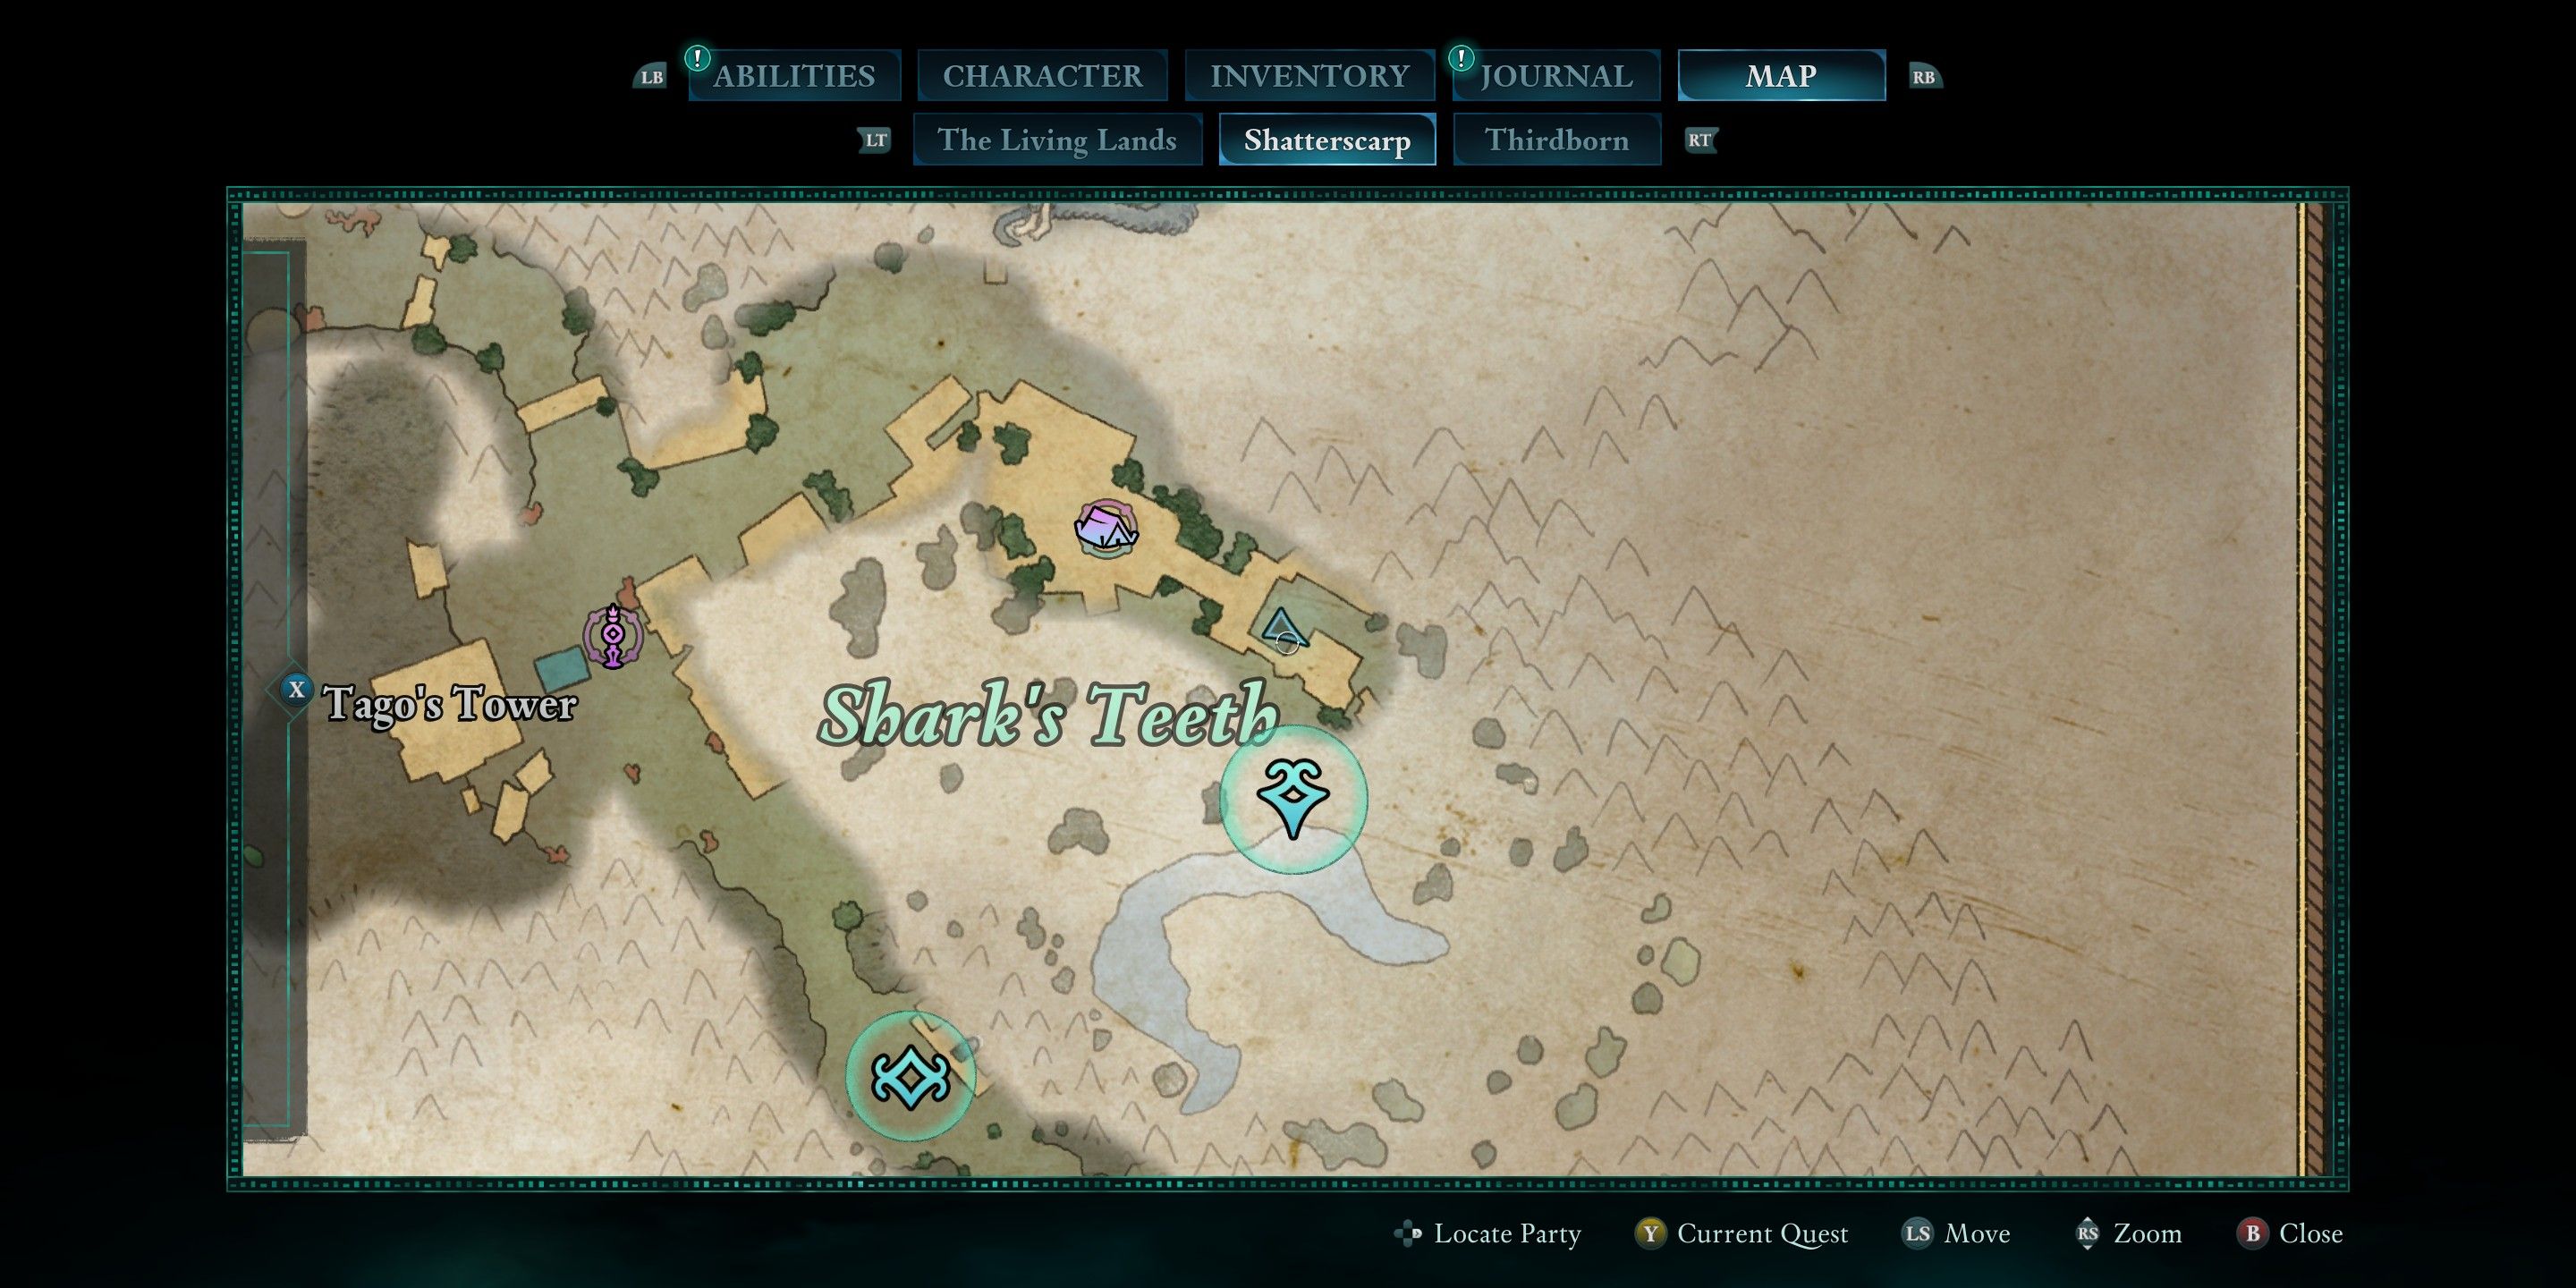 |
Various from all the different enemies. | There are a lot of enemies here, even if it doesn’t look like it at first. Many of the bounties here also have a Priest or Healer of some kind, and you should always take those out first. Again, this one will have an extra burst of enemies partway through. |
| Koda & Dario |
 |
Essence Potion | These two are one of the few bounties that are not hostile when you walk up. They will not engage you until you engage them, and you may want to wait. They are a little tough, but they are not the worst enemy in Avowed. |
| Moi Piki |
 |
None | As you can see with the giant quest marker right next to this one, it nearly overlaps with the main quest area. This means you will likely run into it. The enemies are mostly giving off fire damage, so you can counter with frost. |
| Xaurip Captain Grithin |
 |
None | This one didn’t stand out in my mind. It was pretty easy to get through all considered and you can finish it a bit quicker than the other bounties. |
Kukae Maka’s hideout can be found by the roadside as you journey towards Thirdborn. At first glance, it appears like any other hostile camp you’ve encountered. However, upon closer inspection, you’ll notice it’s not quite the same. Initially, most of the enemies here will be tough 3-Skull adversaries, so it’s best to avoid them for now.
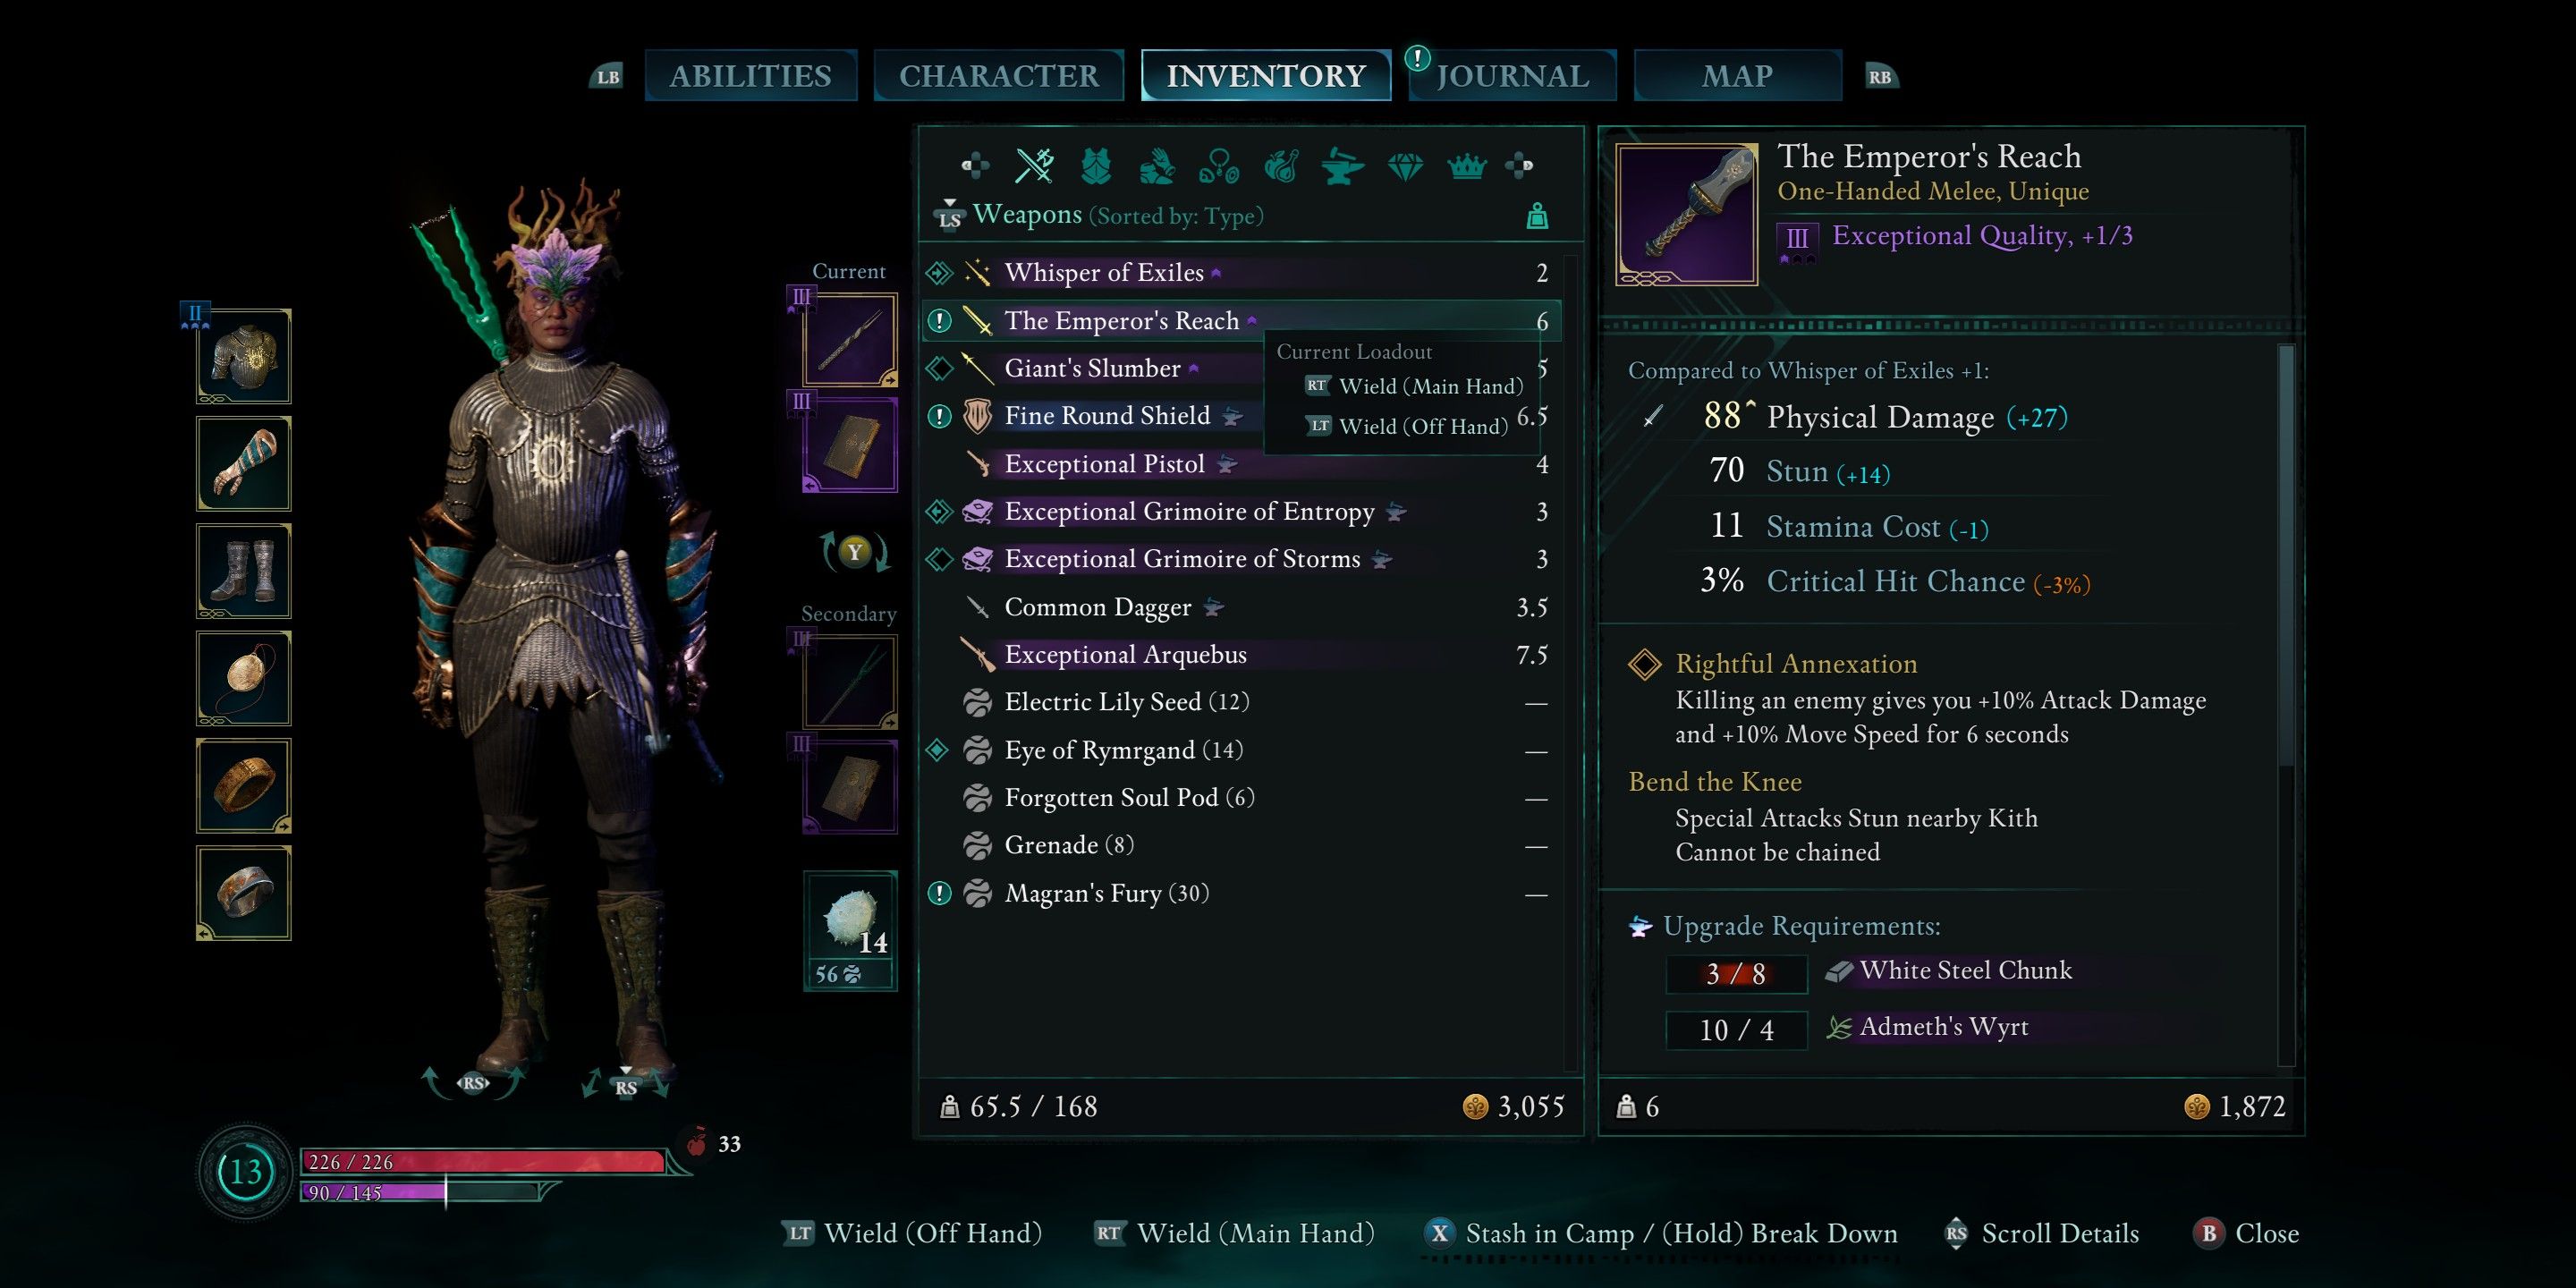
Interestingly, even though Kukae doesn’t drop anything particularly valuable, there lies an item named The Emperor’s Reach on the ground near the body. You’ll receive the Braces of Bloodletting upon completing all five tasks in this area.
How To Get Bounties
Quest Giver & Bounty Boards
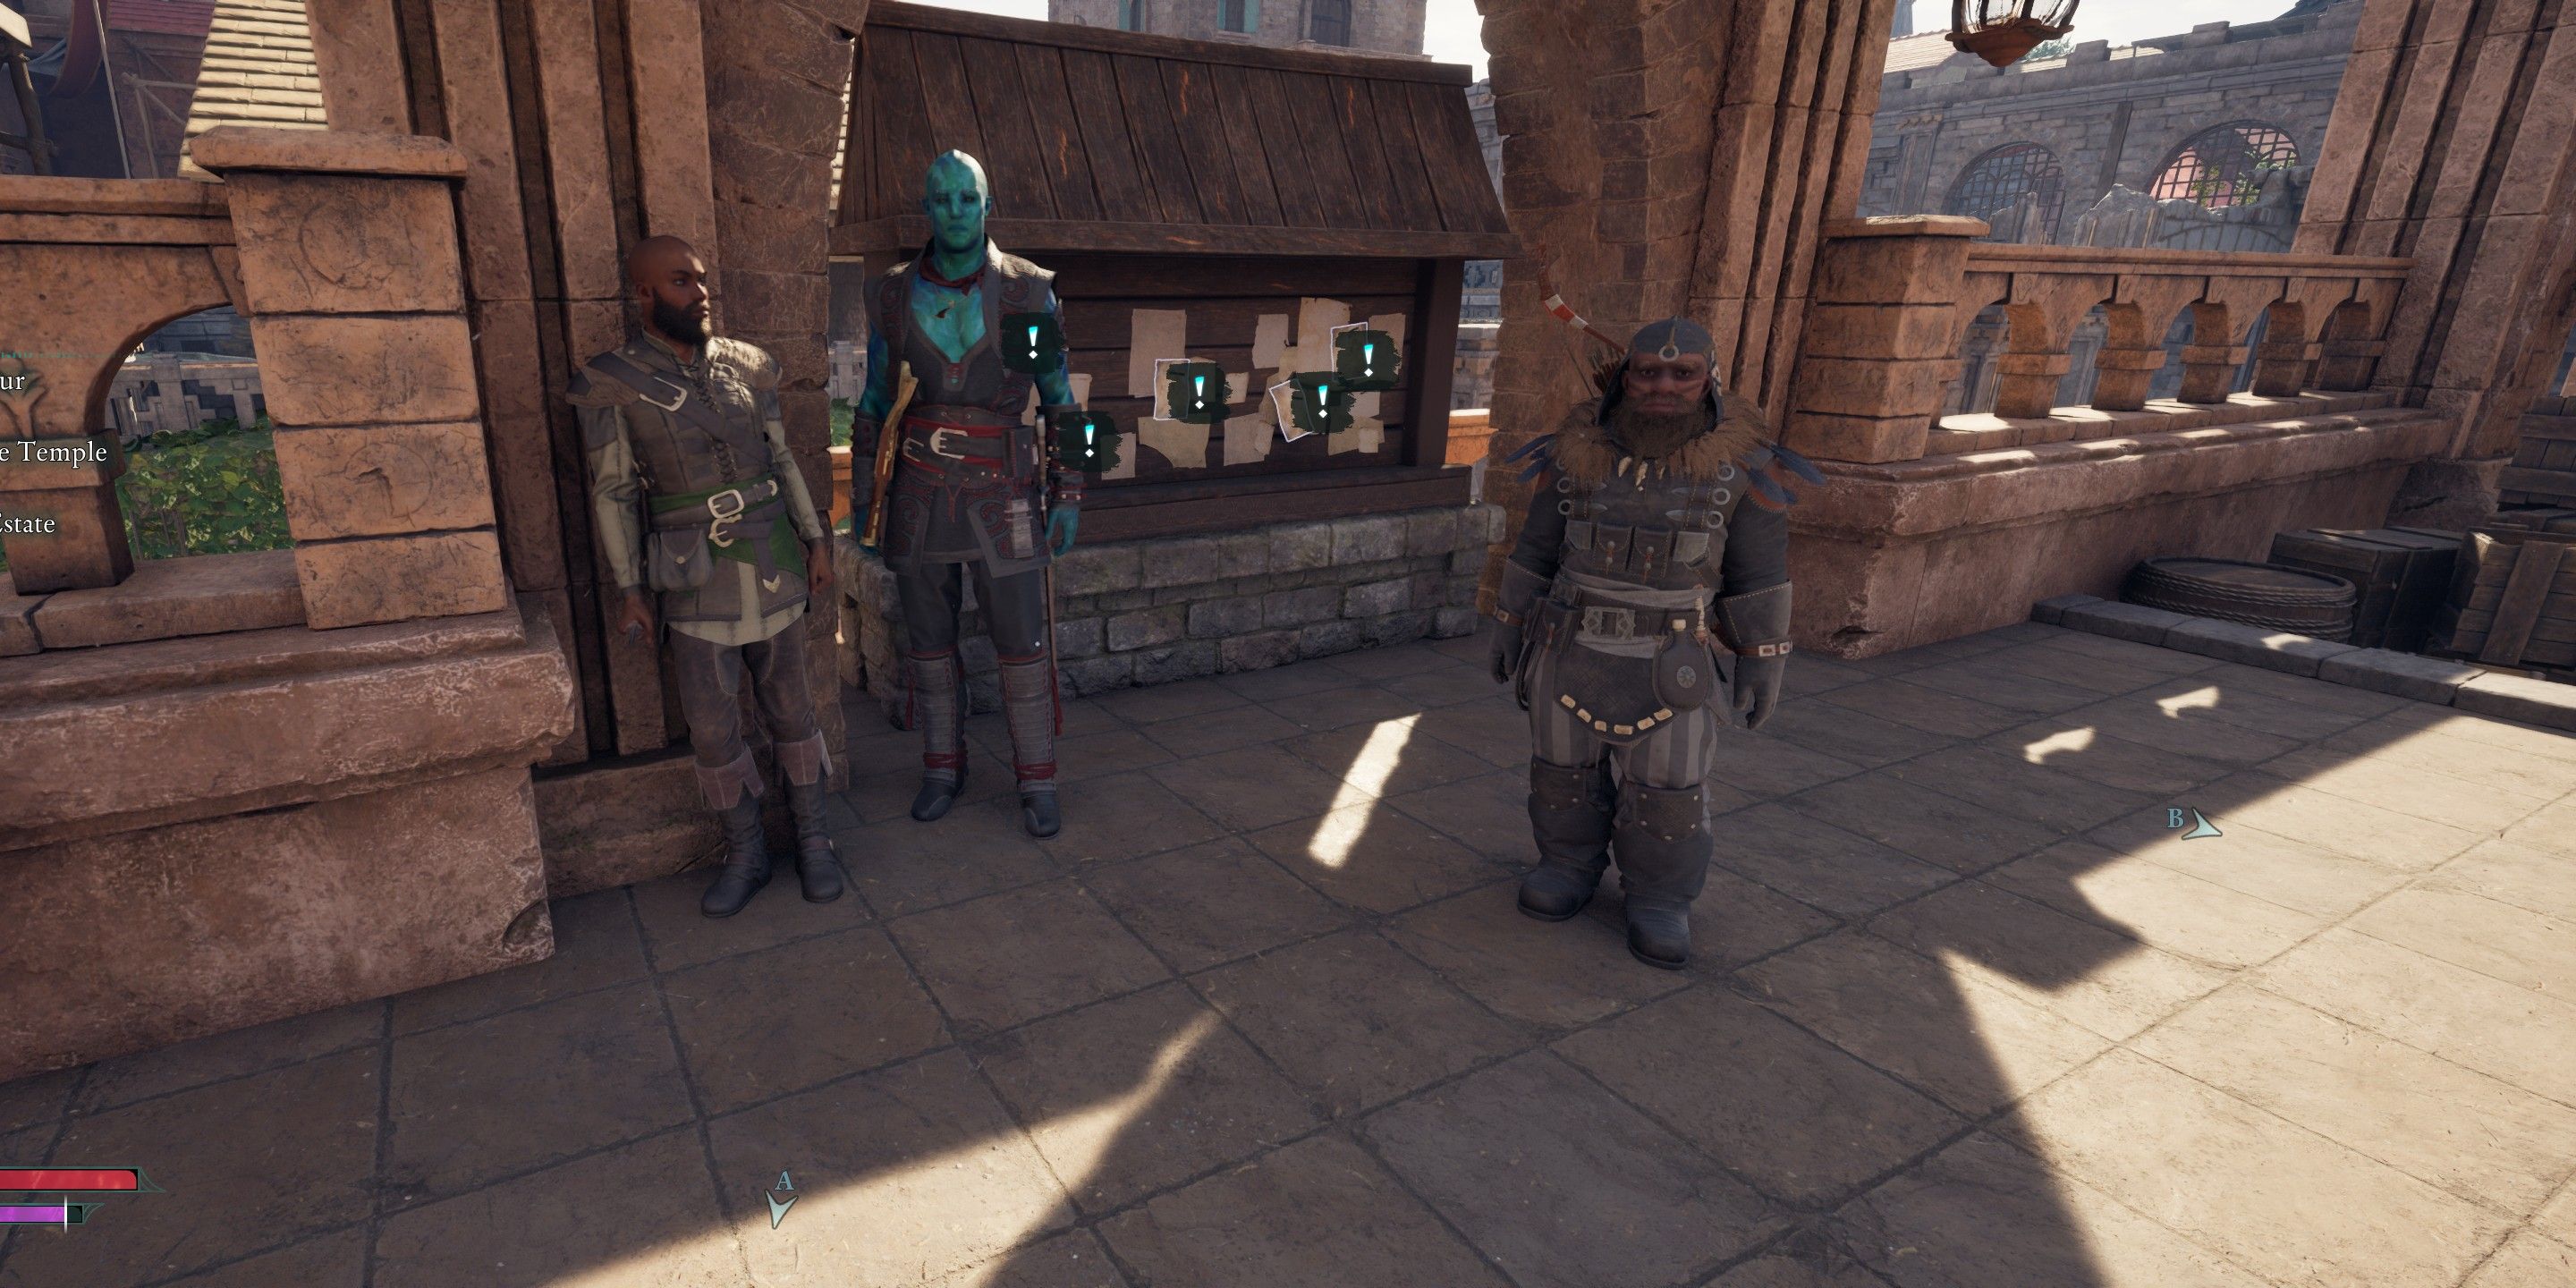
In each location, you’ll discover a notice board, typically not far from the merchants. In the case of Paradis, it’s situated within the Market District, a place that seemed oddly elusive during my exploration. I must admit, I circumnavigated Paradis numerous times without ever stumbling upon it accidentally. It wasn’t until I deliberately searched for merchants on the map to upgrade my equipment that I finally discovered it. However, if you find yourself struggling to locate it, keep an eye out for the exclamation mark on your map, as this signifies all side quests, including bounties. The board in Paradis can be found specifically within its Market District.
1. In the heart of Winterfell, you’ll discover it near the city gates as your entry point. After the city was devastated, the board will be affixed to a wall smack dab in the middle of the makeshift refugee camp the survivors established.
2. The rewards in Shatterscarp can be found sandwiched between two merchants, with the fish merchant being the nearest one you’ll encounter when you first meet Yatzli in Thirdborn.
How To Upgrade Gear
Gear That Will Help You Take Down Enemies
In the game Avowed, enhancing your equipment such as armor may seem simple, but it can prove challenging to achieve due to the significant amount of resources required to keep everything at its best. Unfortunately, there isn’t an easy method for tracking upgrade materials like in other games, which can make the process more difficult. However, this is important because almost every enemy in a fresh region will seem like a boss when you initially encounter it.
There are three main options for upgrading your gear:
- Finding materials and upgrading existing gear at the workbench
- Buying a better version of what you already have from a merchant
- Getting a unique piece of gear from defeating an enemy or finding it
It was most convenient for me to purchase updated versions of items that aren’t one-of-a-kind equipment. Some vendors also offer unique gear, which I would assess to determine if it was superior to my current possessions. I typically held onto upgrade materials for the unique equipment. Bosses can be challenging, but I seldom changed my gear specifically for individual battles. Occasionally, I would alter my secondary setup between an arquebus and a long-range one-handed weapon, as well as a grimoire, depending on the situation, but I never made more than that adjustment.
In any region, the initial encounters are usually challenging, regardless of how advanced your equipment was when departing from the previous region. Bounties typically begin with a difficulty level of three skulls each, and a single blow from one of the bosses can be lethal. Therefore, it’s advisable to always save your game at a secure yet nearby location relative to the bounty target before initiating combat. This way, you avoid losing any previous progress, as the autosave only records your progress after defeating the boss.
Maintaining a safe distance enables you to head back to a merchant or Party Camp, giving you an opportunity to reorganize, swap your equipment, or come back at a later date for another attempt. If a battle seems insurmountable, consider retreating, finding a less demanding quest or adversary in Avowed, and attempting the bounty capture again when you’re better prepared.
Read More
- Apothecary Diaries Ch.81: Maomao vs Shenmei!
- Gold Rate Forecast
- Batman and Deadpool Unite: Epic DC/Marvel Crossover One-Shots Coming Soon!
- Who was Peter Kwong? Learn as Big Trouble in Little China and The Golden Child Actor Dies at 73
- Mobile MOBA Games Ranked 2025 – Options After the MLBB Ban
- Hunter Schafer Rumored to Play Princess Zelda in Live-Action Zelda Movie
- 30 Best Couple/Wife Swap Movies You Need to See
- Netflix’s ‘You’ Season 5 Release Update Has Fans Worried
- Gachiakuta Chapter 139: Rudo And Enjin Team Up Against Mymo—Recap, Release Date, Where To Read And More
- Summer Game Fest 2025 schedule and streams: all event start times
2025-02-24 08:10