If you’re new to the Tower of Salvation, take a look at the Tower of Salvation Beginner’s Guide for essential details on gameplay mechanics and getting started.
Using Night World Obsidian
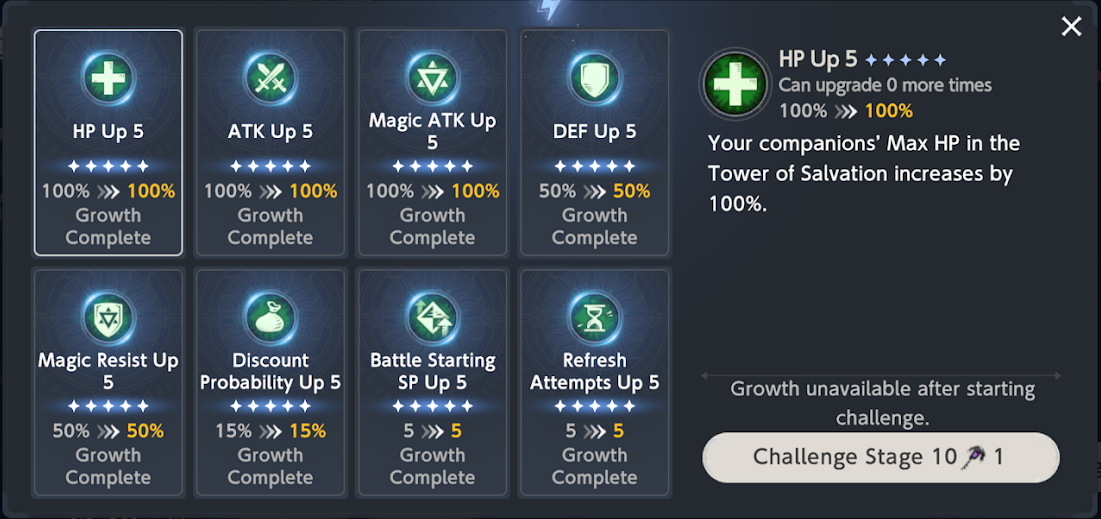
The TOS seasons typically span around a month’s time. This design is to prevent players from conquering all floors immediately. Instead, it gives you an opportunity to accumulate your Obsidian earnings over time. These earnings are crucial in purchasing the seasonal stats that aid in advancing through the tower. Here, we will discuss the ideal sequence for spending your Obsidian.
Order of priority for beginners
For newcomers who haven’t amassed numerous advanced costumes and haven’t yet scaled the higher levels of the tower, dealing damage should be your initial focus. Your objective is to inflict enough damage to eliminate most enemies in the lower floors with a single hit. It’s suggested that you begin by investing solely in either ATK or M.ATK (depending on whether you prefer a physical or magical team), but not both. To start, concentrate on honing either physical or magical abilities for each season separately.
After sustaining some damage, it’s essential to accumulate SP points. As a novice player, you’ll often encounter lower-level costumes that require higher SP investments. Obtaining these SP upgrades can enable you to activate more skills from the very first turn and throughout your gameplay.
Prioritizing a refresh is crucial for enhancing the coherence of your runs. It’s an aspect that shouldn’t be underestimated. Refreshes are seldom wasted because they can serve as a means to re-roll boss relic rewards, which can greatly impact your gameplay. Acquiring the optimal SR or UR relic can significantly alter the course of the game. Therefore, consider investing up to the third tier.
As you progress beyond the initial stages, you might notice that defeating all enemies in a single blow is no longer an option, even with powerful relics. At this stage, increasing Defense (DEF) and Magic Resistance (M.RES) becomes crucial to withstand enemy attacks. While Health Points (HP) are still valuable, they take a lower priority compared to DEF and M.RES in ensuring your survival.
The likelihood of receiving a store discount increases with the concept of ‘discount probability’. For newcomers, this may not be a top concern because they can usually purchase necessary items without heavily relying on discounts.
The recommended order of priority for beginners is:
- ATK or M.ATK (choose one): buy up to and including the 1,000 cost tier.
- SP: buy up to and including the 1,000 cost tier.
- Refreshes: buy up to and including the 1,000 cost tier.
- Then upgrade the 5,000 cost tier for each of ATK/M.ATK, SP and refreshes.
- DEF and M.RES: buy up to and including the 5,000 cost tier.
- Discount probability: buy up to and including the 5,000 cost tier.
- HP: buy up to and including the 5,000 cost tier.
- Then unlock the final tiers depending on what you need most.
Whenever you find yourself in a difficult situation, utilize your keys to instantly engage in a fight at the maximum level you’ve previously reached. Continue this process until you amass sufficient Obsidian to purchase the next stat improvement.
Order of priority for Lv 10 clears
If your aim is to achieve Level 10 clears or impressive scores, the sequence of importance changes significantly. Given that you’re targeting Level 10 clears, it’s likely that you possess advanced costumes with fully unlocked potentials. Consequently, dealing high damage isn’t necessarily a top priority. Instead, consider focusing on aspects like crowd control, survivability, and strategic gameplay for optimal results.
At Level 6 and beyond, upgrading Stat Points (SP) becomes significantly more crucial than increasing damage. As you progress through the levels, SP becomes increasingly rare. Not only does your initial SP pool decrease in higher levels, but from Level 6 onwards, you also no longer gain any SP regeneration per turn.
The importance of a higher discount probability increases as we approach the final stages. Since silver rewards diminish substantially in the later levels, a larger discount probability significantly boosts your chances of obtaining top-tier relics.
Therefore, for Level 10 clears, the order of priority is:
- SP and refreshes
- Discount probability
- ATK or M.ATK (choose one)
- DEF and M.RES
- HP
Physical or Magical?
To maximize your results given the restricted amount of Obsidian for stat upgrades, it would be wise to concentrate on enhancing either physical or magical attributes in each season.
Currently, magical teams seem to hold a slight advantage over physical ones. This is primarily due to the fact that magic costumes generally offer better area-of-effect (AOE) range. In contrast, many physical costumes are equipped with small AOE skills. Additionally, magical teams boast Beach Vacation Morphea, who is a top-tier attacker in TOS.
High value physical attackers for TOS include, for example:
- Blade: Big range and high damage on Young Lady.
- Justia: Pool Party is the cornerstone of her kit for both evasion and boosting damage.
- Liatris: Good damage and range, can be used to activate DOT relics.
- Luvencia: Big range, high damage and high hit count.
- Sacred Justia: Good range and damage, but cost is on the high side, and not good against small mobs.
- Yuri: Very good damage on both costumes. Whitebolt removes buffs.
High value magical attackers for TOS include:
- Eclipse: Big range, good damage. Nightmare Bunny SP recharge helps a lot in later difficulty levels.
- Levia: Track and Field amplifies damage. Night of Jealousy also has good range and damage.
- Michaela: Strong damage with long range AOE. Skill penalties are not a big deal in TOS.
- Morphea (Beach Vacation only): Two attacks in one! Summons can also act as shields to absorb enemy attacks.
- Schera: Removes buffs. Code Name S also silences.
- Venaka: Big range and very good damage. DJ has M.RES reduction.
Absolutely, the choice between physical and magical might be influenced by the type of character outfits you’ve purchased for your character in the game.
High chain or low chain?
A key factor to consider when building teams is whether you’re creating a team with many interconnections (highly collaborative) or one with fewer connections between members (less collaborative).
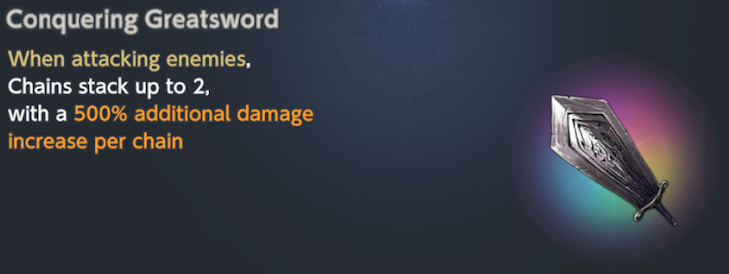
Building low-chain teams is simpler and more reliable: target relics that provide lower chain damage bonuses (like Hammer of Authority, Crushing Axe, Conquering Greatsword) and steer clear of those that boost your chain count. If possible, recruit Beach Angel Teresse for additional harmony. The low-chain approach is less dependent on luck and complements most costumes effectively because the majority of them deal 5 or fewer hits.
 |
 |
 |
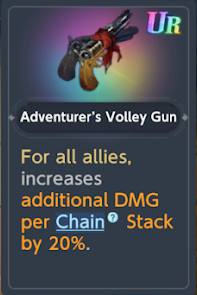
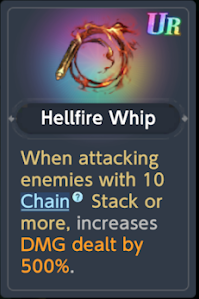
Building high chain teams can be quite challenging compared to other strategies, given their complexity, but the rewards at the end could be significantly greater due to the larger number of Ultimate Rare (UR) relics that synergize with this approach.
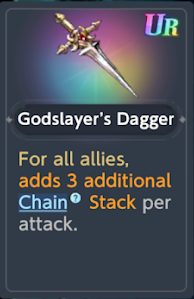
Building a high-chain strategy in this game can be challenging early on because relics that boost chain damage and provide high chain bonuses aren’t particularly useful at the beginning of your playthrough. However, once you acquire relics that enhance the number of chains (like Palace Guard’s Ring, Mages Circlet, or Godslayer’s Dagger), you’ll notice significantly greater rewards as your high-chain strategy begins to pay off exponentially.
The success of the high chain strategy heavily depends on frequent updates and a dash of fortune, as it requires multiple components to establish. If you fail to gather the specific mix of relics and costumes, you might find yourself saddled with moderately potent relics that lack significant individual impact.
Rainbow and mono element teams
In the “Pomegranate” collection, having five allies with distinct elements grants substantial rewards. Conversely, in the “Apple” series, having three, four, or five allies who share the same element yields large bonuses.
Avoid focusing on creating rainbow or single-type teams using the “Pomegranate” and “Apple” series: Building these specific teams is not recommended due to their restrictive nature and potential loss of damage bonuses if a unit dies during combat.
As a gamer, I’d say, “On the flip side, the ‘Grape’ relic collection is definitely worth checking out. You only need three distinct elements in your squad to trigger the ‘Grape’ series, which is quite manageable and often happens naturally, even without conscious effort.
If you possess Divine Grapes, consider acquiring Sky Apple as well. The combination of Sky Apple and Divine Grapes results in a powerful item called Tricolor Marble, which boosts the attack power of all allies by 200%. However, if you don’t have Divine Grapes, Sky Apple is not advised for your collection.
Crit rate and crit damage
Boosting critical damage is an excellent method for enhancing your overall damage production, particularly if you have a satisfactory critical hit rate. Characters like B.Helena, DS. Liberta, and RH.Rou offer a substantial 50% increase in the critical hit rate. With suitable accessories such as Gambler’s Token or Deadeye’s Bayonet, achieving a high critical hit rate becomes effortless. As a result, relics that enhance critical damage prove to be exceptionally beneficial investments.
Reminder: Unlike typical narrative fights, the dice rolls in Tower of Salvation are predetermined. You won’t be able to continuously reshuffle the deck in search of critical hits. Regardless of whether you restart the battle, the critical hits will occur exactly as they did before.
Nevertheless, you can manipulate the critical outcome chances by resetting and adjusting the sequence of your characters’ attacks. This will also affect which attack lands as a critical hit. For instance, if you observe that the first four hits don’t crit but the fifth one does, you can rearrange your characters in such a way that the character performing the fifth hit deals a critical strike.
Other offensive relics
- Relics that buff property damage are not recommended. It’s not common to have a strong element costume available. Many bosses also have no element.
- Relics that increase damage dealt at the expense of damage taken (Forbidden Powder, Unidentified Dish) are ok in lower difficulty levels, but not recommended in higher difficulty levels. The loss of survivability can be very punishing in the higher floors, and is generally not worth it.
- Relics that buff 1st position damage (Fleetfoot Herb, Fair Wind Flower) are not recommended. 1st pos is usually reserved for buffers, not attackers, so the damage bonus is usually wasted.
- On the other hand, the relics that buff 5th position damage (Vanguard’s Spear, Peerless Javelin) are highly recommended, and are better than most other relics of the same rarity. These relics give very large offensive buffs, and allow you to do focused damage with your best attacker. Simply put your best attacker in the 5th position.
Defensive relics
- Defensive relics are not really required for early difficulty levels. They become more relevant only in later levels where you cannot reliably clear battles within a single turn.
- The best defensive relics are the ones that grant evasion (Veil of the Night, Talisman of Speed).
- The next best defensive relics are the ones that increase DEF and M.RES (e.g. Elven Cloth, Fairy Silk). Keep in mind that DEF/M.RES caps at 90%.
- Relics that give energy guards at the start of battle (Rabbit Doll, Teddy Bear) are also good. Relics that give energy guards on hit are not as good, because some enemies can one-shot you.
- Healing relics are generally not needed, especially if you can recruit B.Helena and/or MC.Teresse. Note that healing is available at all shops for a small cost of 1000 Silver.
- Other defensive relics, including counter relics, are mostly low priority and only work well in niche situations.
Other relics
- SP cost reduction and SP gain relics are very useful for the later difficulty levels. After Lv6, you have no automatic SP regen, and your only source of SP is normal attacks and SP charging skills.
- Interest bonuses and silver reward bonuses are only worth picking up in the first half of your run. They also should take lower priority than any decent offensive or defensive (evasion, DEF/M.RES) relics offered to you.
- Unless you have planned a route with many event rooms, event success relics are not really worth it.
High value costumes for high difficulty levels
For the first few levels, it’s all about damage.
Defensive / utility costumes
BV Morphea |
Beach Vacation Morphea is simply one of the best for Tower of Salvation.
First of all, her two summons can act as shields to absorb enemy hits and protect your team (just remember to de-select their self-destruct skills). In tough battles (especially where there are only 1 or 2 enemies), she can use her summons repeatedly to stall until Death Time. Secondly, Morphea and her summons each have different knockback skills, so she gives you access to 3 different kinds of knockback in one. Many battles have weird enemy formations, so do not overlook the strategic value of her knockbacks to reposition enemy mobs. Thirdly, Morphea’s summons can pack a punch. Her skill effectively gives you 2 strong AOE attacks in one turn. Fourthly, Morphea’s summons can help you recharge SP from normal attacks if you don’t self-destruct them. The SP recharge can really add up in longer battles. Her main drawback is her high SP cost, so she does not leave much room for other high cost costumes. |
Evasion |
Evasion is an effective way to deal with heavy damage from even the strongest enemies.
Of the evasion costumes available, Justia is the best value if you have her with at least +3 costume level and her potential upgrade that boosts SP gain. SP is an extremely valuable resource in later levels, so being able to charge SP and tank attacks with evasion for only 1 SP is very good value. In addition, her skill boosts the power of her next few attacks. Tip: subbing out PP.Justia, and then immediately subbing her back in, refreshes her skill cooldowns. This technique allows you to keep PP Justia’s evasion up every turn for a net 1 SP gain (at +5 full potential, it costs 4 SP to cycle her and 1 SP to activate her skill for 6 SP gain). Honorable mention goes to WC.Rou and Maid Rubia. |
Silencers   |
Silencers are recommended when you do not have enough damage to one-shot your enemies. In the later levels, many enemies simply cannot be killed in one turn, so silence is an effective way to keep your team alive.
In particular, in later levels you will encounter enemies who gain very strong buffs (especially counter buffs) and are immune to buff removal. A great way to deal with them is to silence them before they can activate their buffs. The best silencer is FS.Olstein (due to his big AOE and SP recharge effect), but B.Eleaneer and CNS.Schera also work. Remember to check the enemy’s status at the start of battle to see if they are immune to silence, buff removal, etc. |
| Buff removers |
Buff removal is useful to deal with enemies with taunt, counter, and strong offensive buffs (as long as they are not immune to buff removal). It’s useful to have at least 1 buff remover in your roster.
Schera, Yuri and Eleaneer are best for this purpose. |
Buffers    |
You should make it a priority to find a buffer as soon as possible, ideally in your opening team. The best buffers to look for in your opening team are B.Helena, DS.Liberta and BA.Teresse. If you get one of these buffers but don’t yet have them at +5 costume level, it’s a good idea to max them out when you get to your next shop.
After the above, MC.Teresse (damage and heal) are RH.Rou (crit rate and energy guard) are also high value picks. H.Lathel is also very good for physical teams, but doesn’t offer quite as much utility as the other buffers. |
If none of your character choices seem ideal for a particular situation, think about incorporating characters who offer various types of knockback effects. These diverse knockback abilities may provide solutions when dealing with tricky team compositions.
Read More
- Apothecary Diaries Ch.81: Maomao vs Shenmei!
- Gold Rate Forecast
- Batman and Deadpool Unite: Epic DC/Marvel Crossover One-Shots Coming Soon!
- Who was Peter Kwong? Learn as Big Trouble in Little China and The Golden Child Actor Dies at 73
- Mobile MOBA Games Ranked 2025 – Options After the MLBB Ban
- Hunter Schafer Rumored to Play Princess Zelda in Live-Action Zelda Movie
- 30 Best Couple/Wife Swap Movies You Need to See
- Netflix’s ‘You’ Season 5 Release Update Has Fans Worried
- Gachiakuta Chapter 139: Rudo And Enjin Team Up Against Mymo—Recap, Release Date, Where To Read And More
- Summer Game Fest 2025 schedule and streams: all event start times
2025-04-05 14:40