In Monster Hunter Stories 3: Twisted Reflection, Side Stories let you learn more about your Ranger companions and their pasts, and even unlock new skills for them. This guide covers every Side Story available, walking you through each step to complete them. We’ll do our best to avoid revealing key plot points, but will mention chapter titles and what you need to do in each mission.
Thea Side Stories
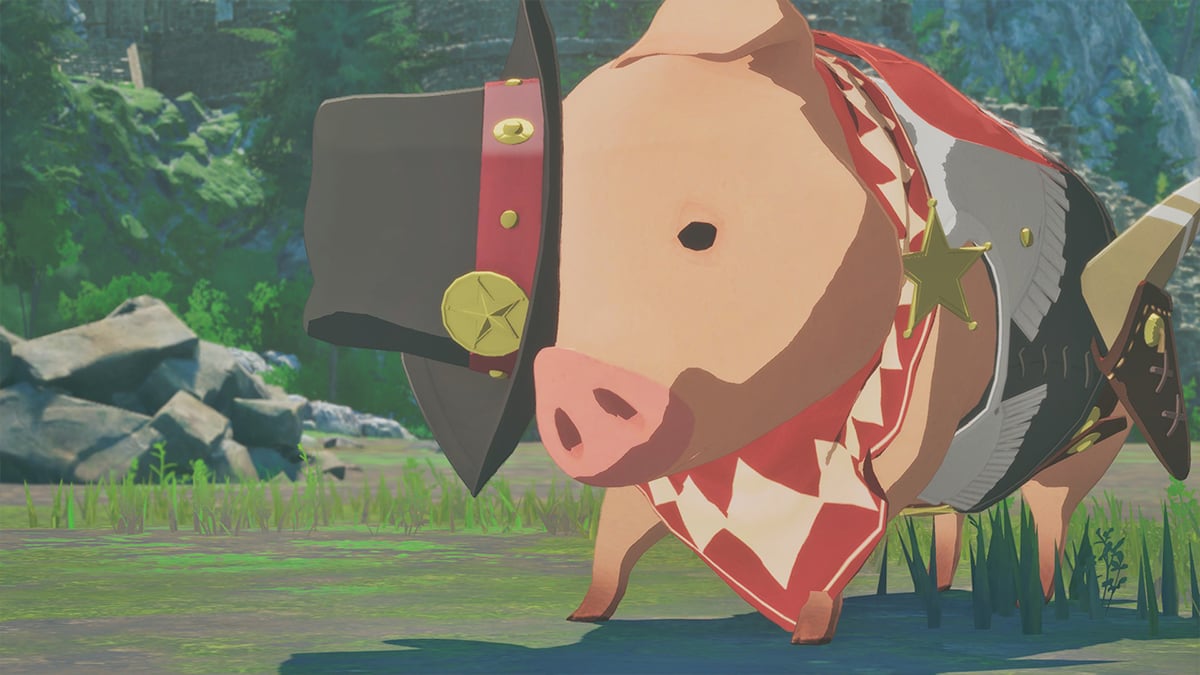
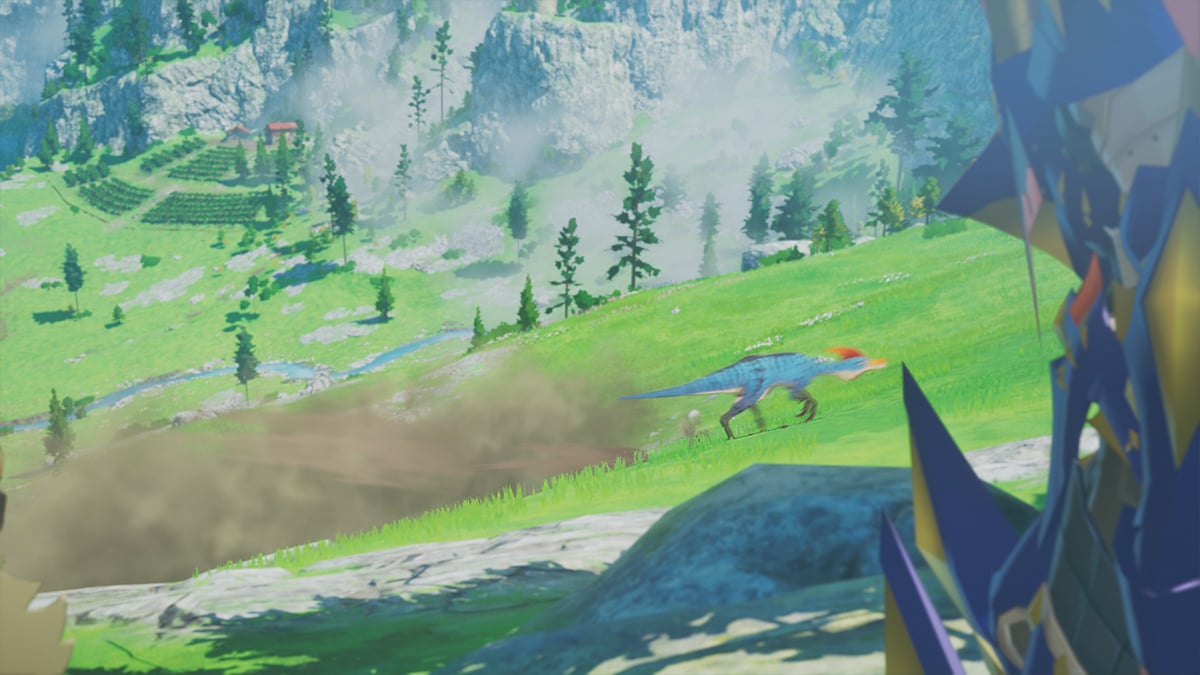
Thea’s side quests are the most lighthearted and enjoyable of the Ranger missions. They involve finding a group of escaped Poogies called the Gale Force Porkers, and each one includes a short racing game. Because they’re quick to finish, we suggest doing them as soon as they unlock.
Chapter 1: ‘The Gale Force Porkers’
Reward:
- Poogie Hunter, the game will give you a notification when you’re near a Poogie. Very important for clearing the ‘Poogie Hunt’ sidequest!
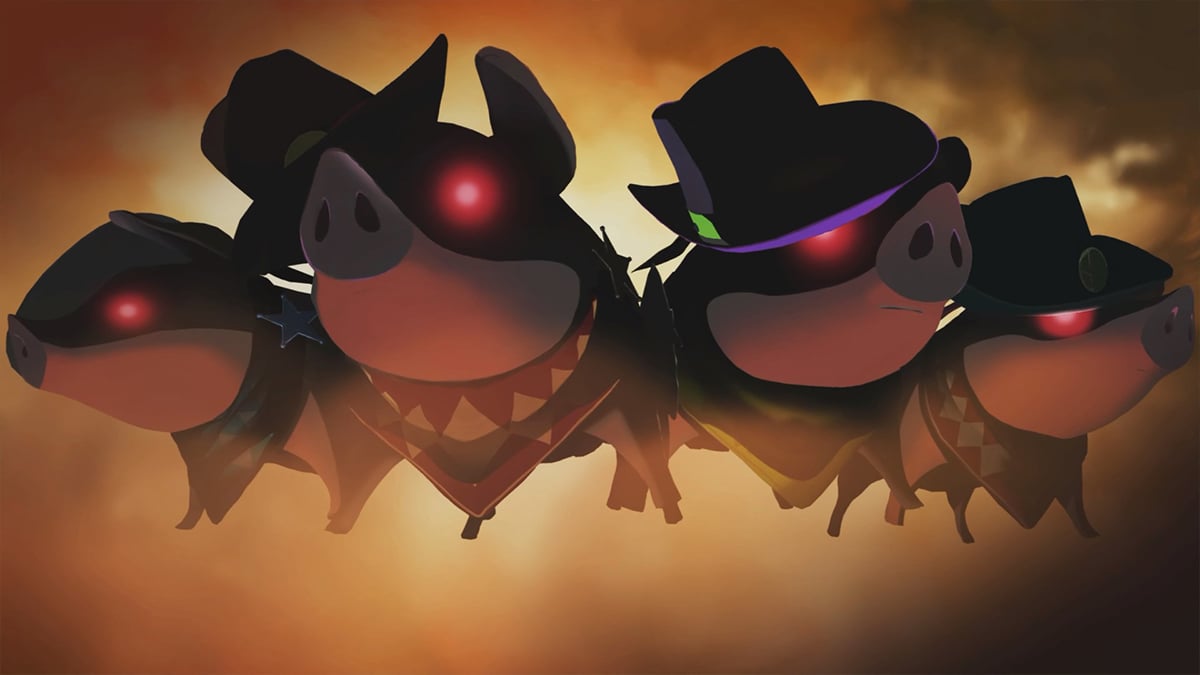
This task is actually part of a larger quest to find missing Poogies, where Thea is looking for four more of them.
So, after chatting with Thea, she sent me to this guy near the Catavan Stand in Azuria. He said he saw a Poogie hanging around the big tree further into Broadleaf Basin. I went deeper into the basin, squeezed through this narrow path, and just followed the marker on my screen. It wasn’t long before I ran into the strangest Poogie I’ve ever seen!
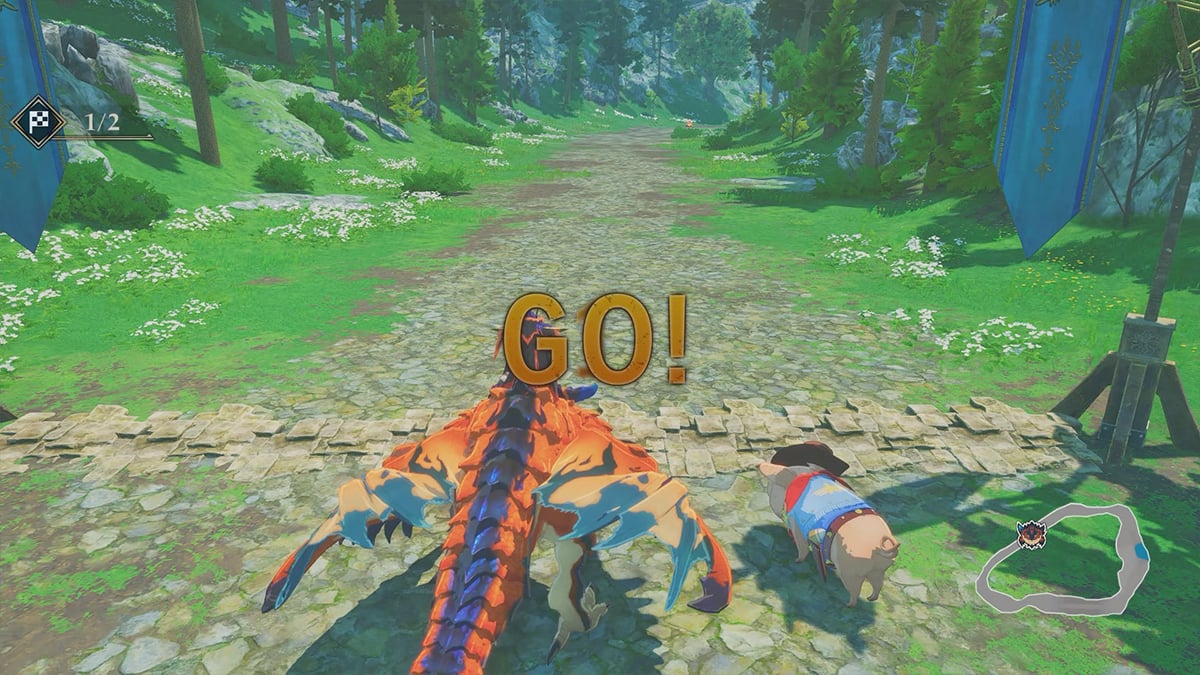
Rather than running or fighting, Swift Swine proposes a race! It’s a simple two-lap challenge: beat the Poogie. You’ll find Ratha is a bit slower than your opponent, but the track is covered in Zoomshrooms. These mushrooms give you a temporary speed boost, and you’ll need them to win!
When racing, the controls can feel a little less accurate than when you’re just moving around the world. Turns aren’t as quick and responsive, and you might find your kart sliding a bit when trying to collect a Zoomshroom or go around a curve.
Luckily, this is just the first race, so even if you don’t collect every Zoomshroom, you still have a good chance of winning.
Chapter 2: ‘Shai of Sheparden’

Rewards:
- Unlocks Water Hunting Horn for Thea.
- Kagachi learns ‘Stealthy,’ which increases Crit Rate when not targeted by Battle Lines.
Okay, so after that, the race takes us to Canalta Timberland. I just fast traveled to the Narrow Passage: Opening Catavan Stand, and I’m heading north now to find the next Poogie racer. His name is Bullet Bacon – sounds like a tough one!
This course is pretty straightforward – it’s just a simple circular track. But this race has a new challenge: Slowedstool mushrooms. If you hit one, it will drastically slow you down, so try to avoid them! Instead, focus on collecting the Zoomshrooms, and you’ll be well on your way to winning.
Chapter 3: ‘The Tarkuan Trotters’
Rewards:
- Grape Juice Recipe.
- Thea’s Aerial Aim is upgraded to the AMP version
- Thea’s Rousing Riff is upgraded to the AMP version.
You’ll find the third Poogie in Tarkuan, but there’s a catch. A Blood Orange Bishaten is running around and frightening it away. You’ll need to scare off the Bishaten – with a good show of force – before the Poogie race can start.
Blood Orange Bishaten Status
| Normal | Enraged | |
|---|---|---|
| Move | Speed (Fire) | Power (Fire) |
| Weakness (Element) | Water x2 Thunder x1 |
Same |
| Weakness (Ailment) | Darkness x2 | Same |
After you beat the Bishaten, the Presto Piggy will show up, starting another race. This race is tougher than the last two. While the track is still a circle, you’ll encounter Slowedstools more often, and your Poogie will be running at a higher speed.
This game can be unforgiving, so try not to make many errors. Prioritize collecting every Zoomshroom, and you’ll likely start to win.
Chapter 4: ‘One to Go’
In the final installment of Gale Force Porkers, the Prince returns to Azuria and encounters someone who saw where the Poogie was last seen. Following a long conversation, the ultimate race kicks off.
This track is the hardest one you’ll face. It has sharper turns, more obstacles that slow you down, and rocks that can make it tough to steer. You need to be precise – even missing one boost pad could cost you the win, so concentrate on taking clean, smooth lines around each corner!
If you win the race, you’ll reunite the final Poogie, Boss Hog, with the others. Afterwards, the Prince and Thea have a touching moment with the person who witnessed everything before saying goodbye, happily finishing that side quest.
Gaul Side Stories
Chapter 1: ‘Gaul’s Unexpected Side’
Reward:
- Lifepowder Recipe.
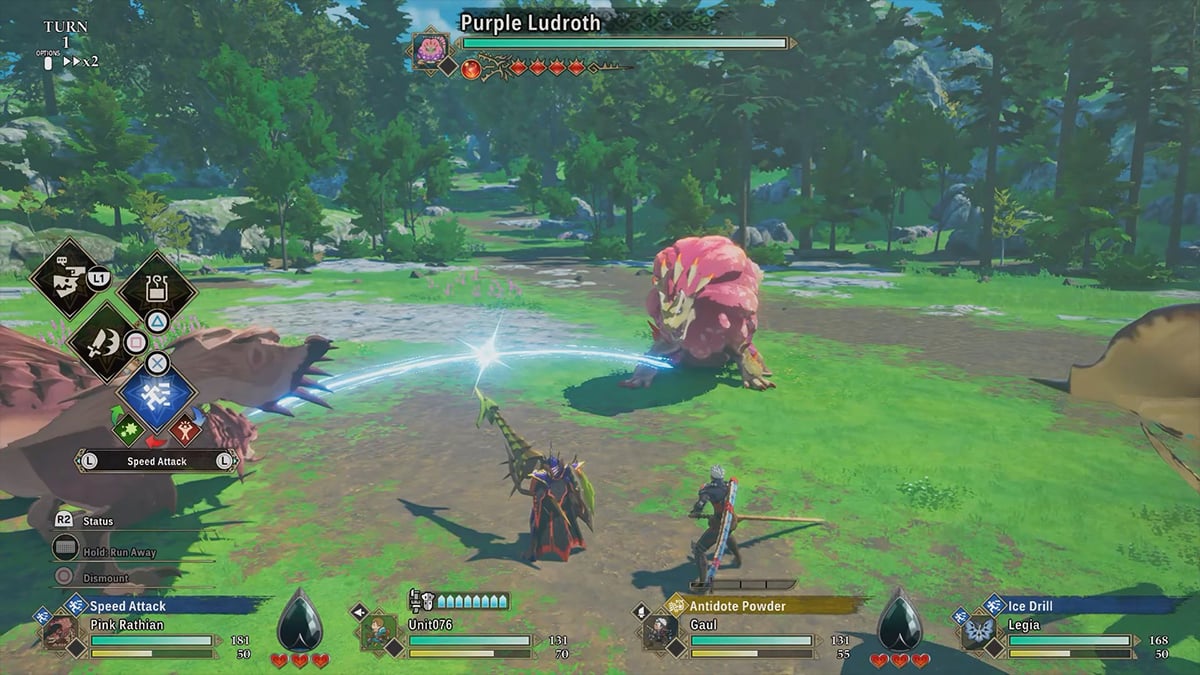
Throughout this storyline, you’ll find out that Gaul has been taking care of many tasks on his own. Since he’s the leader of the Rangers, it makes sense that the Prince would offer help once he learns about it.
Start by heading to Sunpetal Plains in Azuria and finding Lievin, an NPC who will give you a task. He’ll send you to Mirror Lake to defeat a Purple Ludroth. It shouldn’t be too difficult, but here’s a helpful guide just in case!
Purple Ludroth Status
| Normal | Enraged | |
|---|---|---|
| Move | Power (Water) | Technical (Water) |
| Weakness (Element) | Fire x2 Thunder x1 |
Same |
| Weakness (Ailment) | Burn x2 Blastblight x2 |
Same |
Chapter 2: ‘A Request from Kol’
Reward:
- Unlocks Ice Bow for Gaul.
- Legia learns ‘Tailwind,’ which increases Speed at 50% HP or less.
- Key to Combos, gives a chance of getting more items when combining.
We recently received a request from Master Kol in Sheparden, and during that encounter, we discovered something surprising about Gaul’s Palico, Murray.
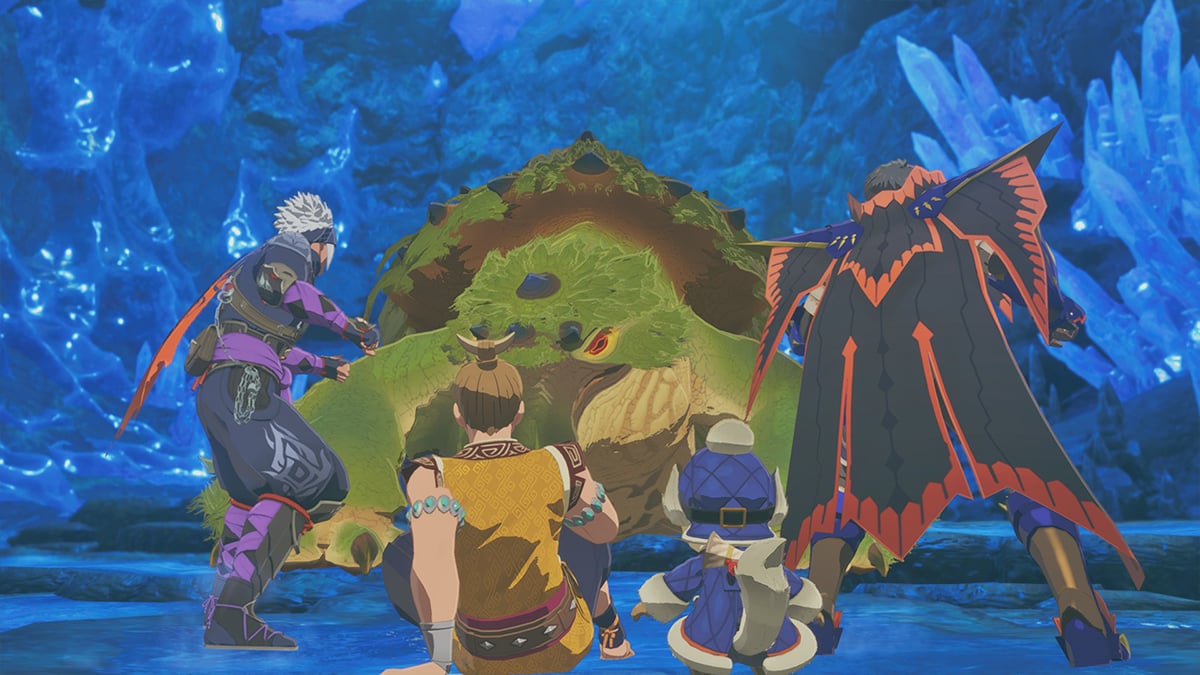
This Side Story quest is pretty straightforward: just head to the Frozen Grotto in Canalta Timberland and scare away a Tetranadon. Easy enough! As a reminder, here’s a look at the Tetranadon’s attack patterns and what it’s weak against:
Tetranadon Status
| Normal | Stuffed | |
|---|---|---|
| Move | Power (Water) | Technical (Water) |
| Weakness (Element) | Thunder x2 Fire x1 |
Same |
| Weakness (Ailment) | Darkness x2 | Same |
Chapter 3: ‘Rent Negotiations’
Rewards:
- Dust of Life Recipe.
- Max Potion Recipe.
- Ancient Potion Recipe.
- Gaul’s Spirithelm Breaker is upgraded to the AMP version
- Gaul’s Rapid Shot is upgraded to the AMP version.
Starting from the Rangers’ headquarters in Galyad, Tarkuan, head north to the Ministry of Eggs. Gaul arrived with a task to complete, but it soon became just another small job to take care of.
To get what you asked for, go to the mines in Bountiful Dunes. It’s a small cave, not a large dungeon, so you’ll get through it quickly. Be ready for a surprise attack by a Shrouded Nerscylla inside. The fight isn’t too difficult, but watch out for its powerful poison!
Shrouded Nerscylla Status
| Normal | Enraged | |
|---|---|---|
| Move | Technical | Speed |
| Weakness (Element) | Fire x2 Ice x1 |
Same |
| Weakness (Ailment) | Burn x2 | Same |
After the monster was defeated, and a short but convincing conversation with Gaul and his companions, the problem was finally resolved.
Chapter 4: ‘As a Friend’
Rewards:
- Unlocks Gaul’s second Monstie: Sereg the Normal-Dragon Seregios.
The final Side Story sends you on a journey across Tarkuan. Follow the on-screen marker to Bountiful Dunes mines and the Rococo Rocks Catavan Stand, and talk to Gaul’s contacts. This will ultimately lead you to Serathis in the Glacial Caps.
Once you’ve spoken with the last of Gaul’s companions, make your way to the final destination. There, you’ll battle a Honed Glavenus – you might recall facing this tough monster back in Azuria. However, you and your Monsties should be much more powerful now. To be safe, equip weapons that deal Water or Dragon damage, as they’re most effective against this stronger version of the Glavenus.
Honed Glavenus Status
| Normal | Overheated (Throat) | Overheated (Tail) | |
|---|---|---|---|
| Move | Speed (Fire) | Technical (Fire) | Power (Fire) |
| Weakness (Element) | Water x2 Dragon x2 |
Same | Same |
| Weakness (Ailment) | Sleep x2 | Same | Same |
Now that the monster is defeated, the story comes to an end with a short, touching scene between Gaul and the Prince.
Ogden Side Stories
Chapter 1: ‘Letter from an Unknown Sender’
Rewards:
- Shock Trap Recipe.
- Tranq Trap Recipe.
Ogden’s Side Stories begin with a collection of strange letters detailing encounters with bizarre creatures called Exotics. Intrigued by these reports and wanting to know if the monsters are real, the Prince and Ogden team up to investigate.
The letter describes a unique Velocidrome found in Azuria, close to the Sunpetal Plains Camp. This creature is much faster than a typical Velocidrome, moving incredibly quickly and seemingly without stopping. At first, its movements seem random, but careful observation reveals it consistently circles a blueberry tree—or possibly a Nullberry tree.
It took a lot of effort, but we discovered the simplest way to get what we were after: just stand under the tree and let it fall on us.
Even though this monster acts oddly when not fighting, battling it is similar to fighting a regular Velocidrome. The main challenge is its incredible speed, which makes it hard to land normal attacks. You’ll need to trick it into using its Double Attack to get your hits in.
Exotic Velocidrome Status
| Normal | Enraged | |
|---|---|---|
| Move | Speed (Normal) | Power (Normal) |
| Weakness (Element) | Ice x2 Fire x1 |
Same |
| Weakness (Ailment) | Poison x2 Blastblight x2 Bleeding x2 |
Same |
Chapter 2: ‘Ogden’s Theory’
Rewards:
- Unlocks Thunder Hammer for Ogden.
- Chirpy learns ‘Proliferating Poison,’ which extends Poison duration by 4 turns.
The second letter details a unique Seregios that only eats Arzuros. You can locate this monster in the southwest part of Canalta Timberland, a region known for both Arzuros and Honey.
To get there, follow the rising air currents near the river, and then use Ground Dive to gain more height.
Just having an Arzuros in your hunting party isn’t enough to lure out the rare Seregios. The catch is, if you swap the Arzuros out during a fight, the Seregios will become enraged and unleash a barrage of powerful scales that can quickly defeat your entire team with just two hits.
So, you’ll need to carefully prepare your Arzuros for this battle. We suggest leveling it up to around 25 or 26 and equipping it with Genes that specifically counter the weaknesses of the Seregios, as listed below.
Exotic Seregios Status
| Normal | Enraged | |
|---|---|---|
| Move | Speed (Normal) | Technical (Normal) |
| Weakness (Element) | Thunder x2 Ice x1 |
Same |
| Weakness (Ailment) | Poison x1 Sleep x1 Blastblight x1 Bleeding x1 Darkness x1 |
Same |
Chapter 3: ‘The Sender’s Identity’
Rewards:
- Pitfall Trap Recipe.
- Ogden’s Defensive Ditty is upgraded to the AMP version
- Ogden’s Meteor Hammer is upgraded to the AMP version.
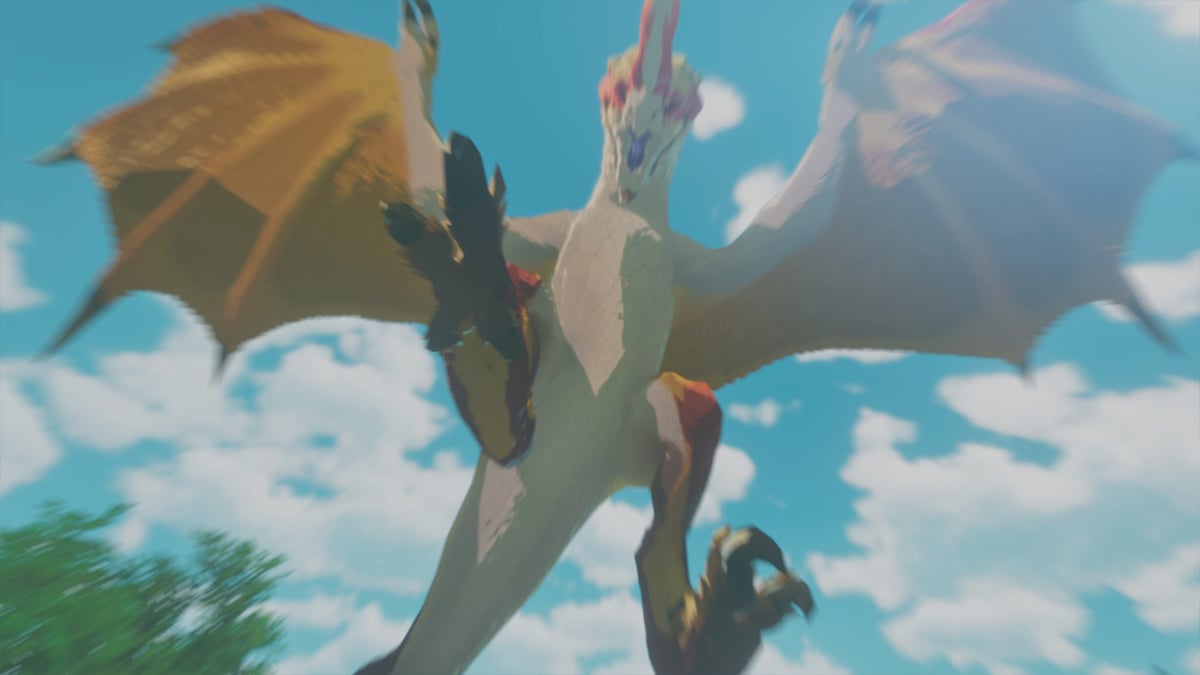
This letter details a unique Exotic Legiana that’s unlike others of its kind. Surprisingly, it seems to prefer hot weather instead of the cold. You can find it circling the crystallized pillars in the Rococo Rocks area of Tarkuan.
To start the battle, you need to bring the enemy down from the air. It flies around the tallest pillar in a circle, pausing at certain spots. Use your Monstie’s Breath attack, aiming a little bit in front of where it’s flying, to hit it and bring it down.
After forcing it to land, fighting Velkhana is much like fighting a regular Legiana, but the fight begins with Velkhana already in the air. You can bring it down to the ground by breaking its wings using Thunder-element piercing attacks.
Exotic Legiana Status
| Normal | Airborne | |
|---|---|---|
| Move | Speed (Ice) | Technical (Ice) |
| Weakness (Element) | Thunder x2 Fire x1 |
Same |
| Weakness (Ailment) | Burn x2 | Same |
Chapter 4: ‘The Truth Unfolds’
Reward:
- Unlocks Ogden’s second Monstie: Plessie the Water-Ice Plesioth.
After receiving the last letter, Ogden starts to figure out who has been sending them. However, before solving the mystery, he still needs to track down one more unusual creature: the Nibelsnarf.
Unlike the last Exotic hunt, this one takes place in the frozen Old Capital Road of Serathis, and it prefers to stay hidden underground. To make it appear, you’ll need to use a Monstie with the Roar ability.
The monster appears whenever you use Roar, but only from five places around the dirt area in the arena’s center. It won’t appear from snowy areas. Once you learn where it will emerge next, position yourself there and use Roar. The Exotic Nibelsnarf should then pop right up and land near you.
However, unlike other Exotics, Nibelsnarf has adjusted to the cold weather and now has a surprising new ability.
Exotic Nibelsnarf Status
| Normal | Camouflaged | |
|---|---|---|
| Move | Technical (Ice) | Technical (Ice) |
| Weakness (Element) | Fire x2 Thunder x1 |
Same |
| Weakness (Ailment) | Burn x2 | Sleep x1 Bleeding x1 Darkness x1 |
Once the Prince and Ogden overcame the last of the strange, powerful creatures, they came face-to-face with the person who had been sending the mysterious letters. But the truth about who sent them – and why – was a complete surprise to both of them.
Kora Side Stories
Kora’s side quests focus a lot on exploring dungeons. They can take a good amount of time – around 15 to 20 minutes each – so it’s best to do them when you have a free block of time.
To explore all areas of the dungeons, your Monsties will need to be able to do these things: attack up close, use Breath attacks, fly, swim, and climb walls.
Chapter 1: ‘A Rocky Past’
Rewards:
- Big Barrel Bomb Recipe.
- Sonic Bomb Recipe.
- Flash Bomb Recipe.
Kora is famous as a geologist, but she also loves exploring caves whenever she can, whether for her work or just because she’s curious. Inspired by her, the Prince decided to help with this endeavor, as in the case of Gaul.
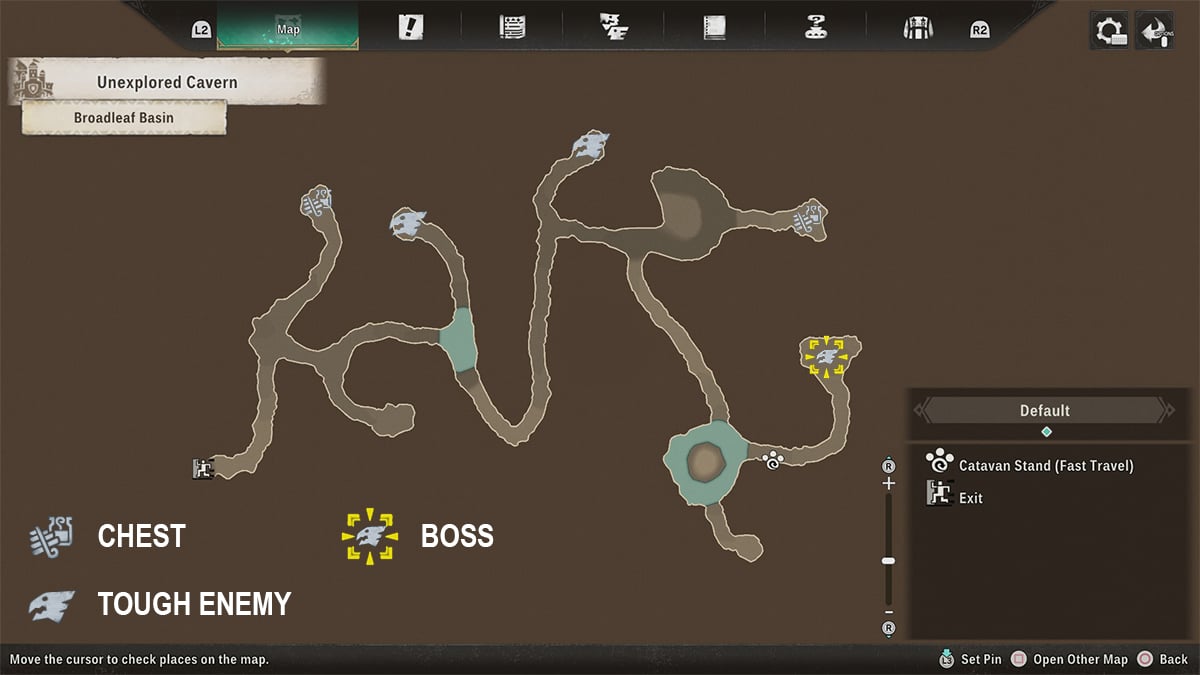
Your first adventure takes you to Unexplored Cavern. You can get there by following Kora from where the quest begins, or by quickly traveling to the Broadleaf Basin Catavan Stand – the cave entrance is close by.
You’ll mostly face easier monsters inside the cave, like Velocidrome, Yian Kut-Ku, Blue Yian Kut-Ku, Royal Ludroth, Plesioth, and Gypceros. But be prepared – the deeper you go, the tougher the enemies get, including Anjanath and Brachydios.
When you reach the end of the cave, you’ll battle the dungeon’s boss: a Purple Gypceros, along with two Bnahabra.
Purple Gypceros Status
Note: Bnahabra uses Technical attacks and is weak against Fire.
| Normal | Enraged | |
|---|---|---|
| Move | Power (Normal) | Technical (Normal) |
| Weakness (Element) | Thunder x2 Water x1 |
Same |
| Weakness (Ailment) | Burn x1 Sleep x1 Blastblight x1 |
Same |
Chapter 2: ‘Kora’s Gunlance’
Rewards:
- Unlocks Ice Long Sword for Kora.
- Gravy learns ‘Protective Shell,’ which temporarily reduces damage taken when inflicted with an abnormal status.
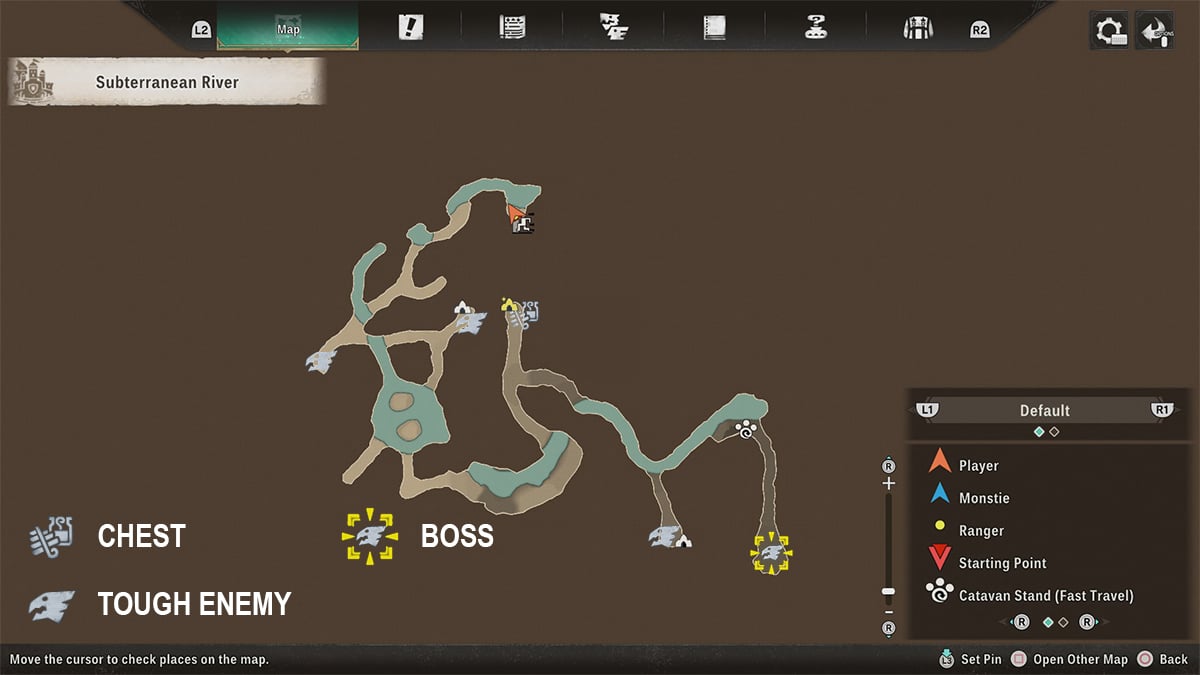
The Subterranean River cave is found in the Canalta Timberland, a little northeast of Blessing Hill Camp. You’ll encounter a variety of monsters there, both swimming and walking around, like Tetranadon, Purple Ludroth, Somnacanth, and the rarer Aurora Somnacanth.
As you progress, you’ll face tougher monsters like Seregios, Khezu, and Garangolm. Luckily, you’ll likely have a Canyne companion by then, helping you escape from them more easily.
The final boss of the dungeon is Red Khezu. Once you defeat it, Kora reveals her reasons for becoming a Gunlancer.
Red Khezu Status
| Normal | Electric Charge | |
|---|---|---|
| Move | Technical (Thunder) | Power (Thunder) |
| Weakness (Element) | Water x2 | Same |
| Weakness (Ailment) | Poison x1 Burn x1 Blastblight x1 |
Same |
Chapter 3: ‘Cave Kids’
Rewards:
- Azure Armor Recipe.
- Mega Barrel Bomb Recipe.
- Kora’s Wyvern’s Blaze is upgraded to the AMP version.
- Ogden’s Sakura Spiritblade is upgraded to the AMP version.
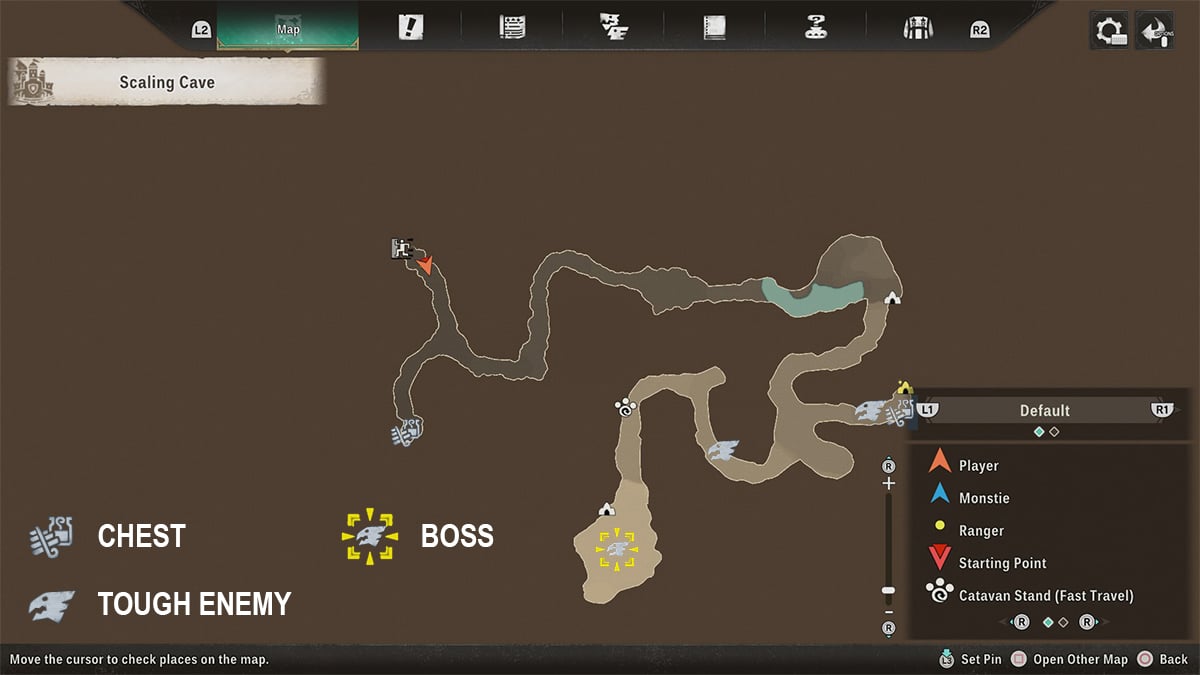
We’re going to the Scaling Cave in Rococo Rocks on Tarkuan for an important task. You can find the entrance by jumping down from the Catavan Stand towards the north.
You’ll encounter monsters like Barroth, Rachnoids, and Ceanataurs frequently. Further in, you’ll face tougher opponents such as Glavenus, and you might even find a sleeping Ajarakan. However, you don’t have to fight the Ajarakan – you can avoid it by destroying the nearby rock or simply flying over it.
Okay, so this fight is seriously challenging! You’re up against a Black Gravios and two Ceanataurs at once. Honestly, you need a powerful Water-type Monstie to have a good chance, because both the Gravios and the Ceanataurs mostly attack with Fire. If you don’t bring one, you’re going to have a really rough time!
Black Gravios Status
Note: Ceanataur uses Power (Water) attacks and is weak against Thunder.
| Normal | Enraged | |
|---|---|---|
| Move | Power (Fire) | Technical (Fire) |
| Weakness (Element) | Water x2 Dragon x1 |
Same |
| Weakness (Ailment) | Blastblight x2 Darkness x2 |
Same |
Chapter 4: ‘A Sense of Belonging’
Reward:
- Unlocks Kora’s second Monstie: Golma the Normal-Water Garangolm.
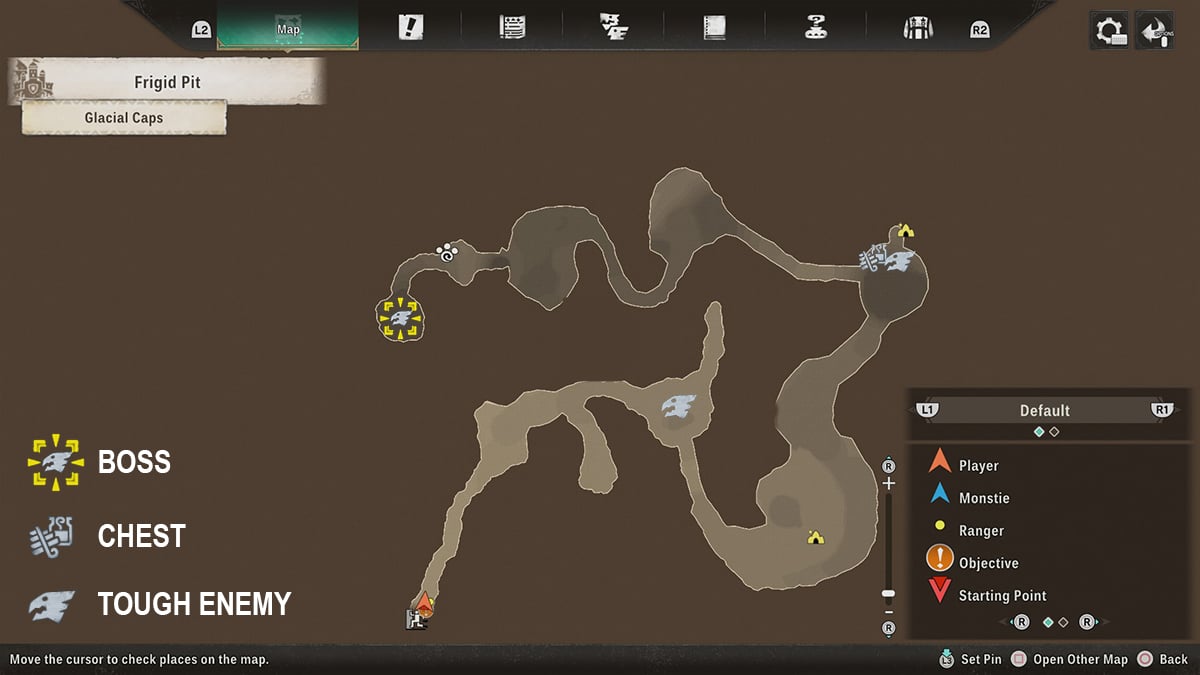
The last dungeon, Frigid Pit, can be found in the Glacial Caps region of Serathis. Something terrible has occurred there, prompting Kora to immediately investigate. To reach it from the Glacial Caps Caravan Stand, head northeast, carefully jumping across the ice and rocks.
The map features monsters like Bnahabra, Ebony Odogaron, and Lunagaron. Be careful though, a powerful Deviljho roams the center. It’s best to quickly ride a fast Monstie, such as a Canyne, and steer clear of it, especially when you’re first exploring.
Destroy the rock in the middle of the area to open a hole, then drop down inside to proceed further into the dungeon. As you go deeper, you’ll eventually find a large chamber with a powerful updraft. Continue down until you see a sleeping Fulgur Anjanath, a chest, and a Rare Monster Den located behind it.
To continue, use the rising air current to get about halfway up, then search for a crack or opening in the wall that leads further down below.
You’ll find the boss, Diablos, at the dungeon’s end. It doesn’t use elemental attacks, but its physical attacks are incredibly powerful. Be sure to bring Sonic Bombs – you’ll need them to flush Diablos out when it hides underground.
Diablos Status
| Normal | Enraged | Burrowed | |
|---|---|---|---|
| Move | Power (Normal) | Speed (Normal) | Speed (Normal) |
| Weakness (Element) | Ice x2 Water x1 |
Same | Same |
| Weakness (Ailment) | Darkness x2 | Same | Same |
Okay, so after finally taking down Diablos and dealing with everything in the Frigid Pit, Kora finally started sharing her story and what’s been weighing on her mind. It was a really touching ending to the adventure, but honestly? It ended with this feeling that someone’s gonna be in serious trouble down the line. It left me a little worried, to be honest!
Eleanor Side Stories
Chapter 1: ‘The Proof is in the Dumpling’
Reward:
- Eleanor’s Cooking Note 1: Vermelian Dumplings.
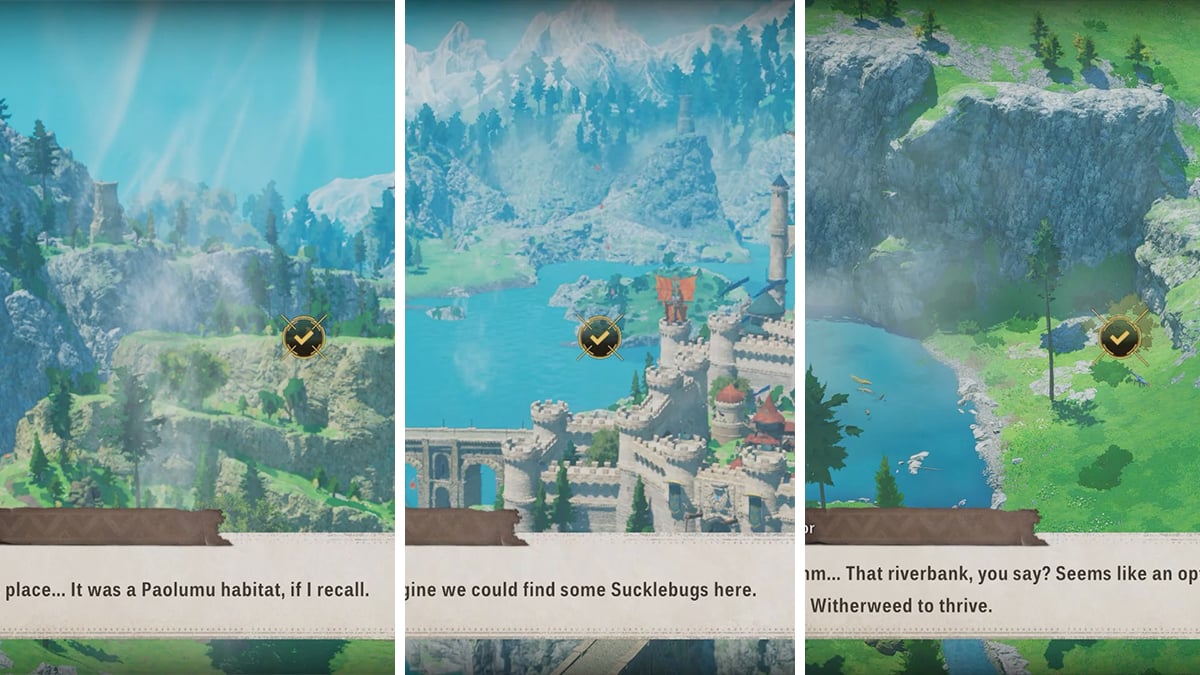
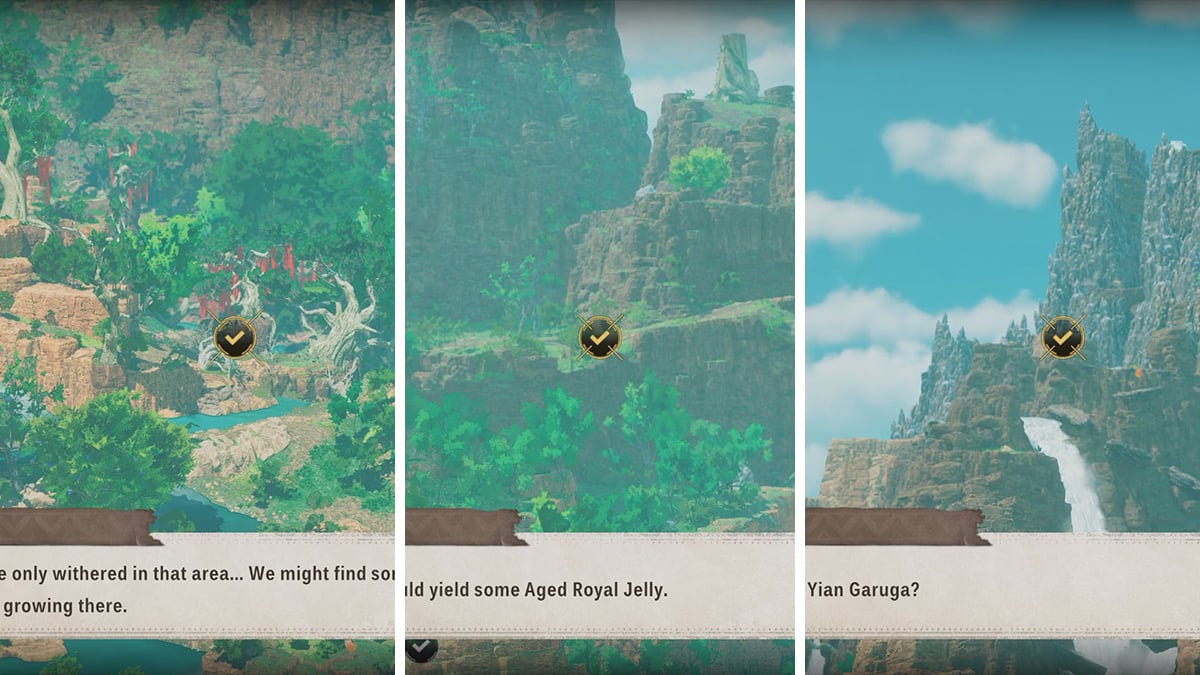
Eleanor is planning a new dish for the Rangers’ Mess and needs some rare ingredients from all over Azuria: Sucklebugs, Witherweed, and Molted Gumshell. These aren’t the typical items you’d find for crafting, so it’s not surprising if you haven’t heard of them before.
Your journey starts at a Lookout Point. Before you can move forward, you’ll need to use the telescope to find some important clues.
- Sucklebugs: Check the small island in Mirror Lake.
- Molted Gumshell: The hint can be found on the hill behind the windmills to your left. It drops from a Breathe attack on a roaming Paolumu in the overworld.
- Witherweed: Found along a riverbank not far from Paolumu’s habitat.
Okay, so once I find all the clues, the game automatically shows me exactly where to go to get the ingredients! Then it’s just a matter of heading to those spots and collecting everything I need to finish the Side Story. Pretty cool, right?
Chapter 2: ‘The Feast Can Wait’
Rewards:
- Eleanor’s Cooking Note 2: Bouillon Waterfall.
- Unlocks Water Hammer for Eleanor.
- Angie learns ‘Fiery Spirit,’ which temporarily increases fire damage when an enemy transforms.
To make her next dish, Eleanor requires a Garuga Stomach, Aged Royal Jelly from an Arzuros, and a Mellowcap mushroom. Remember to use the Lookout Point telescope to find clues about where to gather these ingredients.
- Aged Royal Jelly: The clue is near the large tree close to the Lookout Point. Blast a roaming Arzuros with a Breathe attack for it to drop.
- Garuga Stomach: Yian Garuga’s habitat can be found at Mt. Canalta; look up until you see a towering rocky hill.
- Mellowcaps: keep going to the right until you see a withered, pale tree with red leaves for the mushrooms.
Yian Garuga can be challenging, so it’s a good idea to prepare by crafting fire-resistant armor, such as the Aknosom Armor, before facing it.
Yian Garuga Status
| Normal | Enraged | |
|---|---|---|
| Move | Technical (Fire) | Power (Fire) |
| Weakness (Element) | Water x2 Ice x2 |
Same |
| Weakness (Ailment) | Blastblight x2 | Same |
Chapter 3: ‘Bitter Food, Bitter Memories’

Rewards:
- Eleanor’s Cooking Note 3: Convalesomme.
- Eleanor’s Strong Charged Slash is upgraded to the AMP version
- Eleanor’s Perfect Crush is upgraded to the AMP version.
Her third recipe asks for Ajarakan Gallbladder, Hoary Bone, and Poignant Piquant.
Hoary Bone’s location is right across the oasis from Lookout Point. Continue to the right, and you’ll find a sandship with a Spice Peddler selling Poignant Piquant. To the left of Lookout Point, you can also spot an Ajarakan wandering around the mines.
You can easily find Hoary Bone and Poignant Piquant in each area, but getting the final ingredient will require some effort and might get you a little dirty. Make sure Eleanor has her Water Hammer equipped, and bring a strong Water Monstie with good gear to Ajarakan.
Ajarakan Status
| Normal | Enraged | |
|---|---|---|
| Move | Technical (Fire) | Power (Fire) |
| Weakness (Element) | Water x2 Thunder x1 |
Same |
| Weakness (Ailment) | Poison x2 Darkness x2 |
Same |
Chapter 4: ‘Rangers’ Reminiscence’
Rewards:
- Eleanor’s Cooking Note 4: Rangers’ Reminiscence.
- Unlocks Eleanor’s second Monstie: Dee the Fire-Thunder Glavenus.
For the final feast, make sure you’re wearing your strongest armor. The ingredients are all from formidable monsters: Magnamalo Chuck Roast, Feral Aknosom Thigh Meat, and Almudron Tenderloin.
Good news, fellow gamers! You don’t have to spend ages squinting through that telescope trying to figure out enemy attack patterns anymore. I’ve put together a list of all their attack types and weaknesses right here, so we can all be better prepared for the fights ahead!
| Magnamalo | Feral Aknosom | Almudron | |
|---|---|---|---|
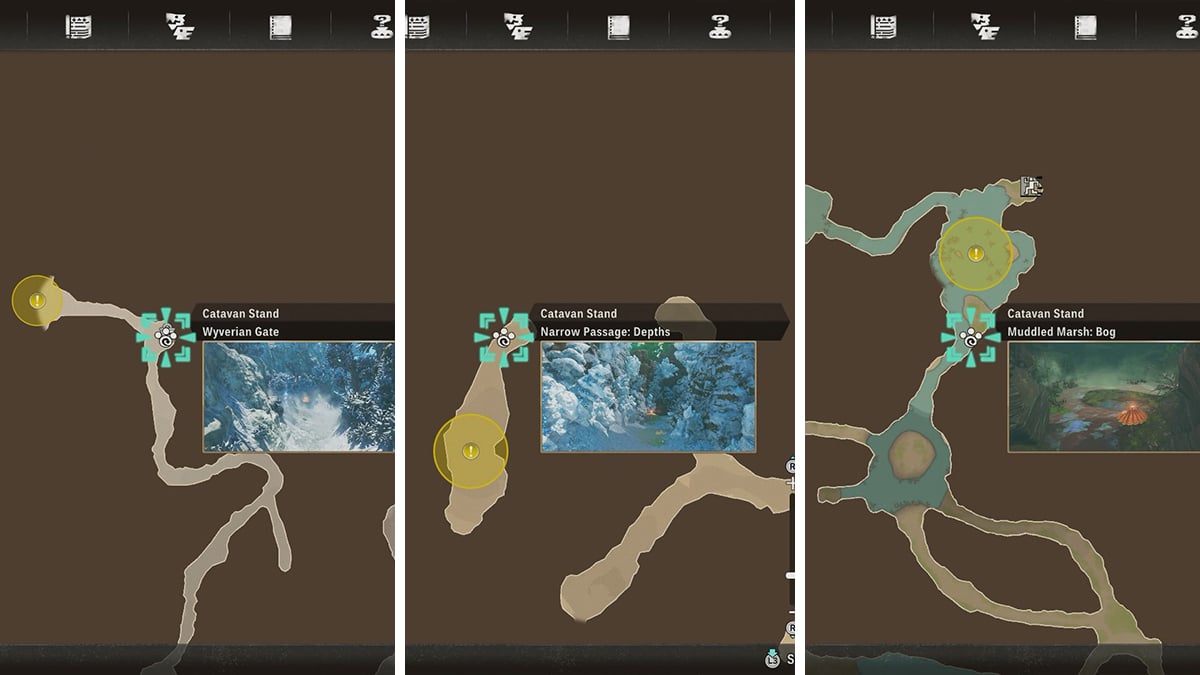
| Location | Ashen Pass, Azuria | Narrow Passage, Canalta | Muddled Marsh, Tarkuan |
| Move (Normal) | Speed (Normal) |
Technical (Ice) |
Power (Water) |
| Move (State 1) | Hellfire Blight Mantle: Power (Normal) |
Enraged: Power (Ice) |
Enraged: Technical (Water) |
| Move (State 2) | Hellfire Blight Critical: Technical (Normal) |
– | Large Mudbulb: Speed (Water) |
| Weakness (Element) | Water x2 Thunder x1 – Hellfire Blight: Thunder x2 Water x1 |
Thunder x2 Water x1 |
Fire x2 Ice x1 |
| Weakness (Status) | Darkness x2 | Paralysis x2 Darkness x2 |
Burn x2 |
That covers all the Side Stories currently available in Monster Hunter Stories 3: Twisted Reflection. Capcom plans to add more Stories after release, and we’ll update this article when they do.
Read More
- 20 Movies Where the Black Villain Was Secretly the Most Popular Character
- Celebs Who Narrowly Escaped The 9/11 Attacks
- Transformers Under the Microscope: What Graph Neural Networks Reveal
- Top 20 Dinosaur Movies, Ranked
- Trading on Thin Air: AI Agents Conquer Crypto Volatility
- Silver Rate Forecast
- Gold Rate Forecast
- Every Notable ‘Star Trek: The Original Series’ Actor Who Died
- 22 Films Where the White Protagonist Is Canonically the Sidekick to a Black Lead
- Invincible Season 4 Gender Swaps Tech Jacket As Fans Question Major Comic Change
2026-03-13 07:47