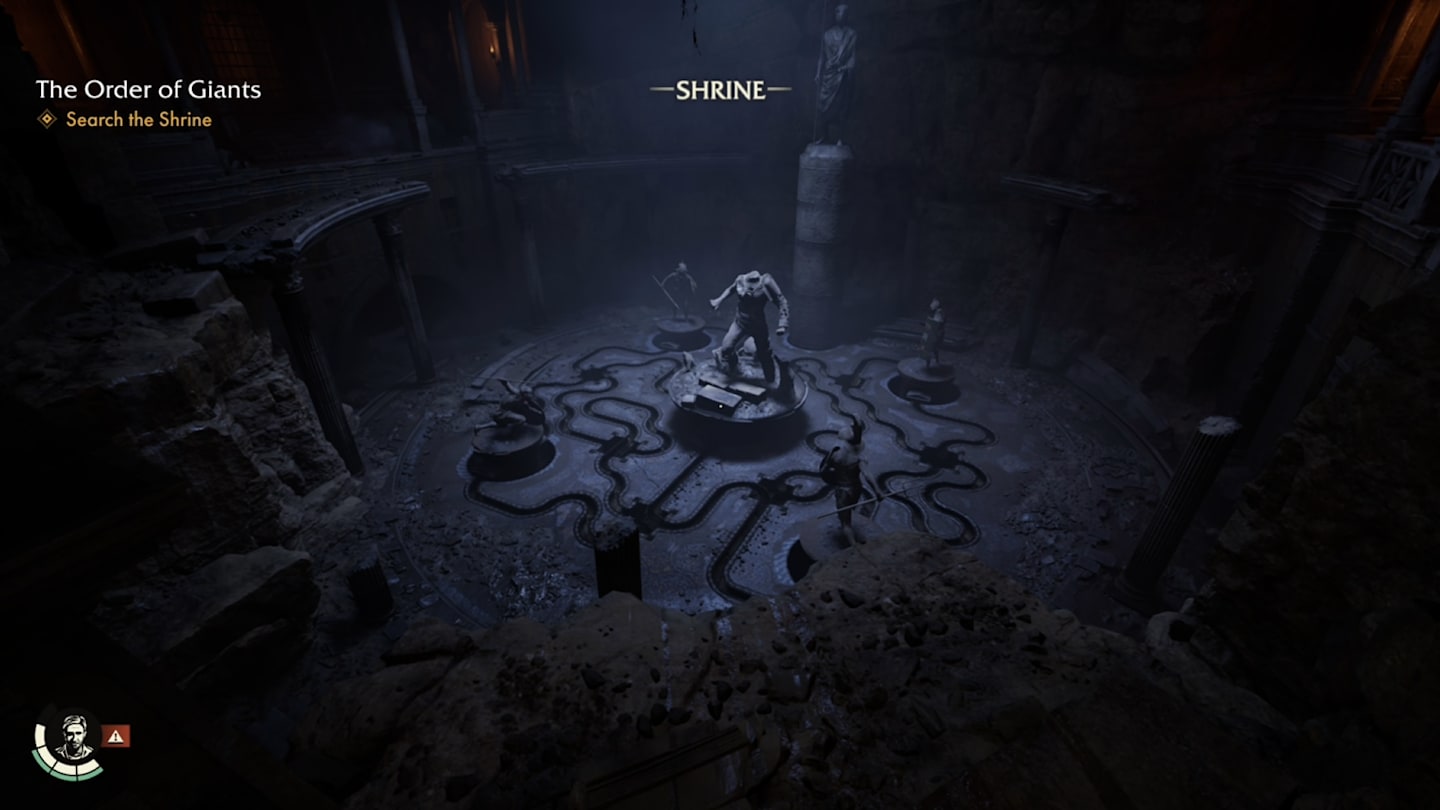
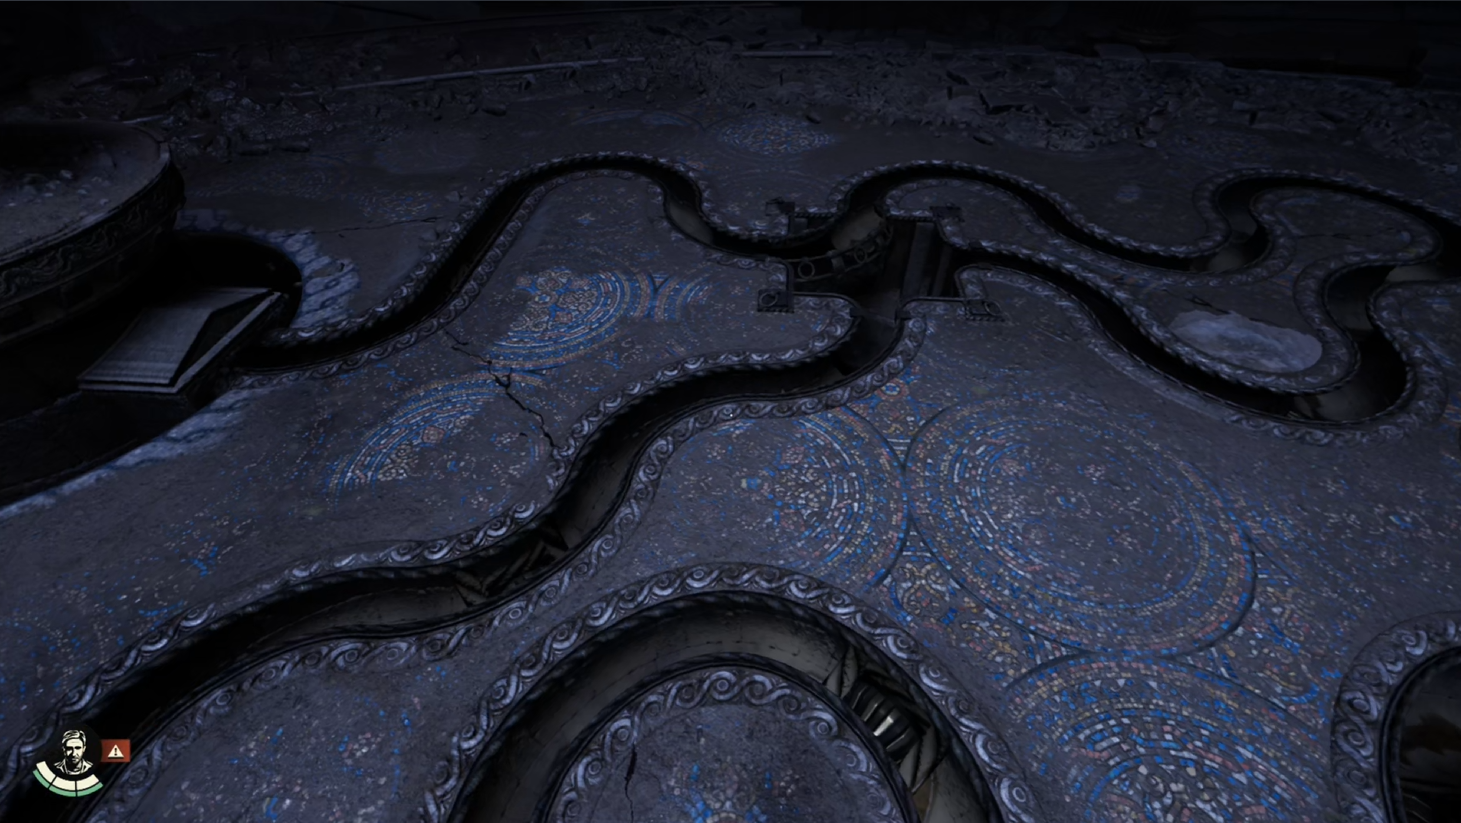
The new DLC for Indiana Jones titled “The Great Circle Order of Giants” offers an array of engaging and intriguing puzzles similar to those found in the original game. One of the most exemplary examples is the puzzle within the Cloaca Maxima Shrine, which could easily be compared to a challenge from The Crystal Maze. Here, you’ll navigate a ball through a labyrinth, ensuring it avoids falling into traps and reaching four specific locations.
We’ll break down how this puzzle works and give you a step-by-step guide to the solution.
How the Shrine ball maze puzzle works – IJGC DLC
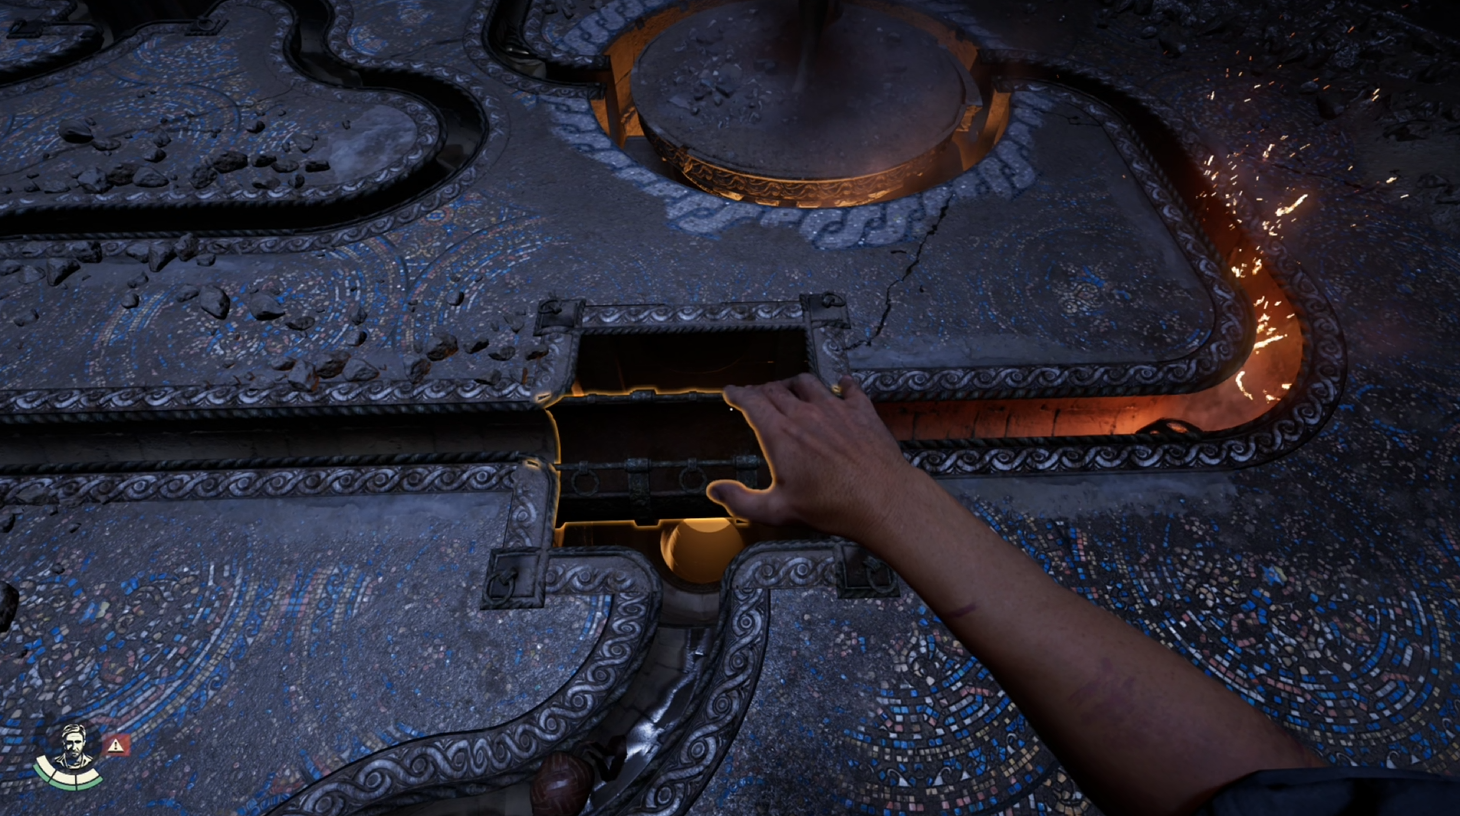
To begin, first locate the broken piece of the sword on the wall to your right upon entering the shrine. Insert this piece into the base of the central statute’s hilt. By using your whip to activate the lever, you can then free the ball that follows.
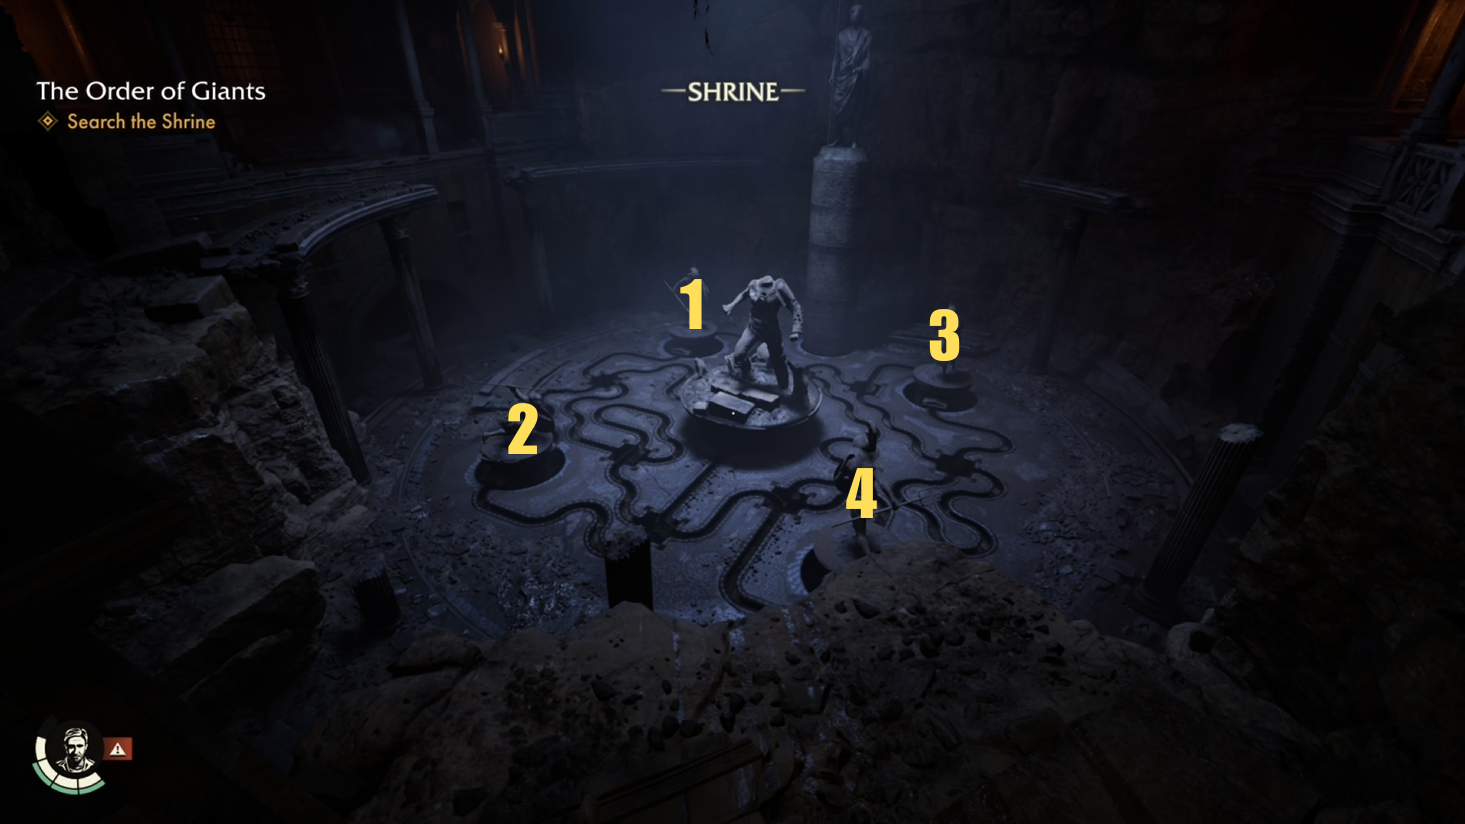
The aim is to pass the ball through the statues sequentially, as indicated by the numbers beneath their images on the wall sides. You can determine the correct order by scaling those walls. For convenience, we’ve provided a screenshot depicting the order, but you should refer to it during the game.
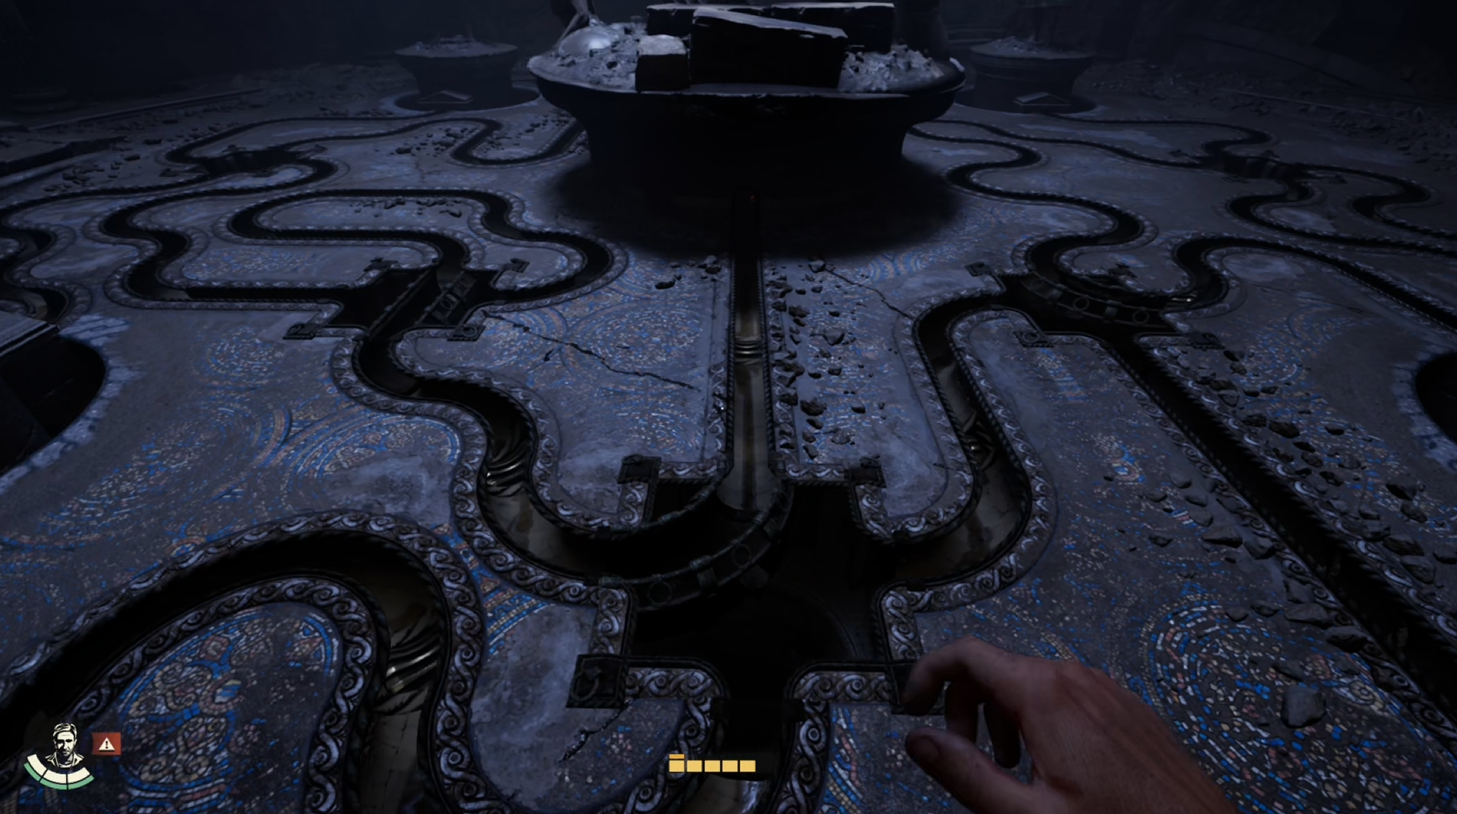
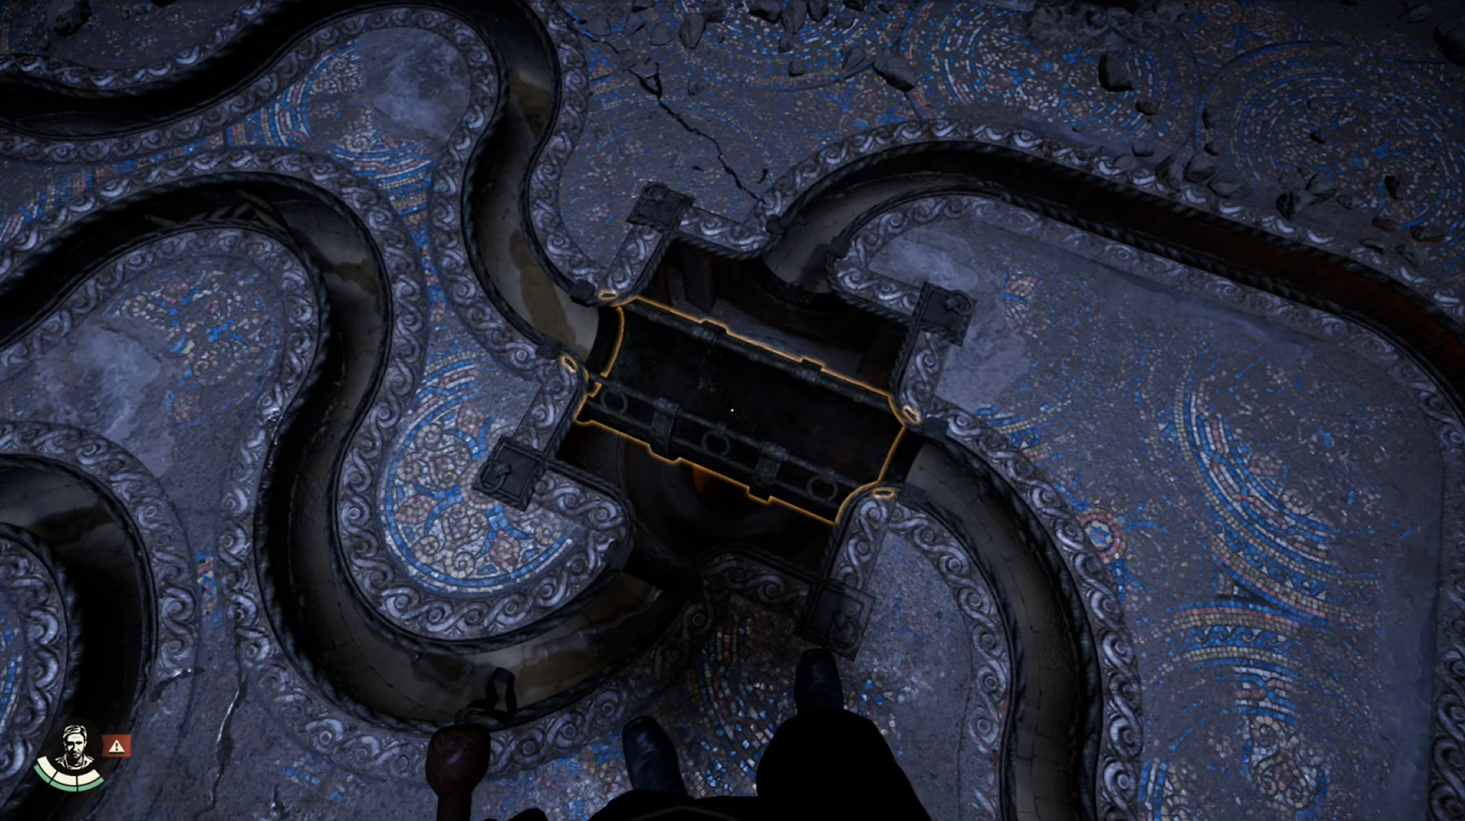
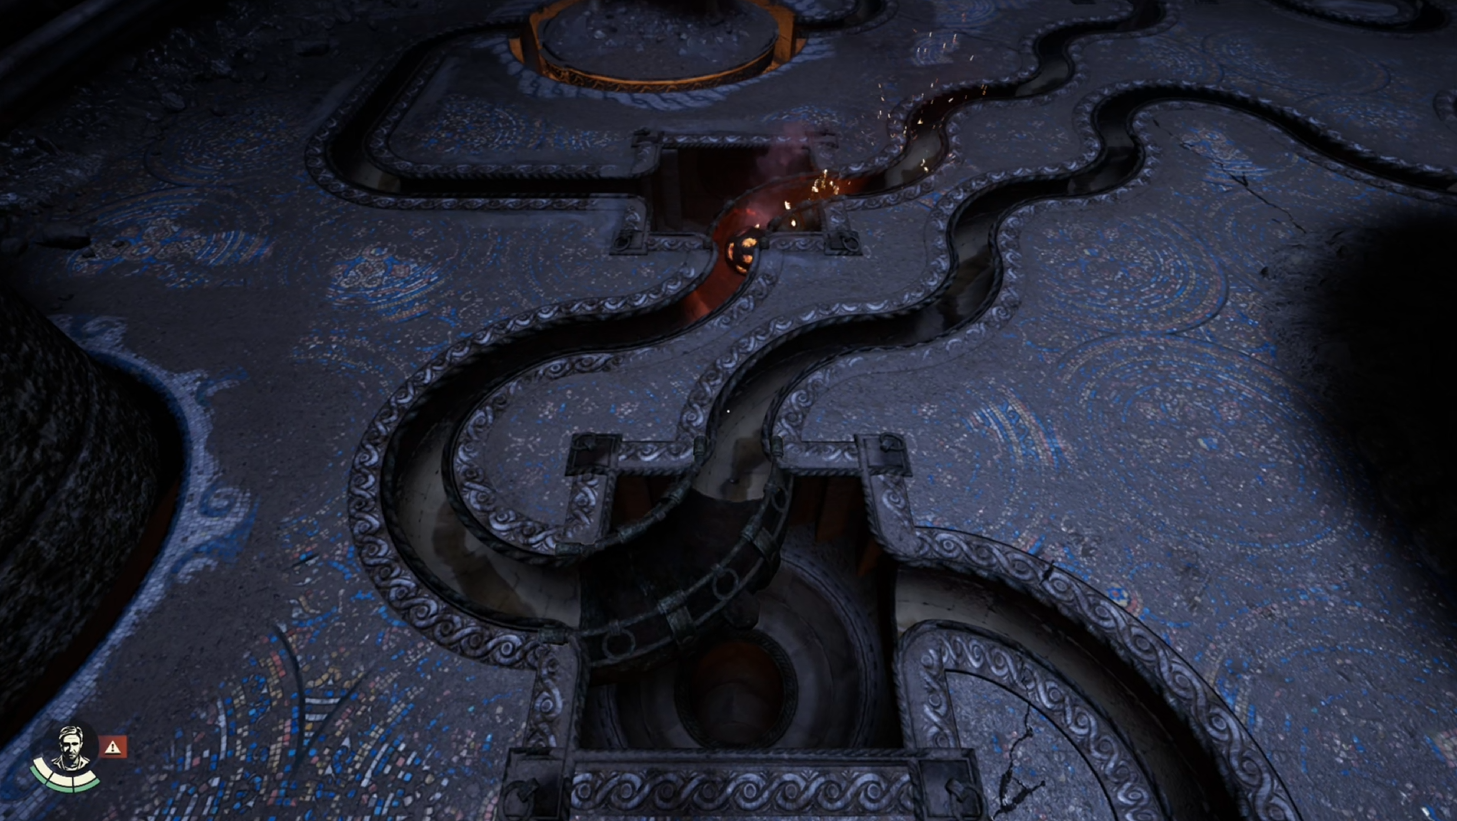
As soon as the ball begins its journey, you’ll have to adjust the small channels or chutes to fill the spaces and guide the ball towards your desired destination. Let’s walk through the steps for doing this effectively.
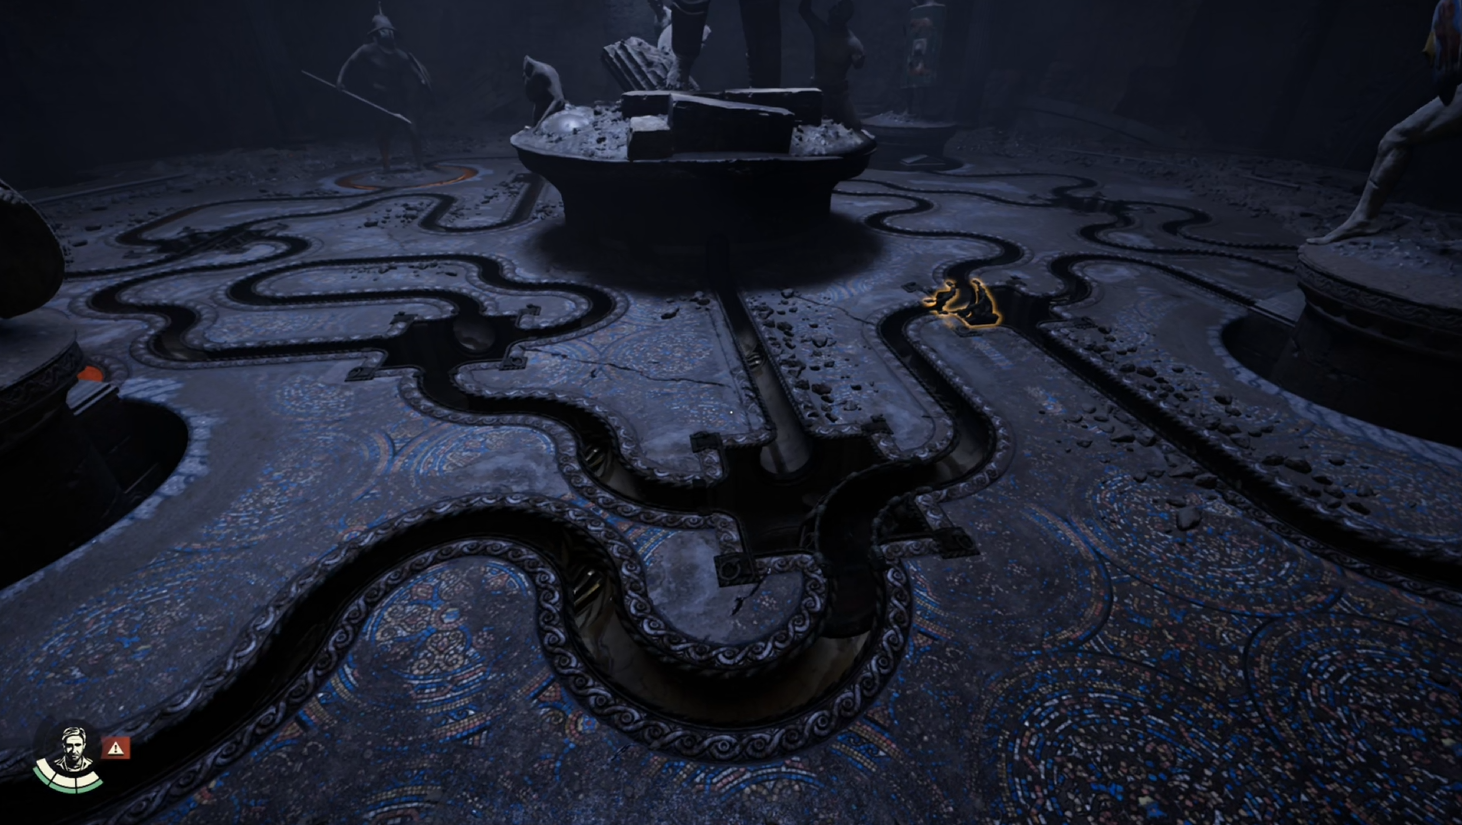
Guiding the ball to the statues – IJGC DLC
In this gaming walkthrough, let’s consider the towering wall with the large pillar next to it, which greets us upon entering, as our reference point or “peak” in the room for simplicity’s sake.
As a gamer, I’d say: “Leave the winding path to my left, while the vertical track heads skyward. Once the ball passes the vertical track, let’s twist it 90 degrees and slide it right back into the same opening.
After the ball crosses over the straight trench for a second time, I’d suggest lifting it and positioning it on the following pit, ensuring it’s in the same direction. This maneuver should guide the ball towards the first statue.
After it clears the gutter, grab it and orientate it so it’s pointing downward, as the ball emerges from the rear of the first statue.
This paraphrase aims to maintain the original meaning while using simpler words and a more conversational tone for easy understanding.
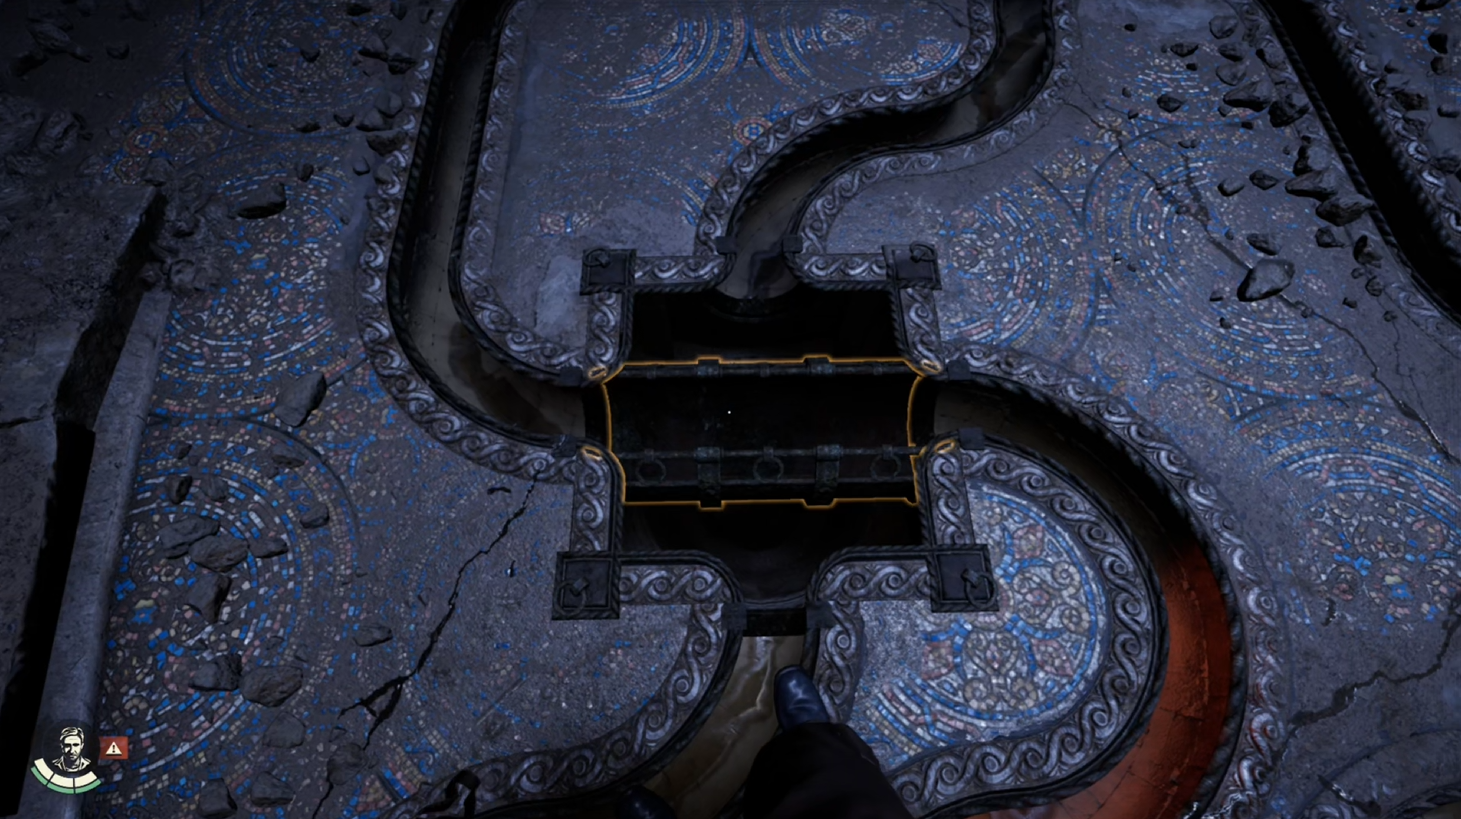
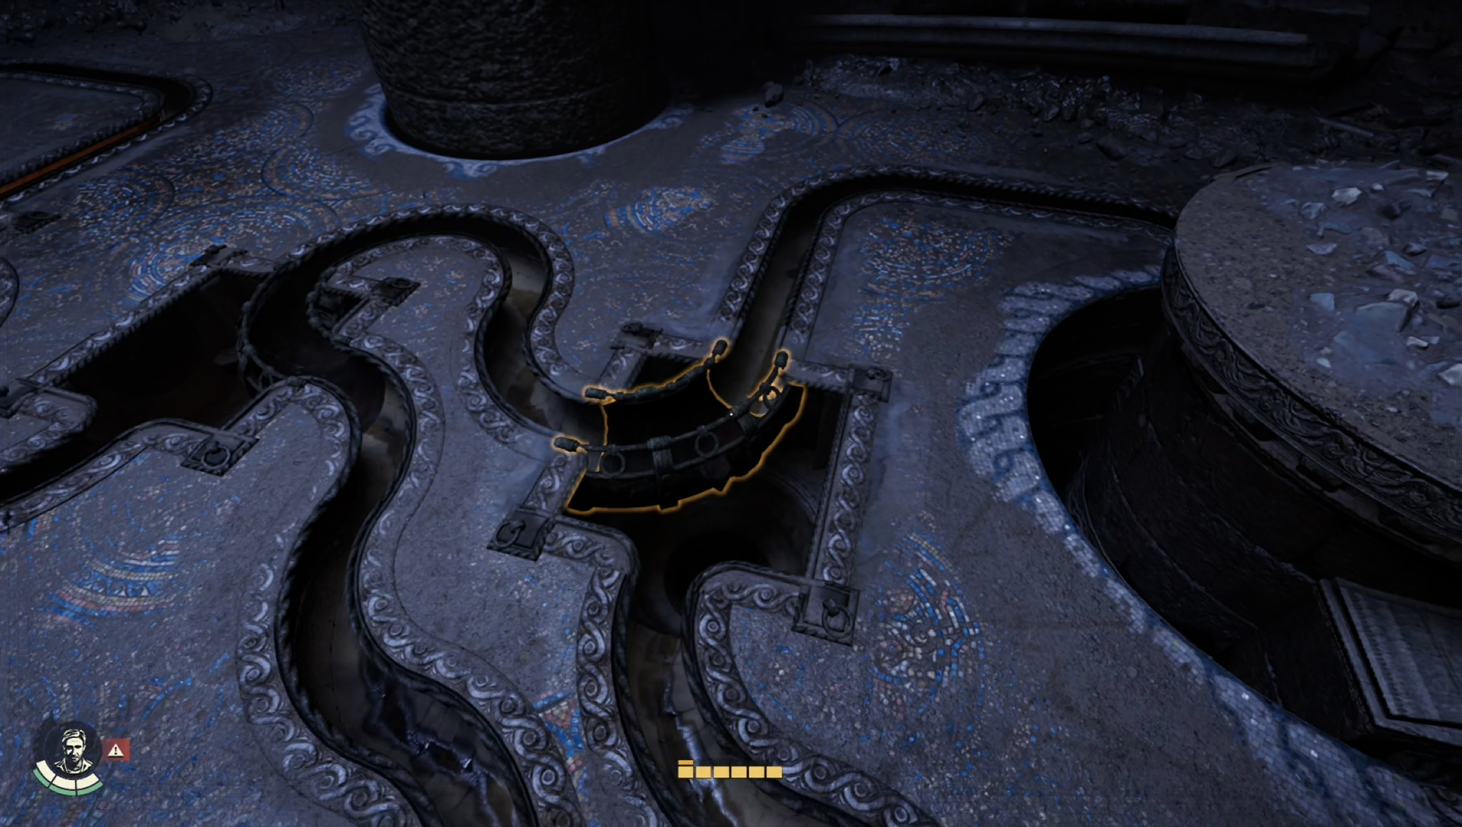
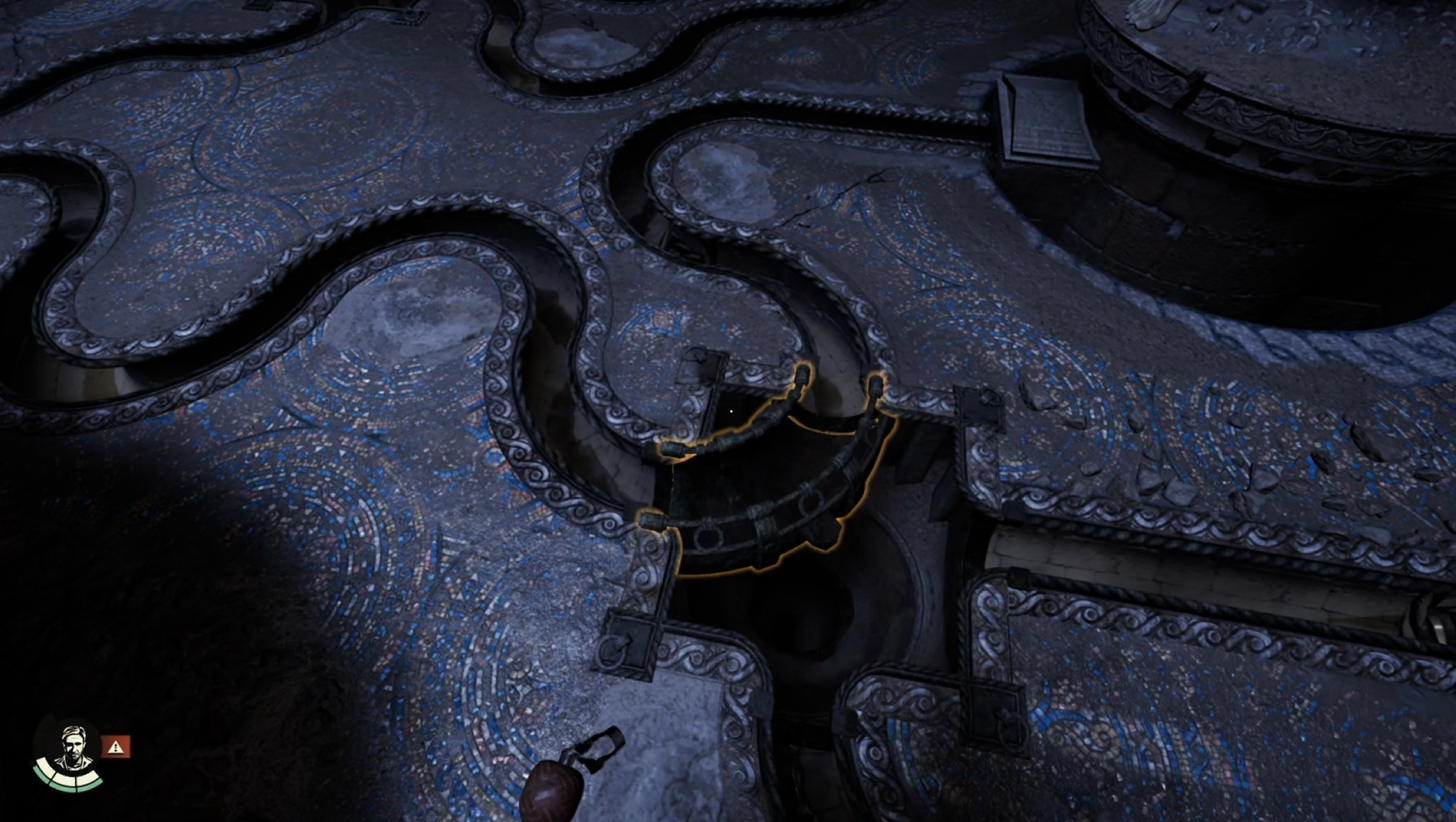
As the object reaches the drain, grab the adjacent straight drainpipe for the final time (since you won’t require it afterward), then position it above the following descent hole. This action ensures that the ball will directly land on the second statue, offering you a moment to prepare the upcoming setup.
Here’s a more conversational way to explain the steps:
“First, head to the curved trough you initially set up at the start of the puzzle. Give it a 180-degree turn so it now links the bottom and right channels that originate from the backside of the second statue. Next, pick up the second curved trough and position it over the next pit, allowing it to take in from the left side and releasing the ball through the top.
Here’s a simpler way to explain the steps:
1. Move swiftly because there’s little time between moves. After the ball clears the first curved gutter, pick it up and place it in the next pit that curves from right to top.
2. Go back, wait for the ball to pass the second gutter, then grab it and place it in the pit adjacent to the first one, this time curving from left to top.
3. By following these steps, you’ll get the ball to the third statue.
As a fan putting together this puzzle, here’s what I’d suggest next: Pick up the initial curved gutter and set it over the pit emerging from the third statue, aligning the upper channel with its right side. Then, give the second curved gutter a 90-degree twist, so it now takes in from the bottom and discharges towards the left.
After the ball emerges from the third statue and moves beyond the initial arched trough, spin the ball so it sucks in from below and expels to the left. The ball will traverse a small loop before returning. Upon crossing again, shift that first gutter back to its original position two steps away, next to the other curved trough. Arrange the gutter horizontally, pointing upwards into the left channel.
As a gamer, I’d say: Alright, let’s tackle that tricky part first. You need to grab one of those curved channels and position it over the next pit on the track, making sure it extends from the top channel towards the left side. This maneuver will send the ball to the fourth statue, solving the puzzle. Once done, the pillar at the room’s peak will lower, giving you a chance to snag the Cylinder Piece.
Read More
- Gold Rate Forecast
- Games That Faced Bans in Countries Over Political Themes
- Silver Rate Forecast
- 15 Films That Were Shot Entirely on Phones
- Unveiling the Schwab U.S. Dividend Equity ETF: A Portent of Financial Growth
- 22 Films Where the White Protagonist Is Canonically the Sidekick to a Black Lead
- 20 Movies Where the Black Villain Was Secretly the Most Popular Character
- The Best Directors of 2025
- Brent Oil Forecast
- Superman Flops Financially: $350M Budget, Still No Profit (Scoop Confirmed)
2025-09-11 18:49