Quick Links
- How To Prepare For Lala Barina
-
Lala Barina’s Weaknesses
-
How To Beat The Lala Barina
-
Rewards For Defeating The Lala Barina
In the heart of the gameplay of Monster Hunter Wilds, you’ll encounter a fresh monster introduced in the trailers, known as Lala Barina.
No Thanks, Keep Reading
One of the novel monster types in this game is the Temnoceran Lala Barina, which boasts a spider-like shape and possesses the ability to disguise itself as a large blooming flower, hiding a lethal secret within.
In case you find Lala Barina challenging in Monster Hunter Wilds, here’s a comprehensive guide detailing its vulnerabilities and strategies to conquer it, ensuring an easy pathway to its spoils.
For illustrative purposes, I’m engaging the advanced version of Lala Barina in Intermediate territory. However, the preparation process and combat approach should generally stay consistent across ranks.
How To Prepare For Lala Barina
For the key prep, take a full meal to strengthen your defense and give your character extra buffs.
Different from the Rompopolo, who requires antidotes due to its monstrous nature, the Lala Barina induces paralyzing attacks. Unfortunately, there’s no way to stop these attacks before they occur.
The attacks that temporarily incapacitate you originate from its bloom-like assault, which I’ll discuss in more detail later in the guide. These attacks can make you unconscious for a short while, and if your Palico doesn’t revive you, Lala Barina might follow up with another attack to significantly reduce your health.
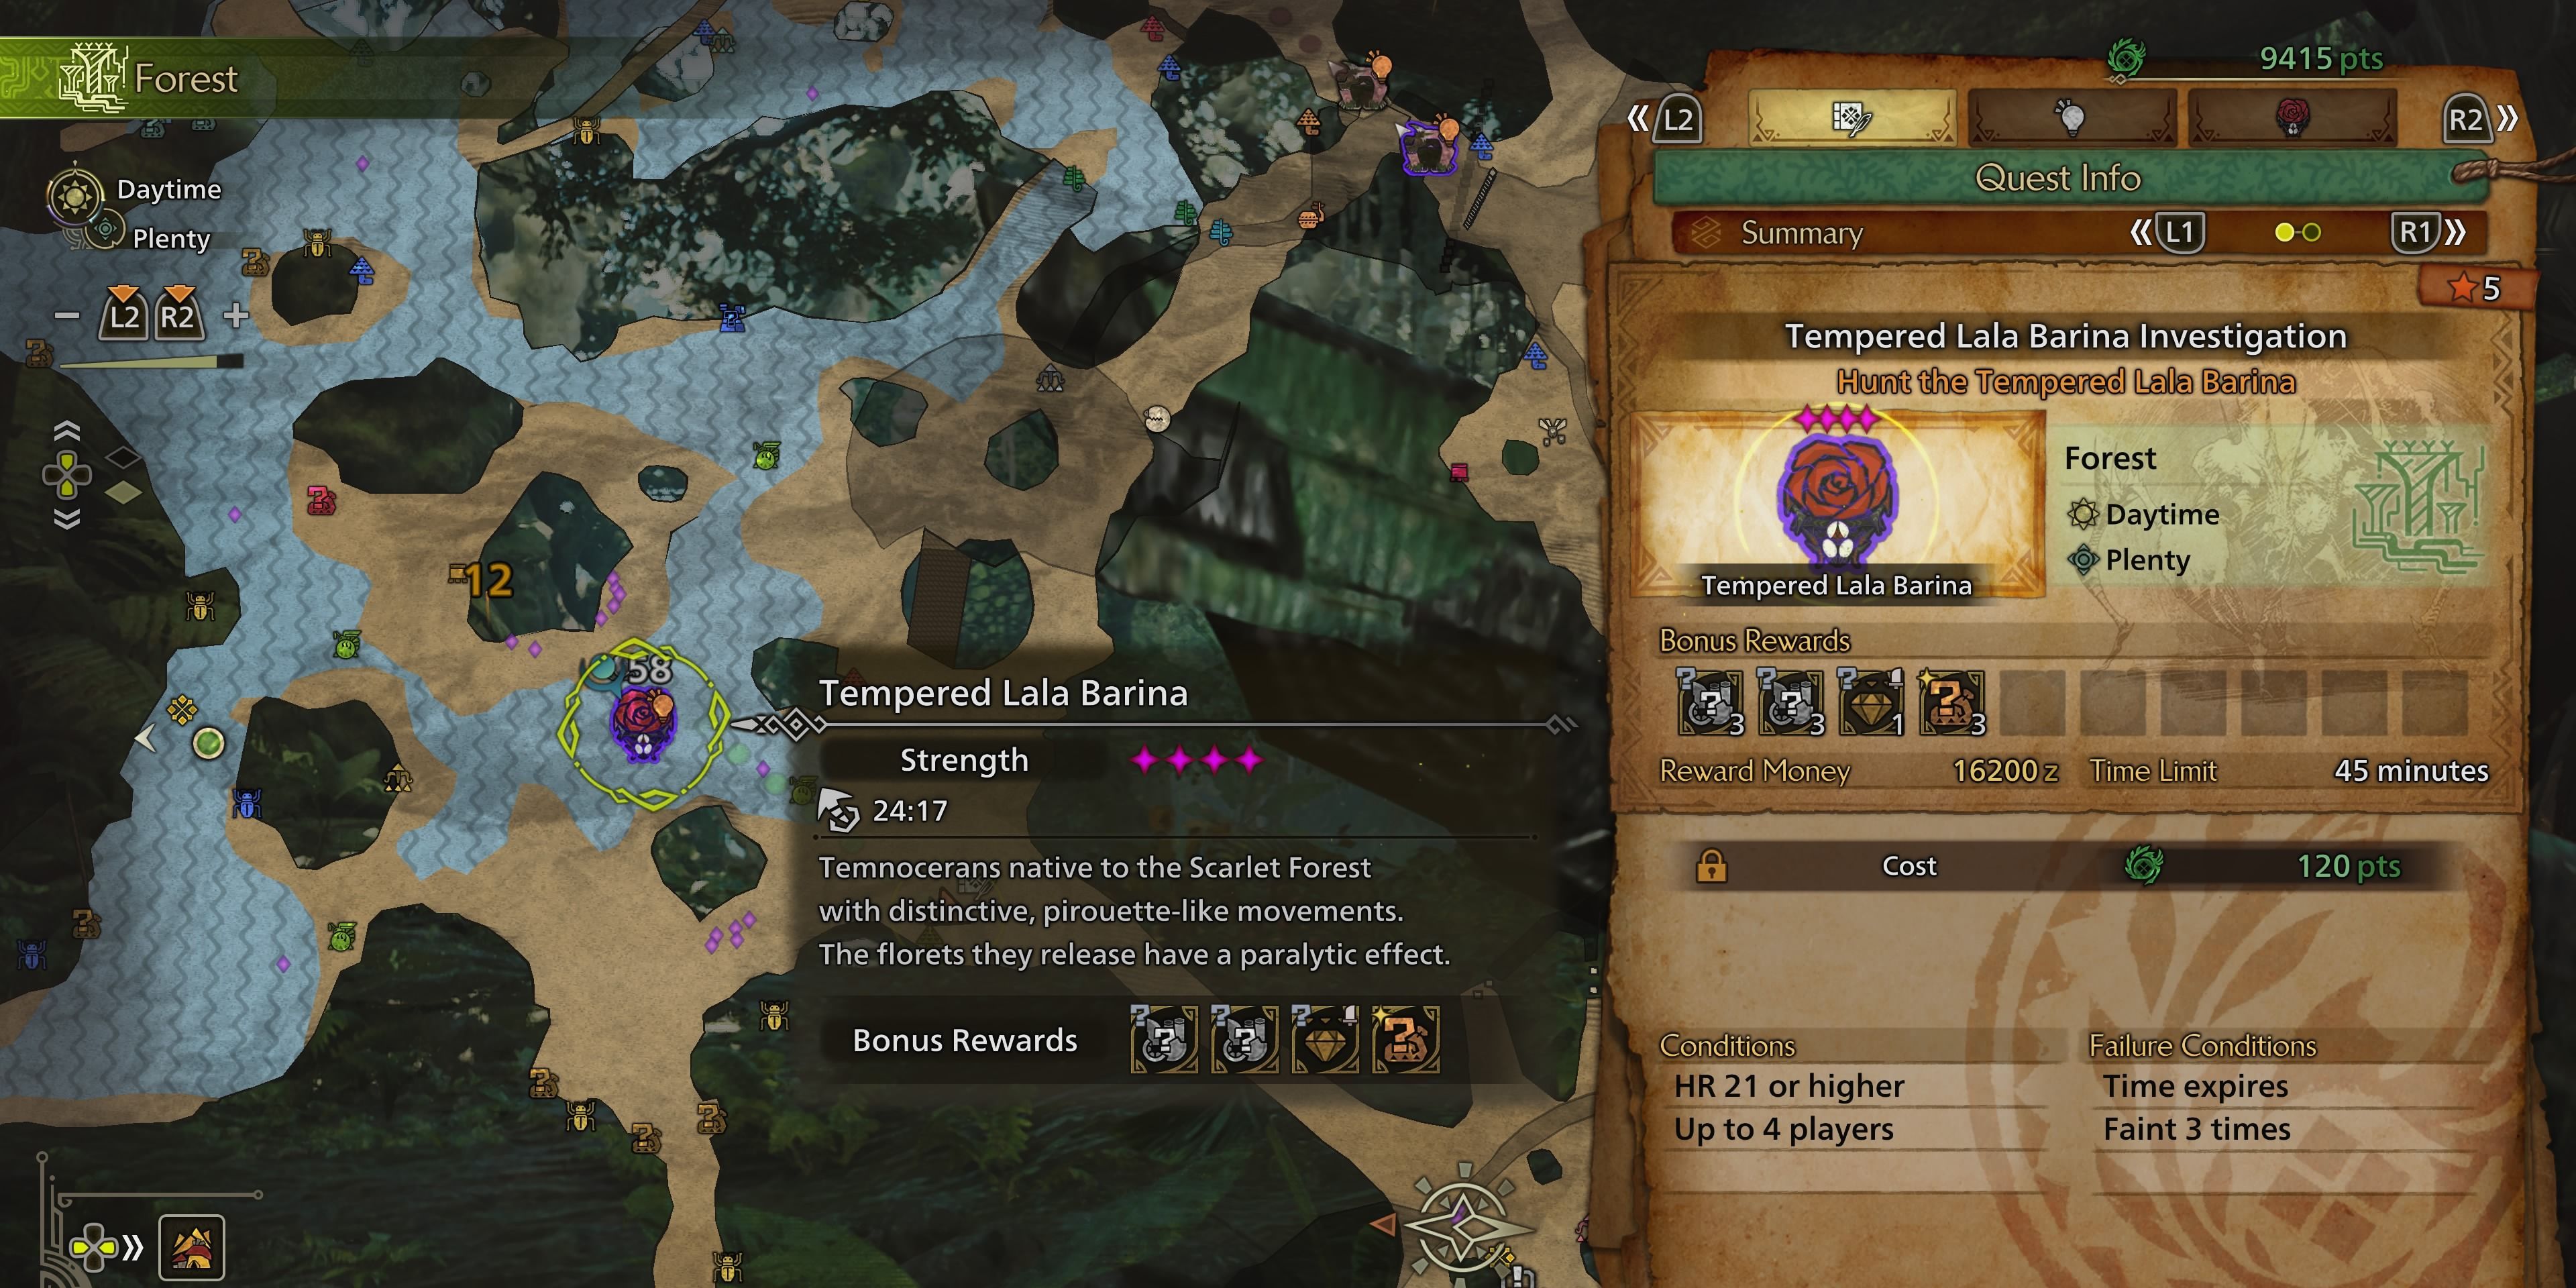
If your intention is to apprehend the monster rather than killing it during this chase, remember to carry some Tranquilizer Bombs and set up a Shock Trap.
It’s beneficial to have either the Rocksteady or Evasion Mantle, as they allow you to withstand and dodge attacks effectively, enabling you to concentrate on dealing maximum damage.
Lala Barina’s Weaknesses
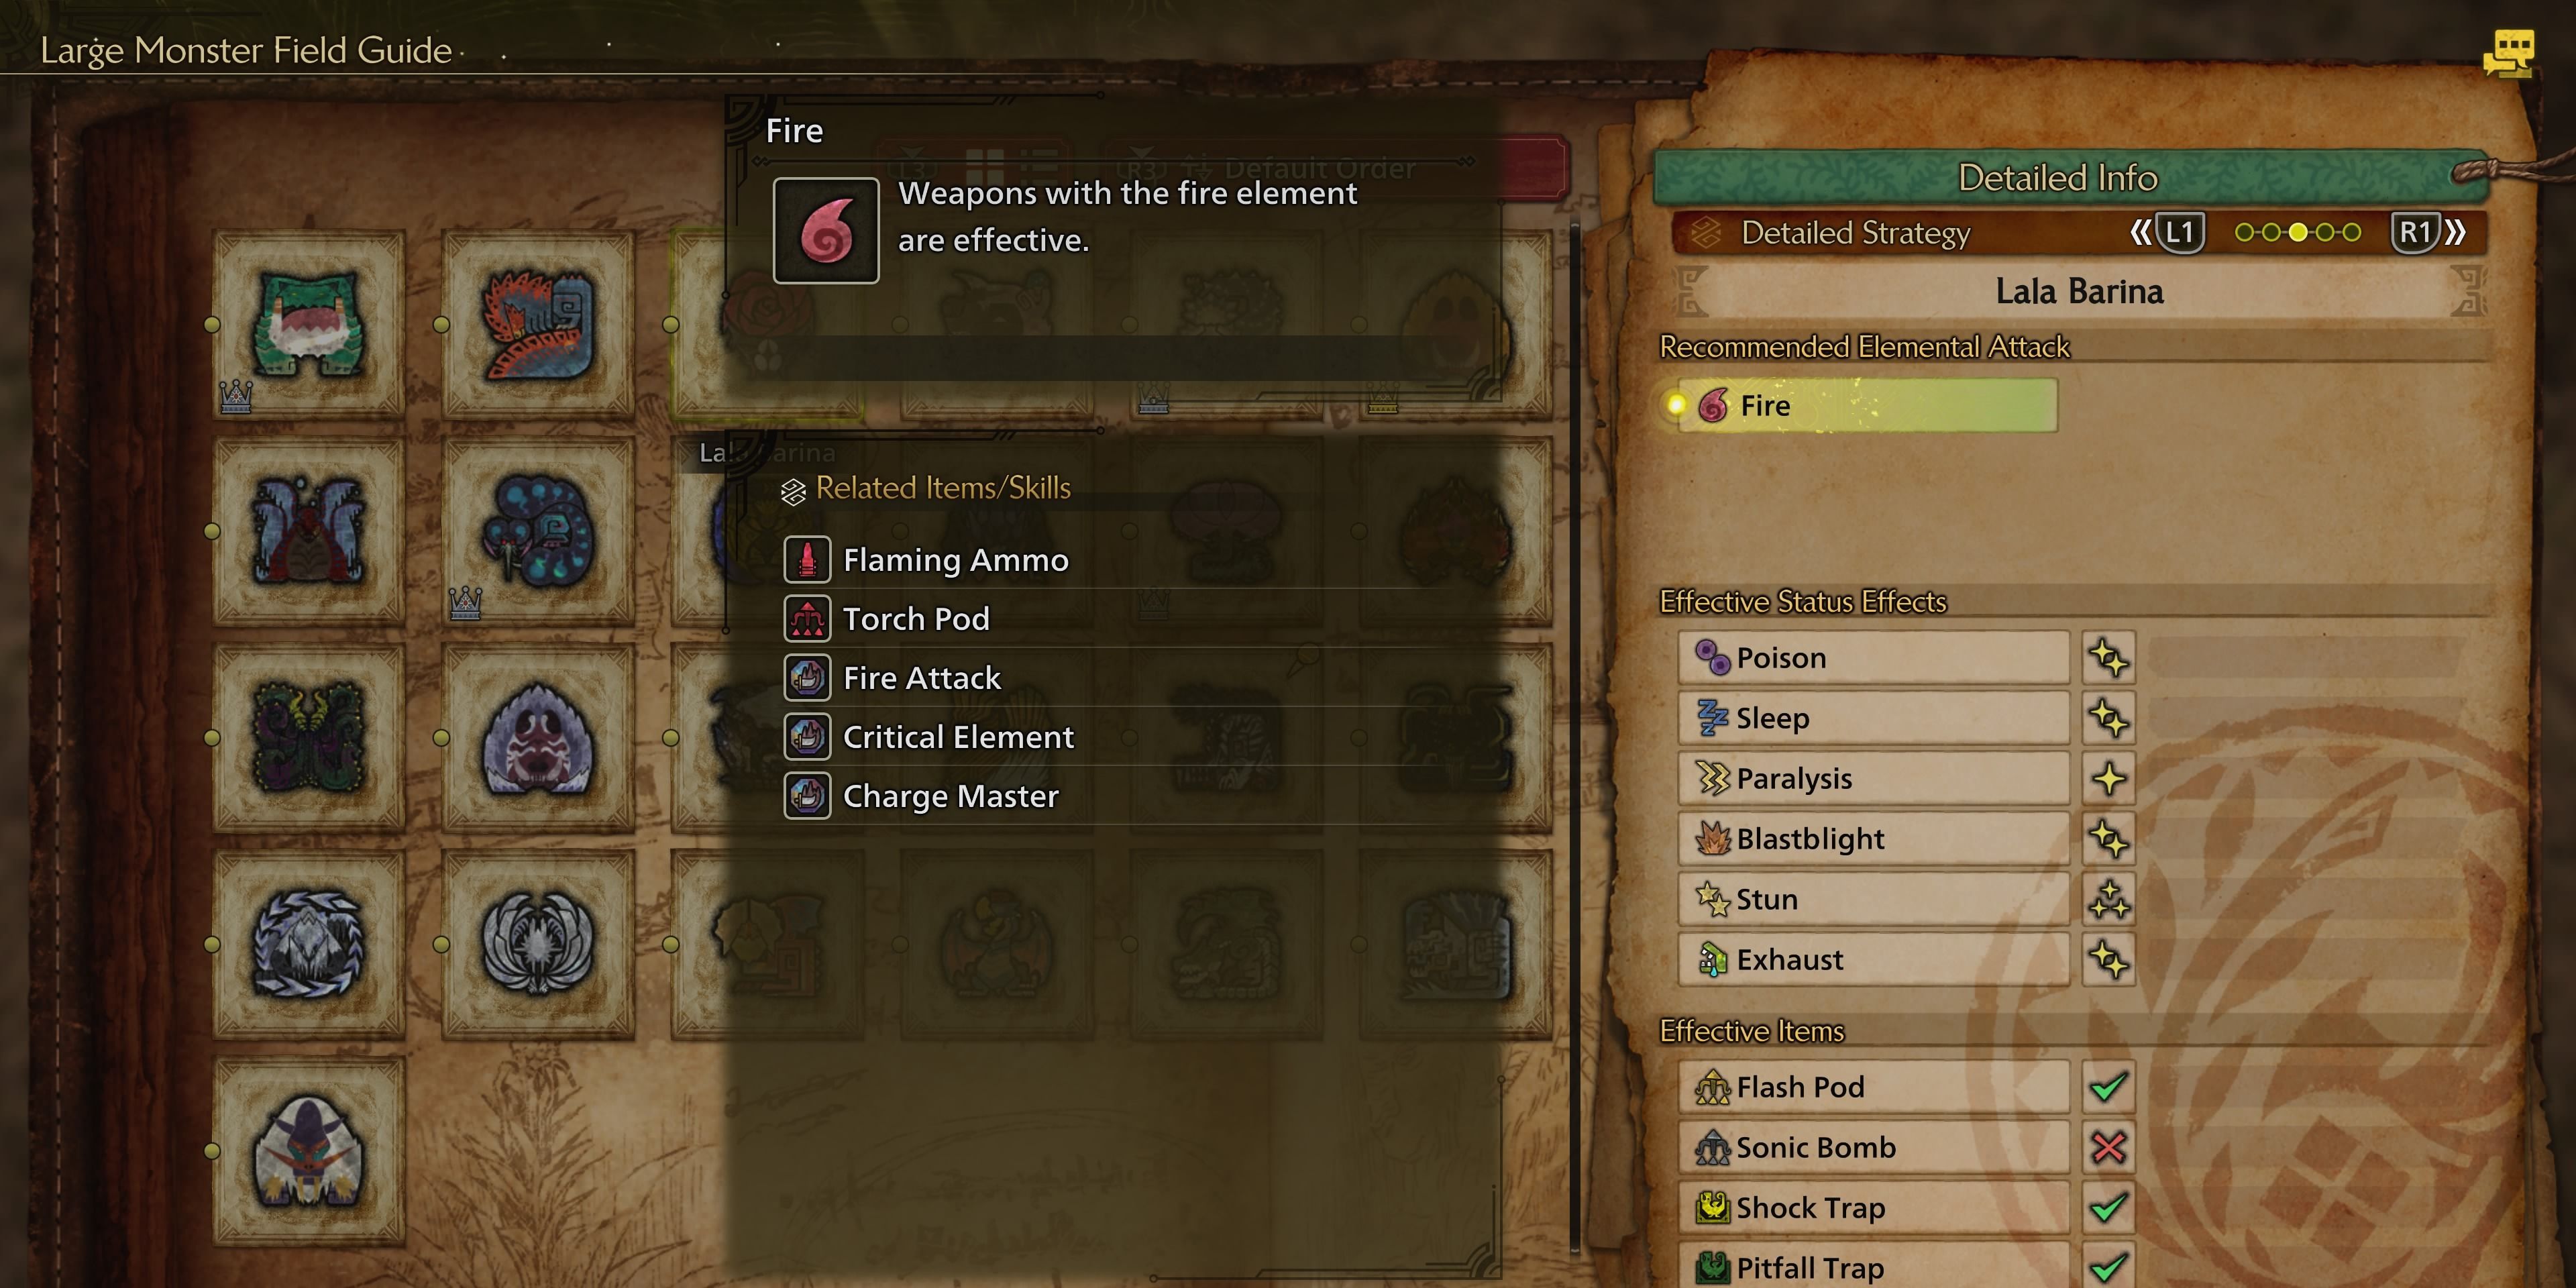
Since the Lala Barina is vulnerable to fire, equipment or projectiles that are fire-based from ranged weapons would be particularly effective in defeating this creature.
In terms of weapon choice, those that allow for swift strikes and provide invincibility frames (I-frames) or frame advantage (offset attacks) are ideal in this situation. For instance, the Hammer or the Longsword fit these criteria nicely.
I found the Hammer particularly appealing due to its aggressive gameplay style that I preferred. Additionally, it’s worth noting that the Hammer is effective in stunning this creature by repeatedly striking its head with blunt force.
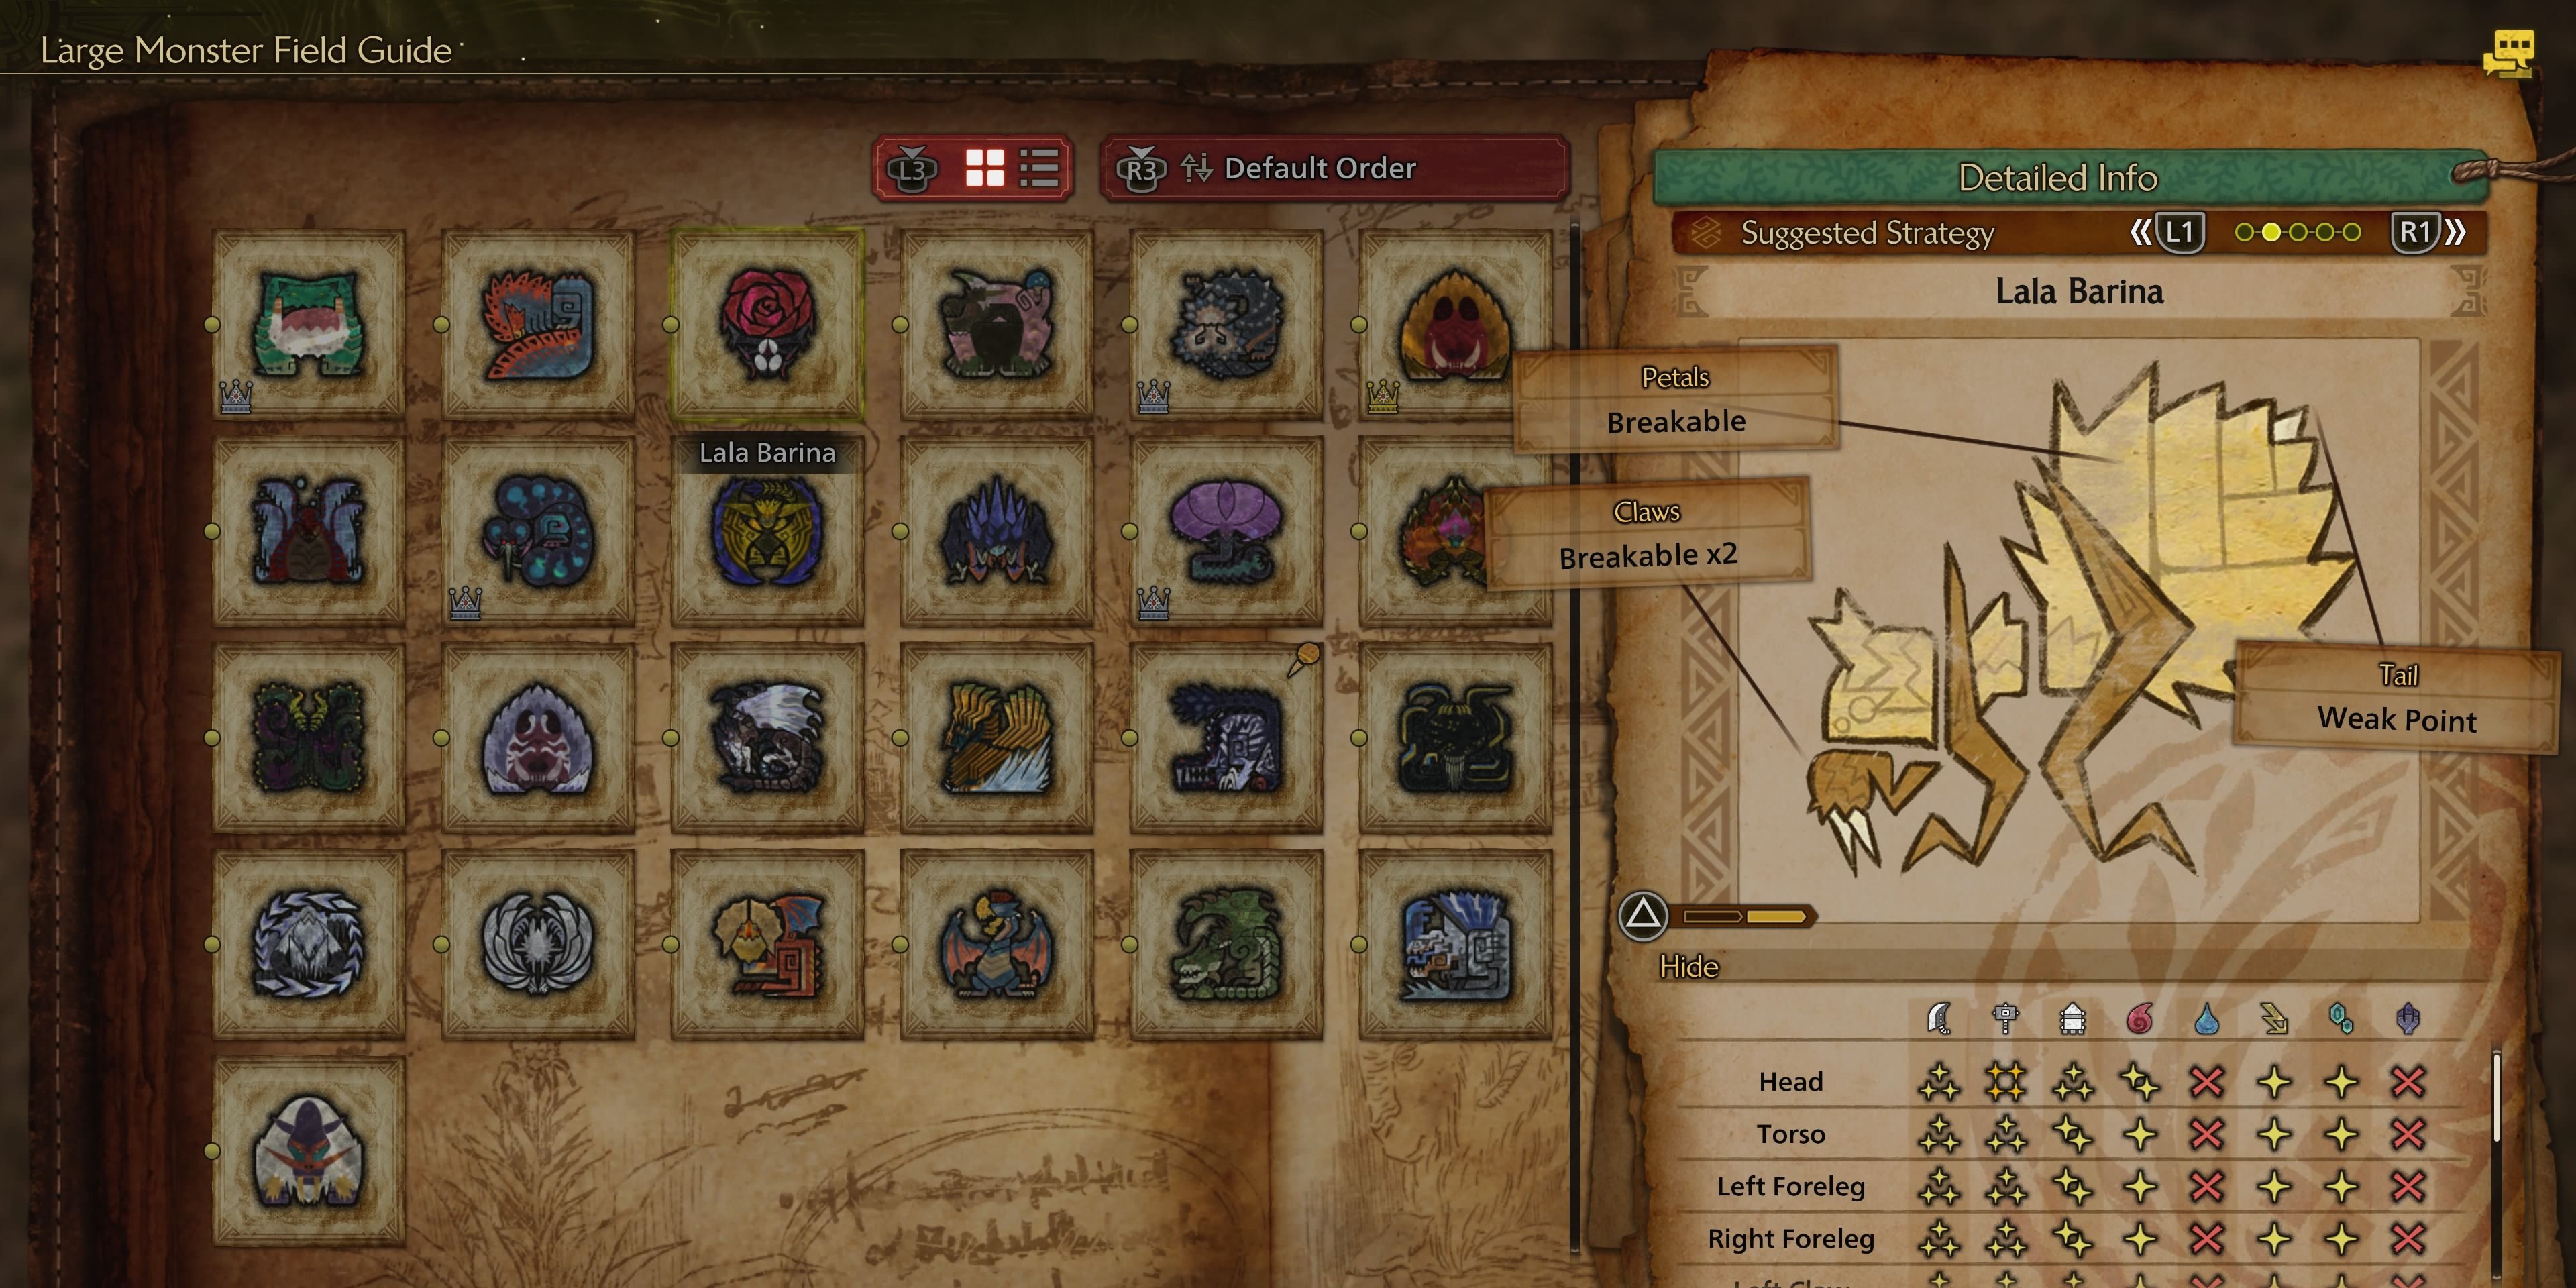
Additionally, consider targeting its limbs, such as its legs and claws, to inflict injuries that will provide you with multiple chances to bring it down and inflict harm.
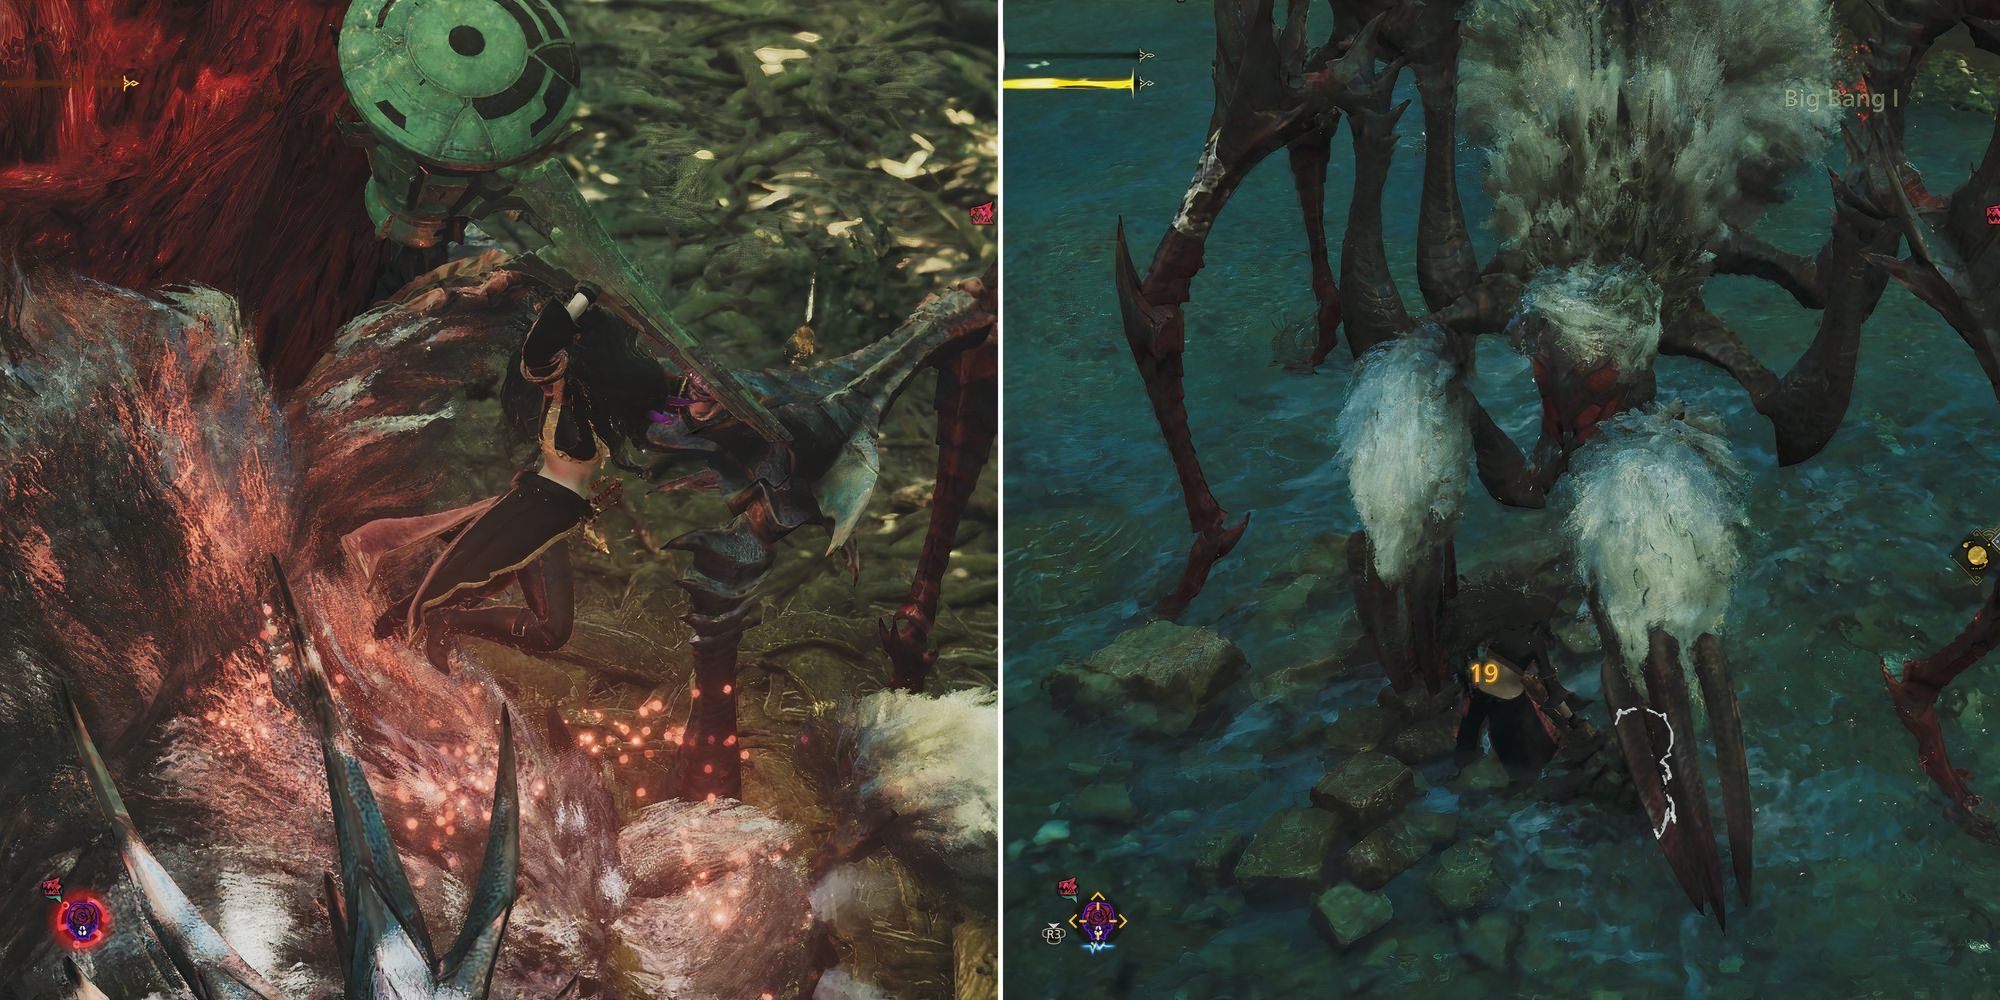
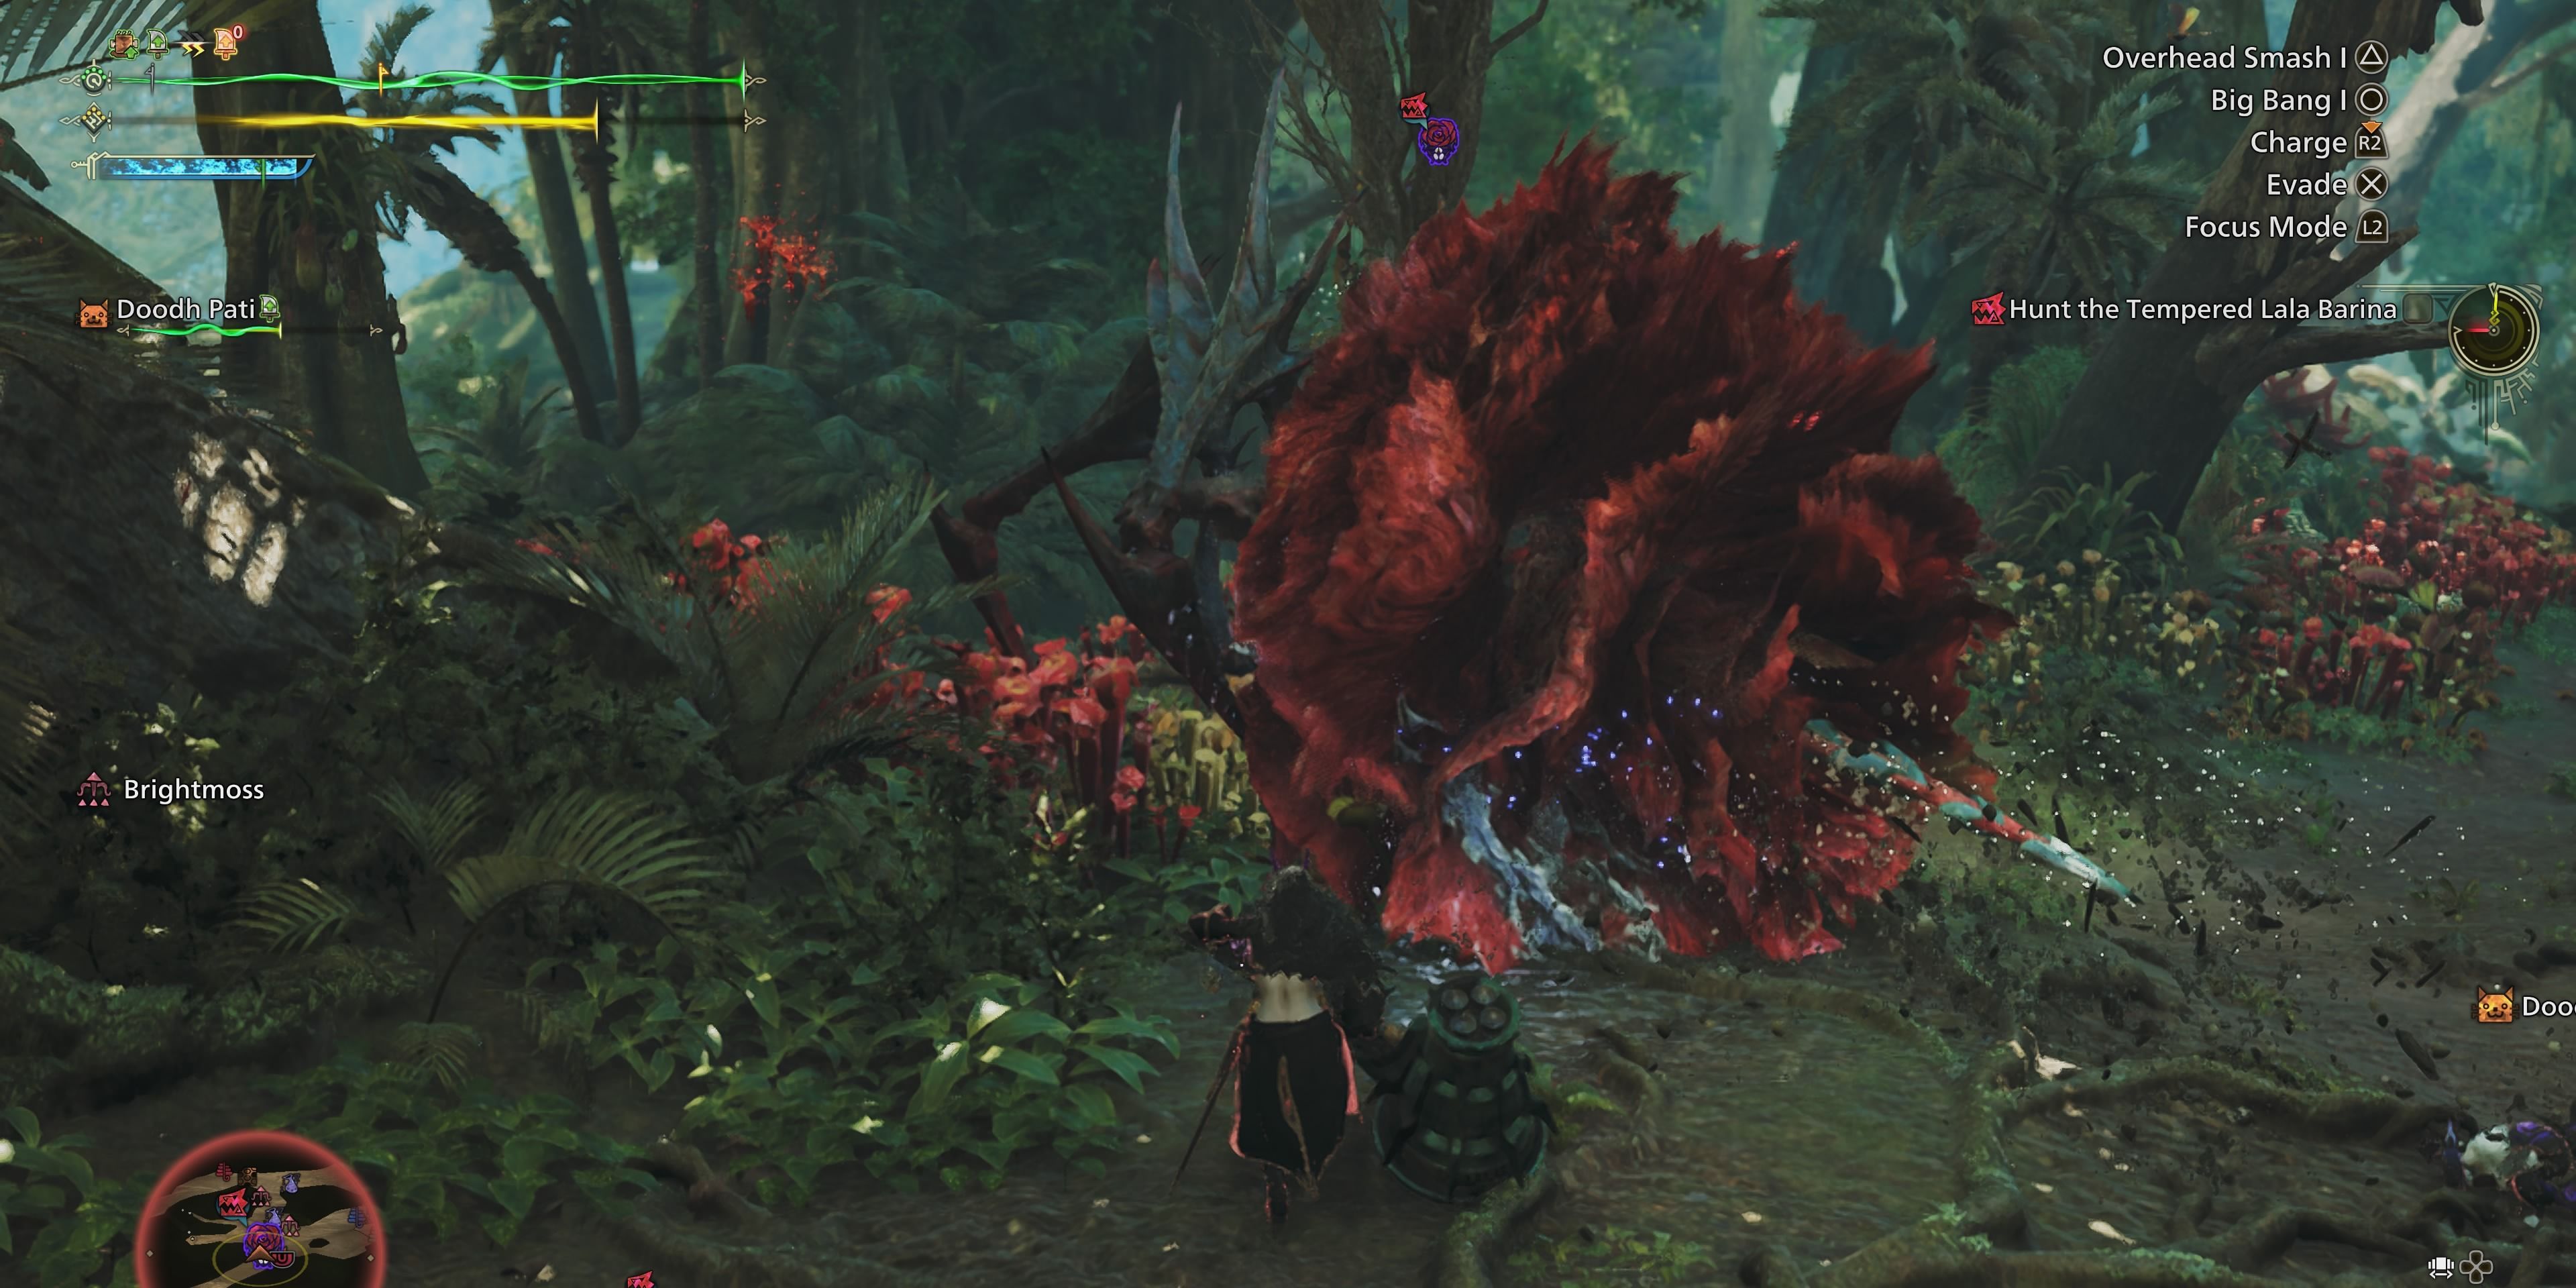
Striking both the head and its blooming petals, especially when it’s in an agitated state, is another effective method to lessen its strength, provided you manage to dodge its harmful stings from behind.
How To Beat The Lala Barina
Just as with other creatures found in the Wilds, I’ve outlined the primary attacks of the Lala Barina here, so you can stay vigilant, and I’ve also included some useful tips for engaging in combat against this formidable foe.
| Attack | Pattern | How To Counter |
|---|---|---|
| Claw Pokes | An attack from the front where it will poke at you with its claws. | Dodge beneath it or to the side. It can also be offset by the Hammer’s upswing attack. |
| Claw Swipe | Another frontal attack where it’ll swipe its claw on the ground in front. | Dodge under it or to the back. |
| Leg Poke | Lala Barina will hit you with one of its legs via the sidelines. | Dodge as usual, but don’t worry too much since it’s its weakest attack. |
| Stinger | One of Lala Barina’s major moves when you’re behind it. | When it’s about to do a Stinger, pay attention to the animation and get out of the way. |
| Double Stinger | A variation of the previous move. In its agitated form, with the flower bud on the back, it will sting you twice. | Like before, you can read this move during its split-second chargeup. |
| Charging Pounce | A powerful attack where the Lala Barina will charge and lunge at you with a vicious strike. | Avoid staring directly at Lala Barina when it’s agitated. It can be offset via the Hammer’s upswing, but dodging to the side is advised. |
| Blossom Spread | The Lala Barina will sidestep and shower a bunch of its paralysing flowers in the vicinity. | The attack shows specific hitboxes in an open area, thus making it easy to avoid. If you’re fighting in tight spaces, just back away. |
To ensure maximum safety during the confrontation, strive to impair its mobility by focusing attacks on its legs, and deliver blows to its head when it is not in an agitated or enraged state.
In simpler terms, since the claws do not cause a push-back effect (knockback damage), you can handle it effectively either by inflicting substantial damage on them or the head. If this isn’t possible for you, it would be wise to remain under Lala Barina and aim for her legs or back instead.
When agitated, this powerful entity is most likely to use its deadliest moves like the Stingers and the Pounce when approaching head-on. However, with caution and vigilance, it’s unlikely that many other attacks will pose a significant risk to your wellbeing.
Although these seemingly harmless blooms may appear innocuous, a touch from them could cause temporary unconsciousness, leaving you vulnerable to an unwanted beating unless your Palico companion gently nudges you awake.
Rewards For Defeating The Lala Barina
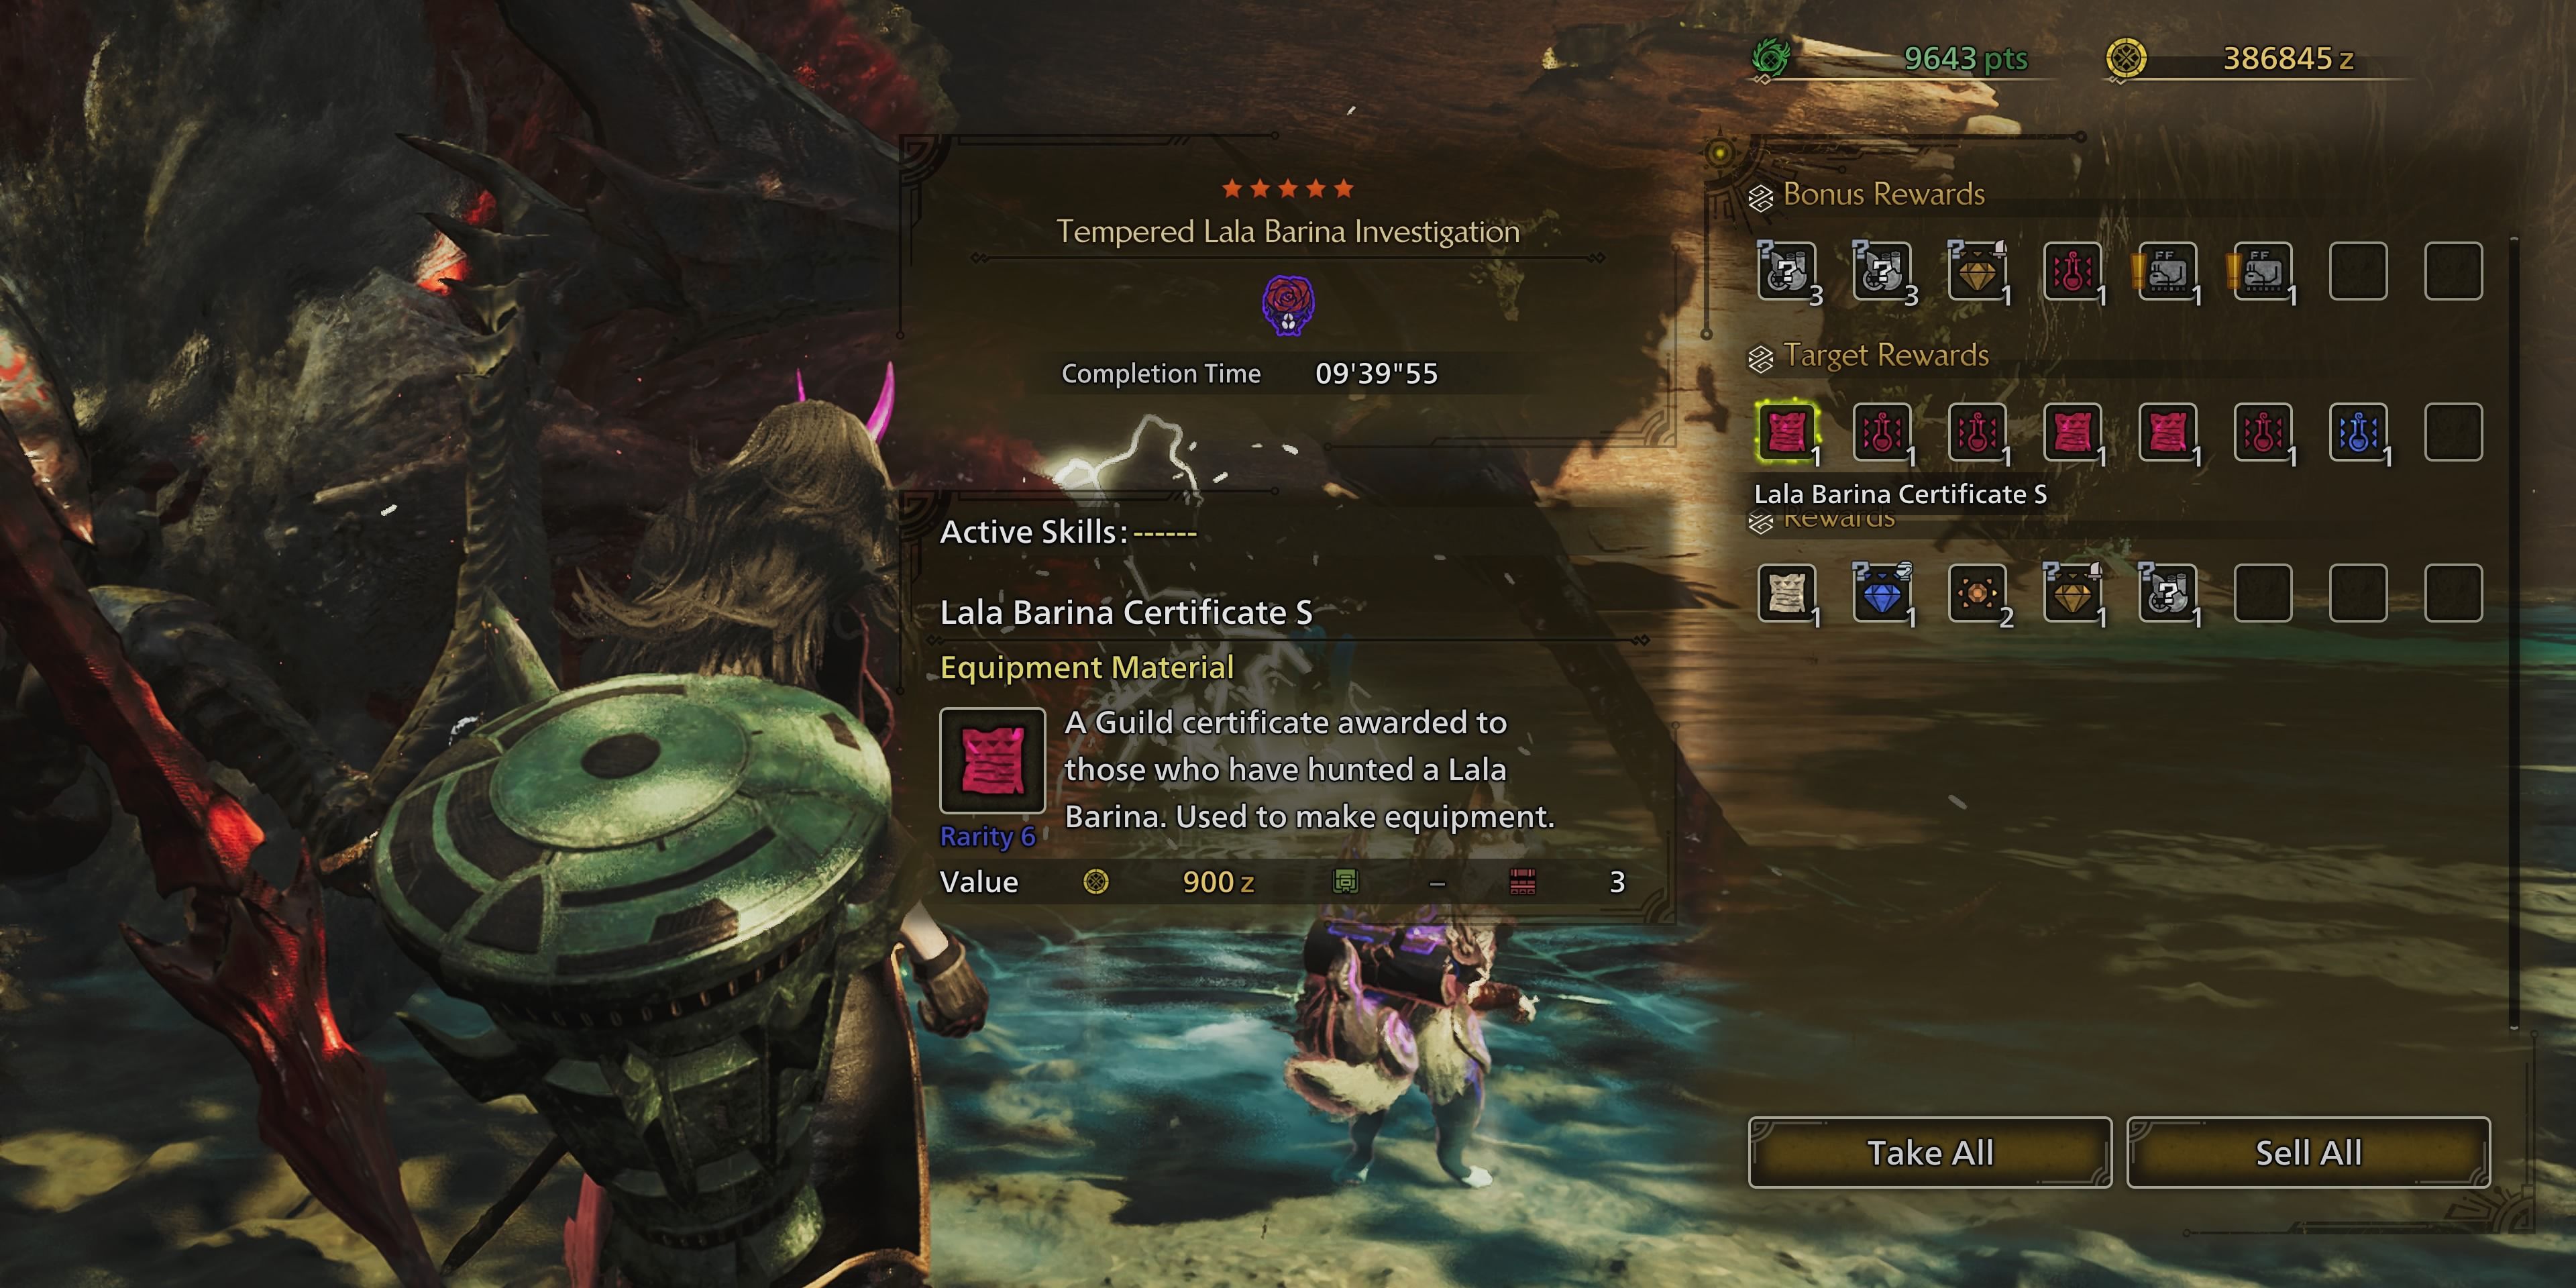
Listed below are the prizes you’ll receive for defeating Lala Barina in both versions of MH Wilds, Low-Rank and High-Rank. The Frequency refers to the likelihood or rate at which these rewards/materials will drop.
Enjoy exploring your new loot!
| Low-Rank | High-Rank | ||
|---|---|---|---|
| Material | Frequency | Material | Frequency |
| Lala Barina Claw | 4/5 | Lala Barina Claw+ | 4/5 |
| Lala Barina Floret | 3/5 | Lala Barina Floret+ | 3/5 |
| Lala Barina Stinger | 3/5 | Lala Barina Stinger+ | 3/5 |
| Lala Barina Shell | 2/5 | Lala Barina Carapace | 2/5 |
| Lala Barina Mucus | 2/5 | Lala Barina Mucus+ | 2/5 |
| Monster Fluid | 2/5 | Monster Broth | 2/5 |
| Lala Barina Certificate | 1/5 | Lala Barina Certificate S | 1/5 |
During your hunting expedition, don’t forget that you can acquire additional resources by focusing on specific areas of Lala Barina and taking them down. Some scarce materials might not appear in every hunt, adding an element of surprise.
In addition to being obtained from the Monster Fluid and Broth, these items may also be acquired as drops from other monsters. Furthermore, Lala Barina Certificates sometimes appear among the rewards displayed on the post-quest screen.
Read More
- Apothecary Diaries Ch.81: Maomao vs Shenmei!
- 30 Best Couple/Wife Swap Movies You Need to See
- Gachiakuta Chapter 139: Rudo And Enjin Team Up Against Mymo—Recap, Release Date, Where To Read And More
- Netflix’s ‘You’ Season 5 Release Update Has Fans Worried
- Ncuti Gatwa Exits Doctor Who Amidst Controversy and Ratings Crisis!
- All 6 ‘Final Destination’ Movies in Order
- Every Minecraft update ranked from worst to best
- Summoners War Tier List – The Best Monsters to Recruit in 2025
- Tyla’s New Breath Me Music Video Explores the Depths of Romantic Connection
- DC: Dark Legion The Bleed & Hypertime Tracker Schedule
2025-02-27 14:26