The latest downloadable content introduces two unique Nightfarers, and with these new characters comes a fresh set of Remembrance quests to complete!
These quests will take you exploring the new Shifting Earth map to uncover hidden secrets. Like similar quests in the past, they won’t be easy to find, and this time, they have some surprisingly unusual requirements.
Let’s explore the Quest fully so you can collect valuable items and rewards and continue your adventure on the new map!
How to Find the Undertaker
After downloading the new downloadable content, go to the previously locked door where the little Jar Merchant was located and activate it. This will take you to a special area where you can fight the powerful Dreglord.
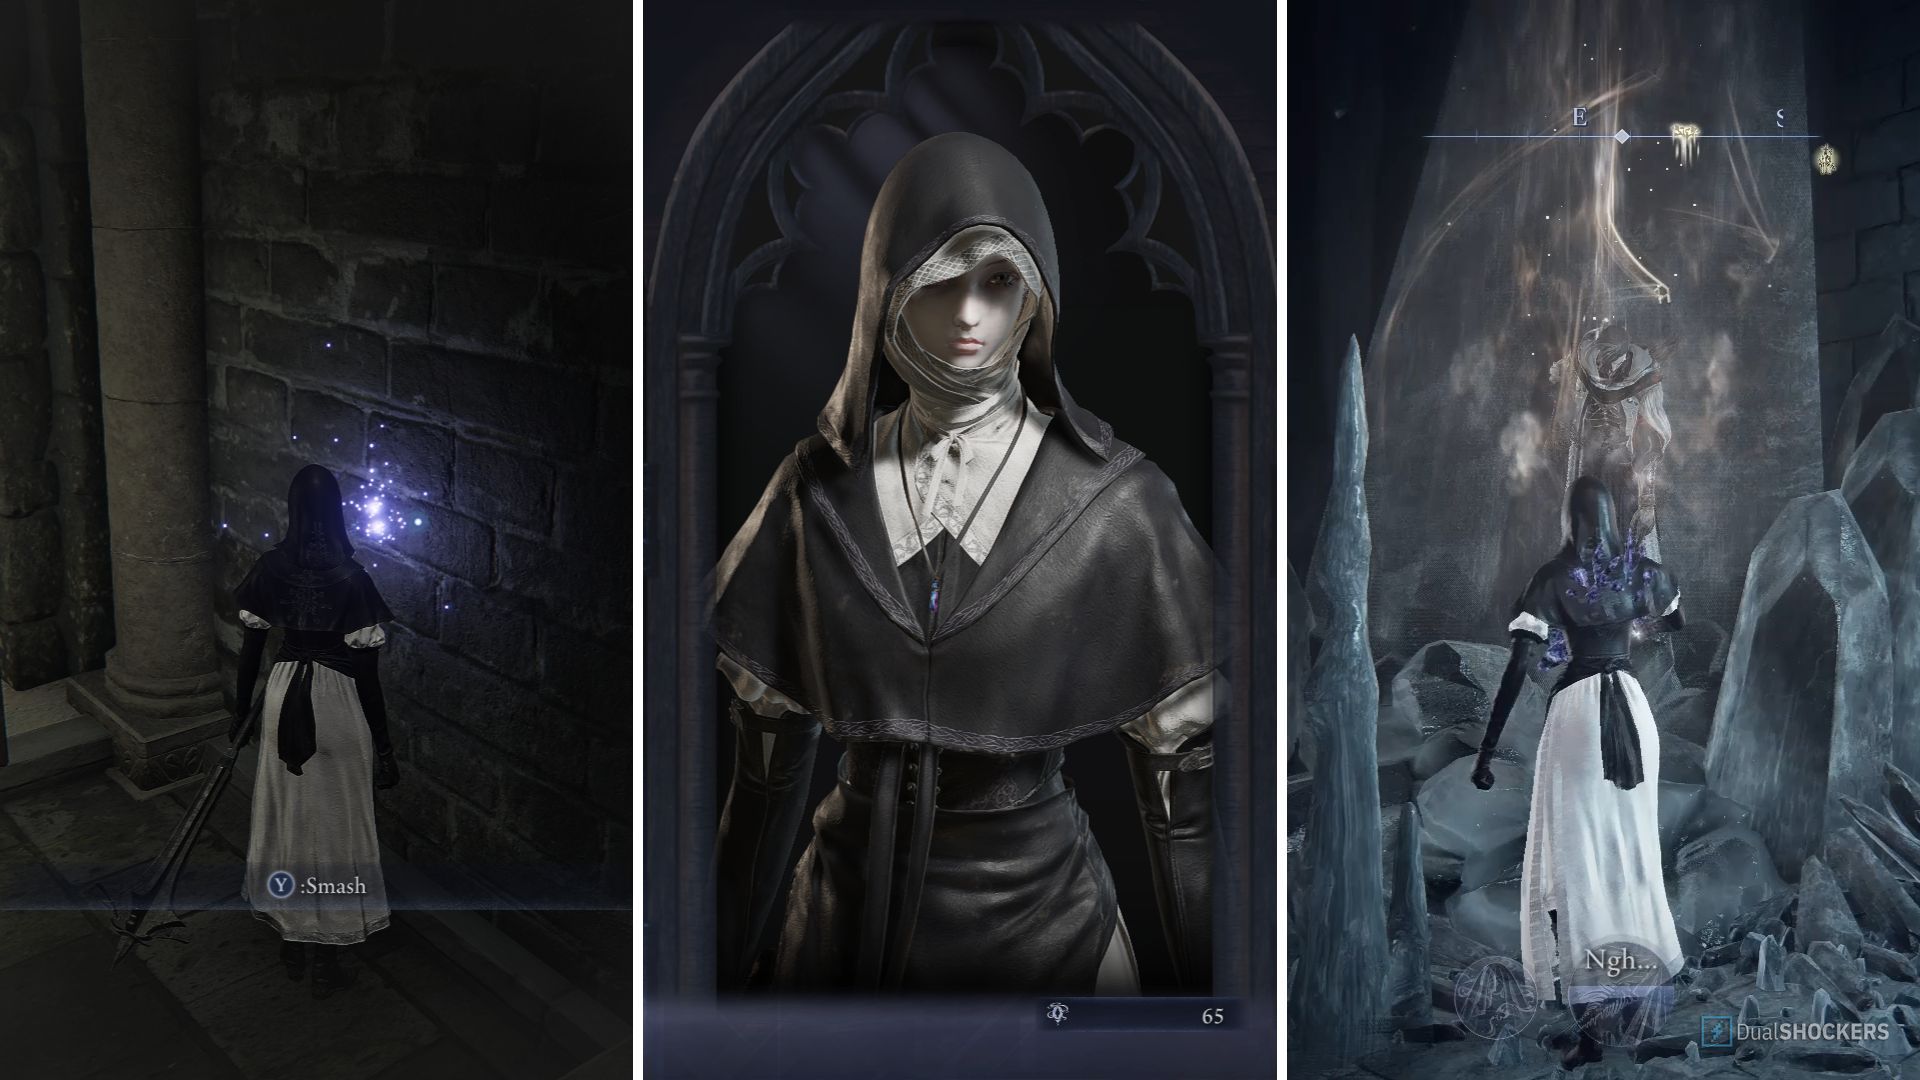
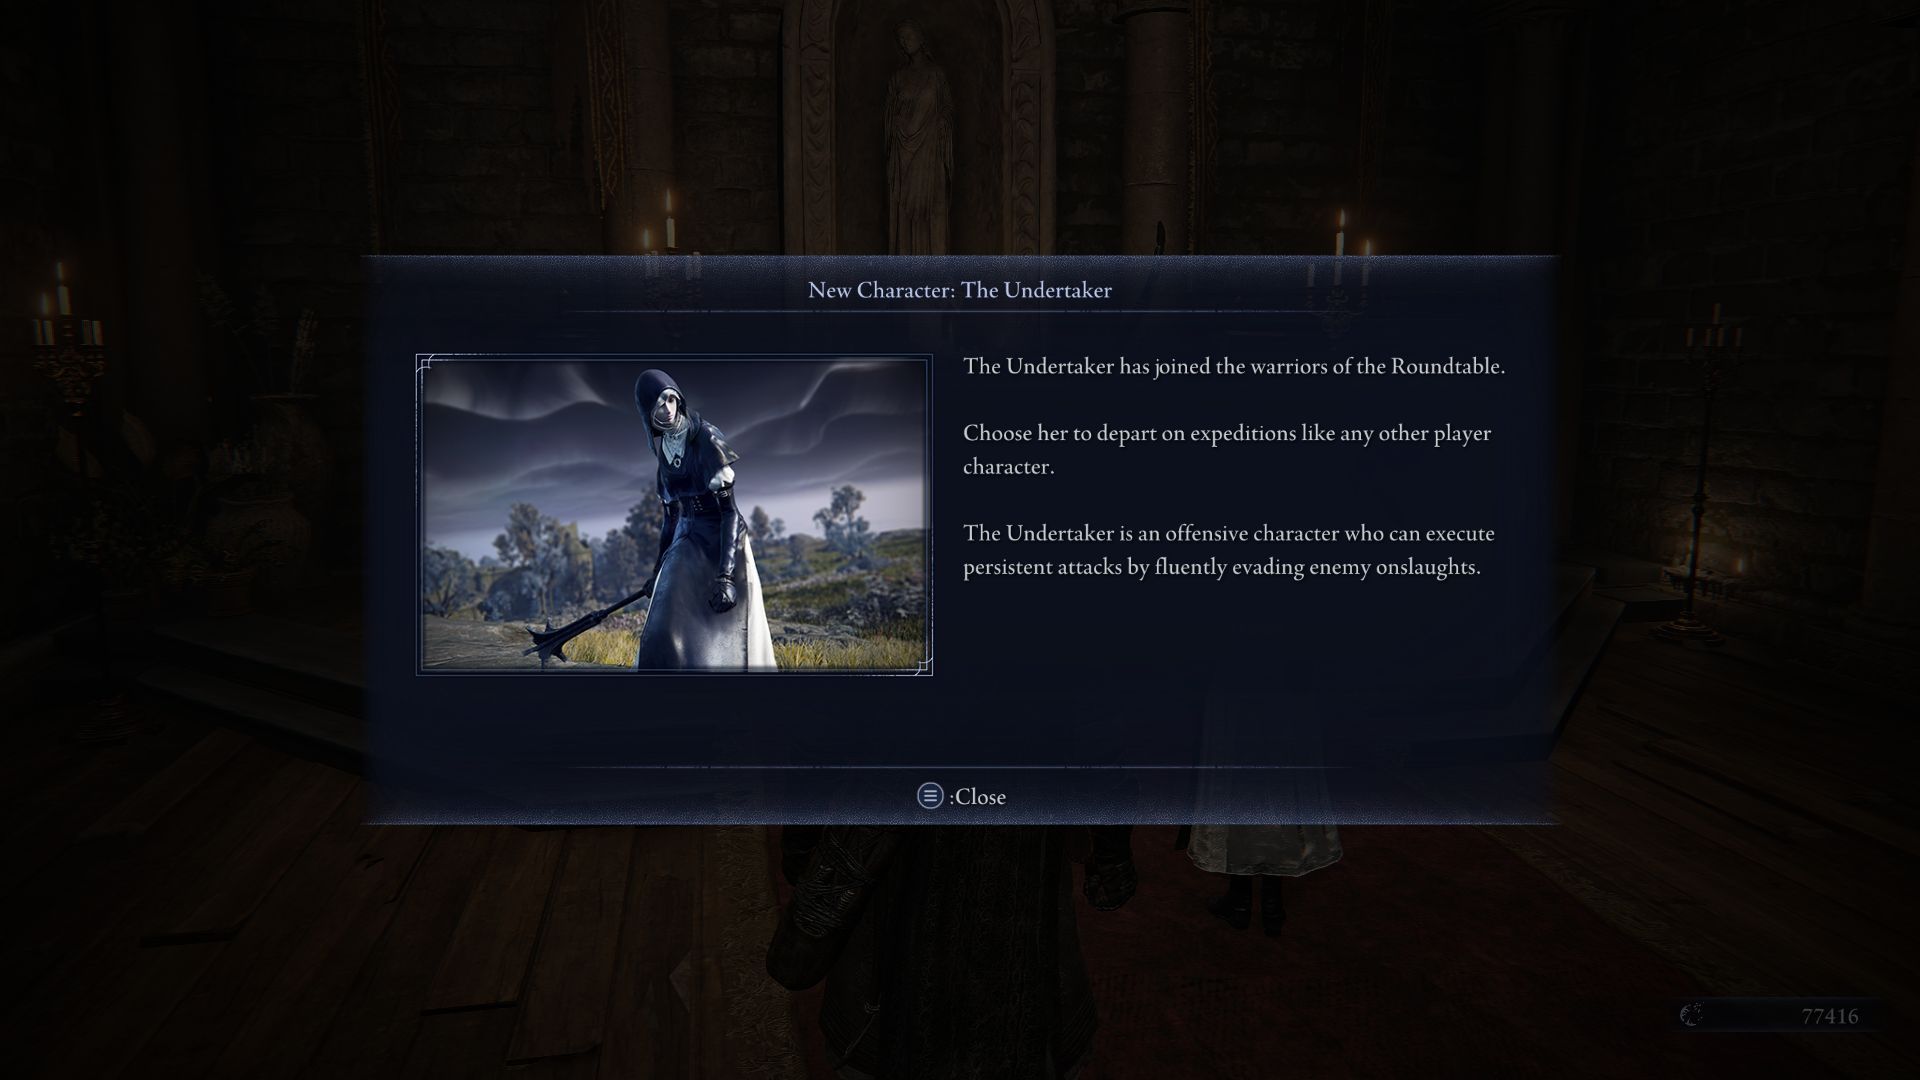
Don’t worry about dying here – the story will keep going. Just return to the doorway you used earlier and speak with the Undertaker inside. She’s now a playable character, and you can begin collecting her Memory Fragments.
Now, begin doing expeditions with the Undertaker. Be sure to defeat the Nightlord at the end – that will unlock the first playable chapter. If you want to finish this quest quickly, I suggest fighting him, as he’s the fastest and easiest opponent.
You can earn new Fragments simply by defeating the regular bosses – you don’t need to play the DLC map or battle the Balancers.
Chapter 3 – The Nightfarer Nightmare
When you start the memory sequence in Chapter 3, you’ll encounter the Iron Menial, and he’ll quickly become hostile. Despite appearances, you’ll have to defeat him.
As soon as he falls, the other Nightfarers will come to his aid and try to stop you.
- First off, take out the Executor who stands in your way. Be wary of his parries. Slow, unpredictable attacks work well here.
- Next up in the main expedition room, you’ll find the Guardian and the Recluse. The caster will stand back while the Guardian comes to you. Focus on the bird first, and drag him away from the Recluse’s line of sight.
- Next up, you’ll have the Wylder to contend with. There’s no special method to beating him. Simply kite him around and jump attack to be safe. If you need more HP, use your Prayerful Strike Weapon Art for an easy boost.
- Finally, once you proceed to the southwest room, the Raider will attack you. In addition, the Ironeye is invisible in this room and will attack you after a short while. Use your skill and your ultimate art here if it’s available. Watch out for Ironeye’s Poison.
You don’t have to fight the Duchess or the Revenant here.
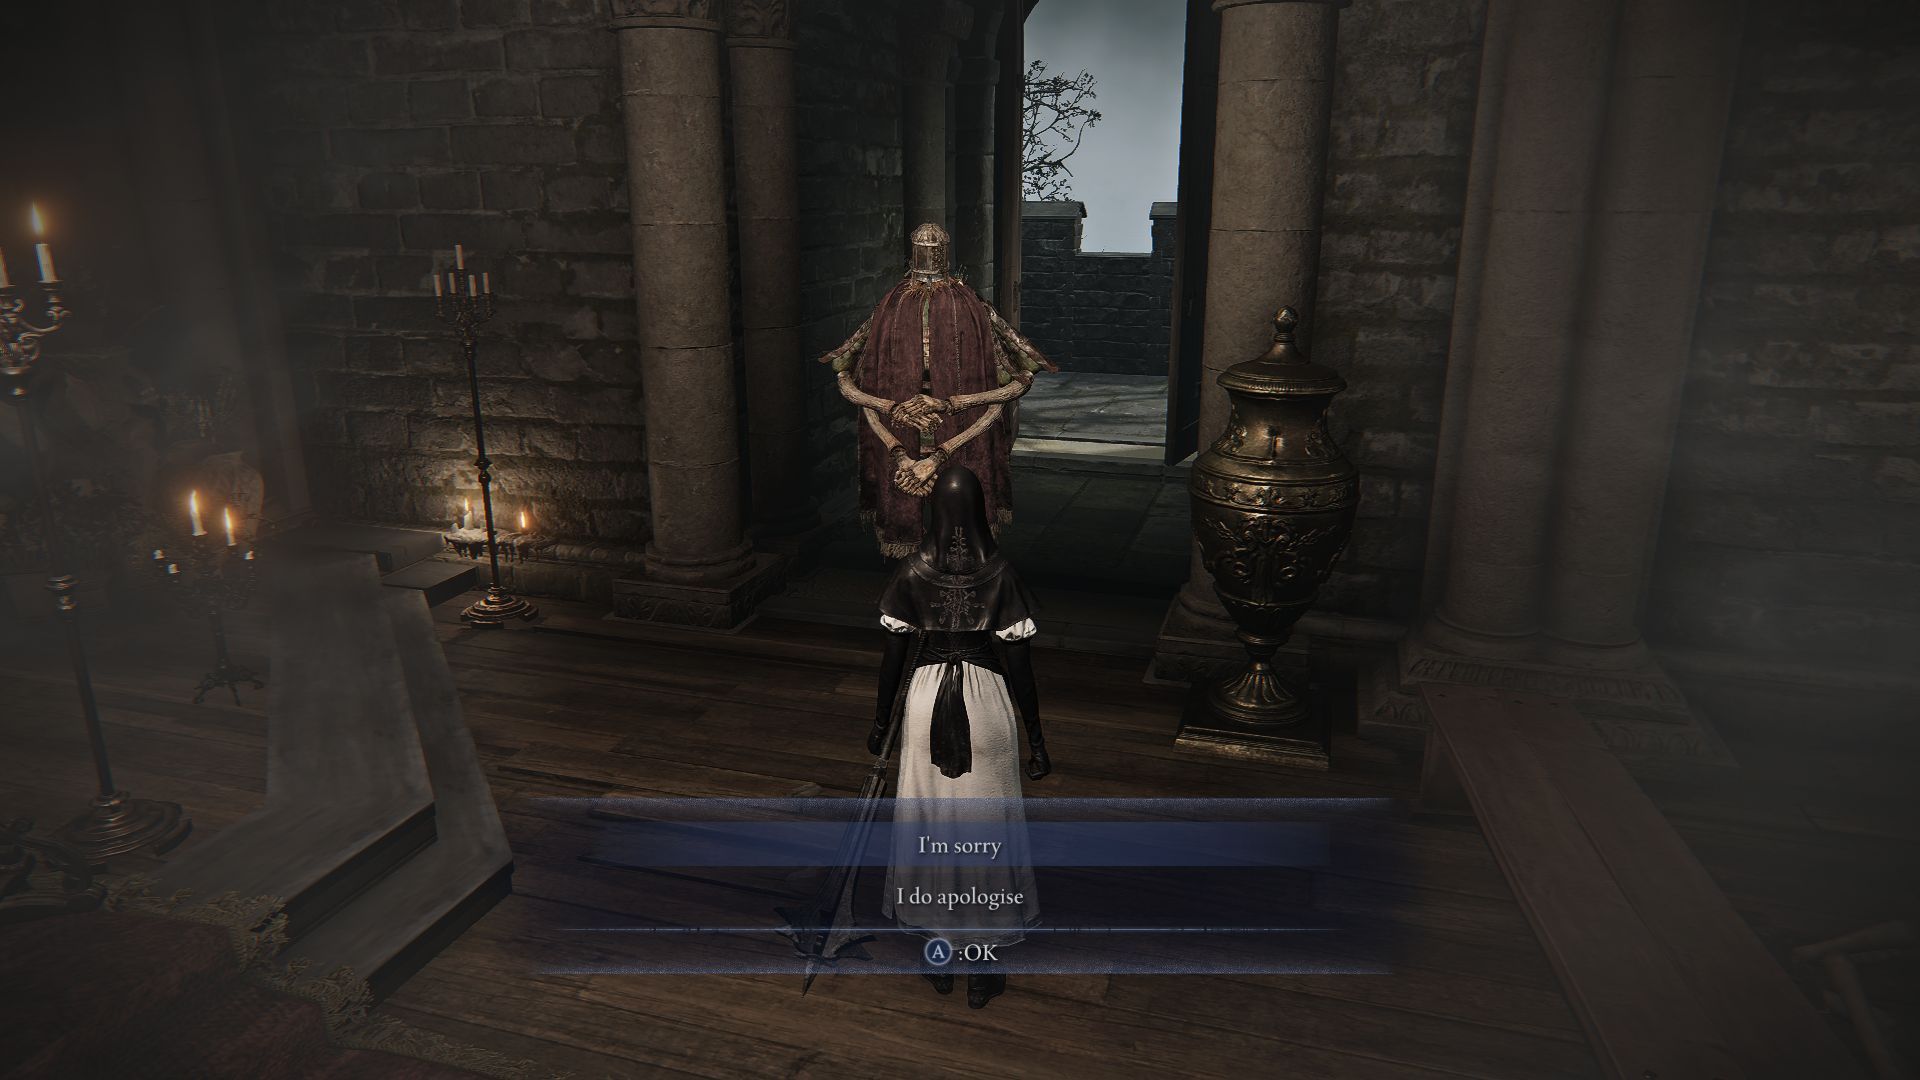
Eventually, you’ll meet the Iron Menial and have a conversation with him. Apologize to him, and listen to everything he has to say. After that, you’ll notice a small, glowing purple spot on the wall. Break it open, and then choose to absorb the night’s power. You’ll then see a short scene of the Undertaker drinking a liquid from the wall.
If you get stuck during a Remembrance Quest, check the map for an exclamation mark – it will give you a clue.
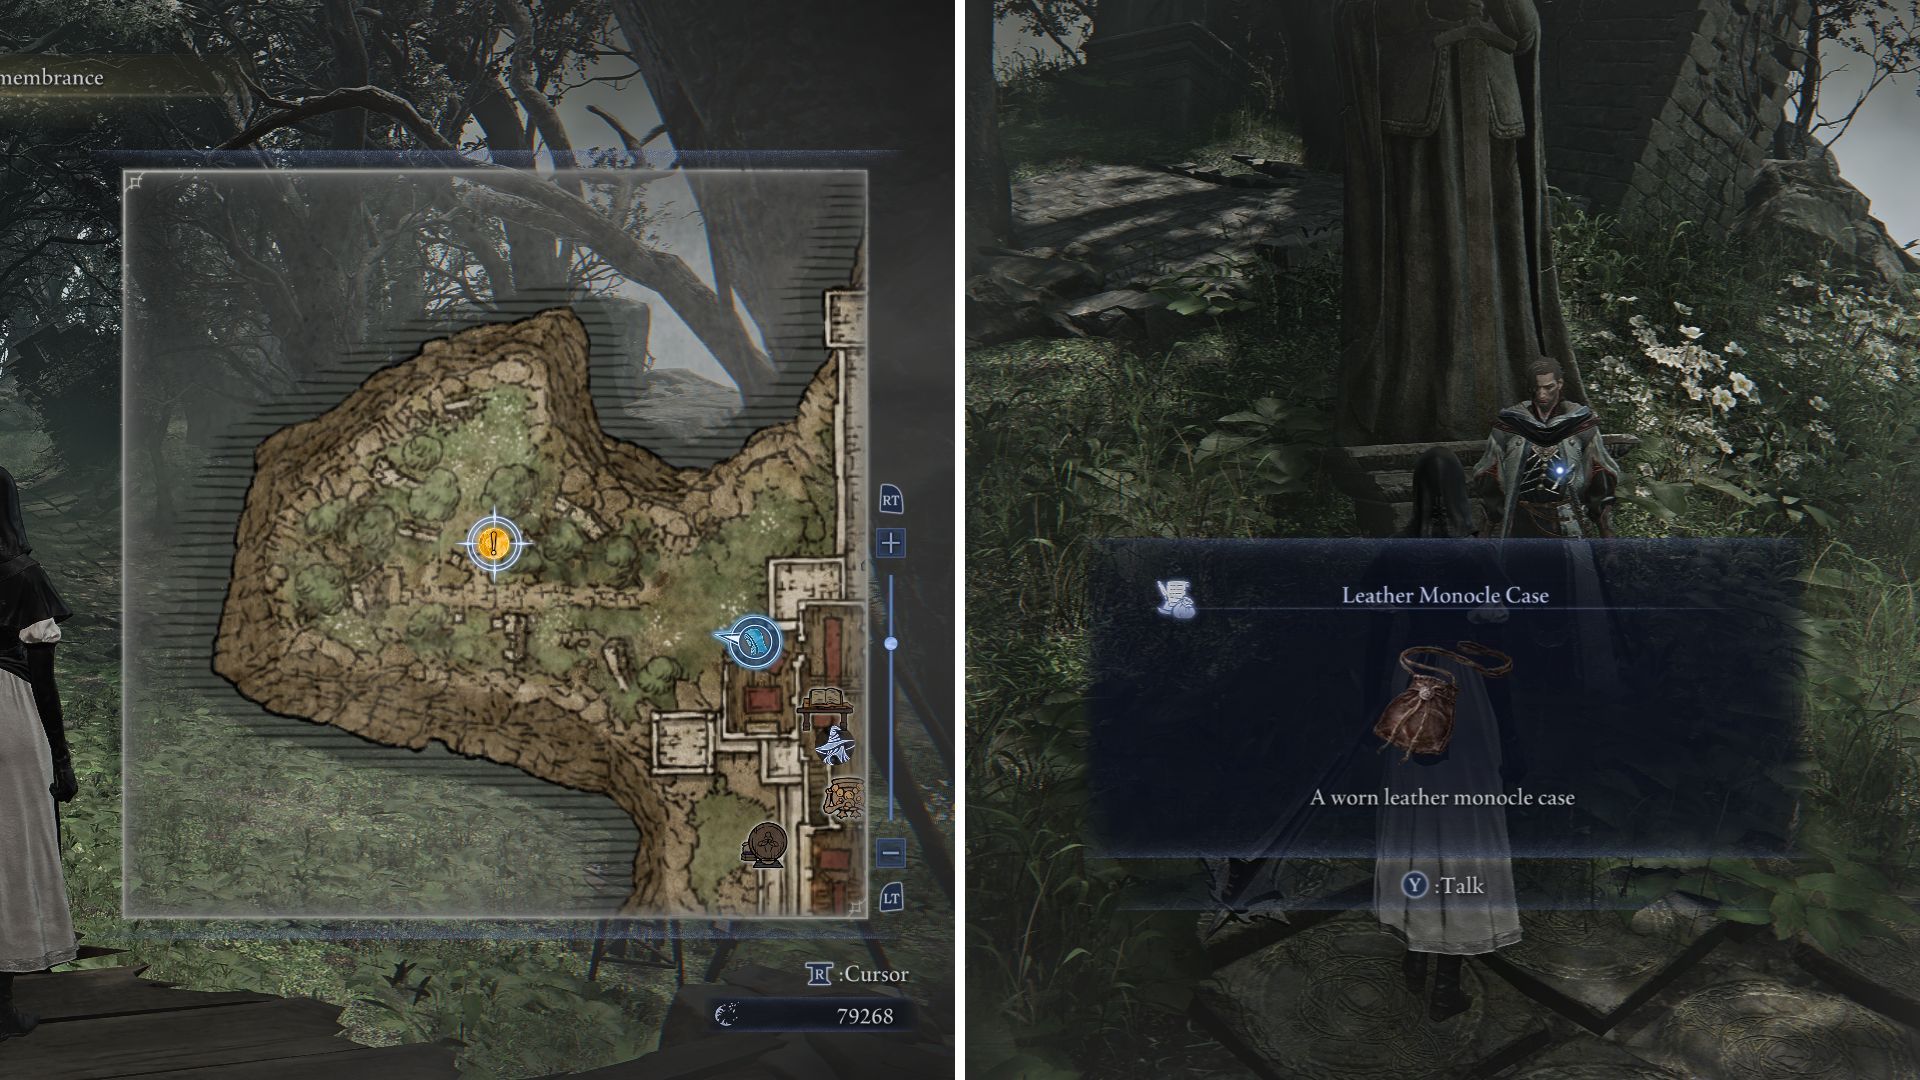
The Scholar is leaving, and you need to find him. He’ll be in the forest, to the west of the main building. Talk to him and accept his request, and he’ll give you the Leather Monocle Case – a blue relic you can equip for special benefits.
- Physical attacks boosted while assist effect from incantation is active for self
- Extend Spell Duration
- Physical Attack Up +2
It might not be immediately obvious, but certain buffs – like Barrier of Gold – will actually increase your attack power while they’re in effect. It’s a bit hidden, admittedly!
Equip the relic, and then complete another expedition for the next set of Memory fragments.
Chapter 5 – The Search for the Scholar
Go to the next Remembrance area and speak with the Duchess in the Expedition chamber. After a conversation where you don’t reveal any information, she’ll send you to the Chapel to pray.
Once you’ve prayed at the altar, talk to the Iron Menial just west of the Expedition room. He’ll tell you about the new Shifting Earth event and suggest the Scholar might be involved.
While still seeing the faint, glowing edges of the screen, start a Balancer Expedition. If you’ve altered any Shifting Earth events, be sure to restore them to their original state in the Great Hollow.
It’s best to do this quest alone, as it sends you on a bit of a detour. Just focus on completing it, you don’t need to win or be perfect. Also, if you exit the game after meeting the Scholar, you’ll have to start the quest over.
- Firstly, head to the large white castle in the far northeast of the map. You don’t need levels (unless you’re doing the expedition properly), as you can simply run past everything.
- At the main entrance, instead of going inside, hug the west wall and run around to the far west of the building.
- Jump up via the Spirit Spring, and enter the northern door on the roof.
- Inside, and to the right, you’ll see a broken railing. Jump from this gap to the large white stone that’s hanging down from the roof.
- Jump from the stone to the rafters and look for a broken gap in the wall. Watch out for the enemy with the crossbow, who can sometimes spawn on the rafters.
- Head through this little corridor to find the Scholar. Interact with him, and you’ll obtain the Scholar’s Primal Core and 30,000 runes. Either finish the expedition or wait for it to end to return to the Roundtable Hold.
Next, go to the Chapel and find the Scholar. He’ll give you the Night-Hued Glass and Bundled Paper. Once you have those, you can leave the remembrance to receive the Undertaker’s Chalice.
The Chalice has a Green Slot, a Yellow Slot, and a Universal Slot.
Chapter 6 – To Cast the Night Asunder
You won’t find many hints about what to do next right now, but don’t worry! First, you need to defeat the Night Aspect – just like you normally would when finishing the game.
After the white screen appears, you’ll be outside the Roundtable Hold. Check your inventory, and you’ll discover a severed finger among your usable items.
Go inside and up to the expedition room, then continue through to the long corridor on the north side where you’ll find the figure. Before you speak to him, open your inventory and get rid of the finger, dropping it on the floor. If you do this correctly, the Undertaker will say, “This will do… I’m sure.”
Be careful and don’t hurry! If you keep the finger or put it in the incorrect spot, you’ll have to repeat the entire process. Take your time and watch the video above to see exactly how it’s done.
At this point, skip the cutscene, and you’ll receive the final rewards of the Remembrance Quest.
Rewards and Outfits
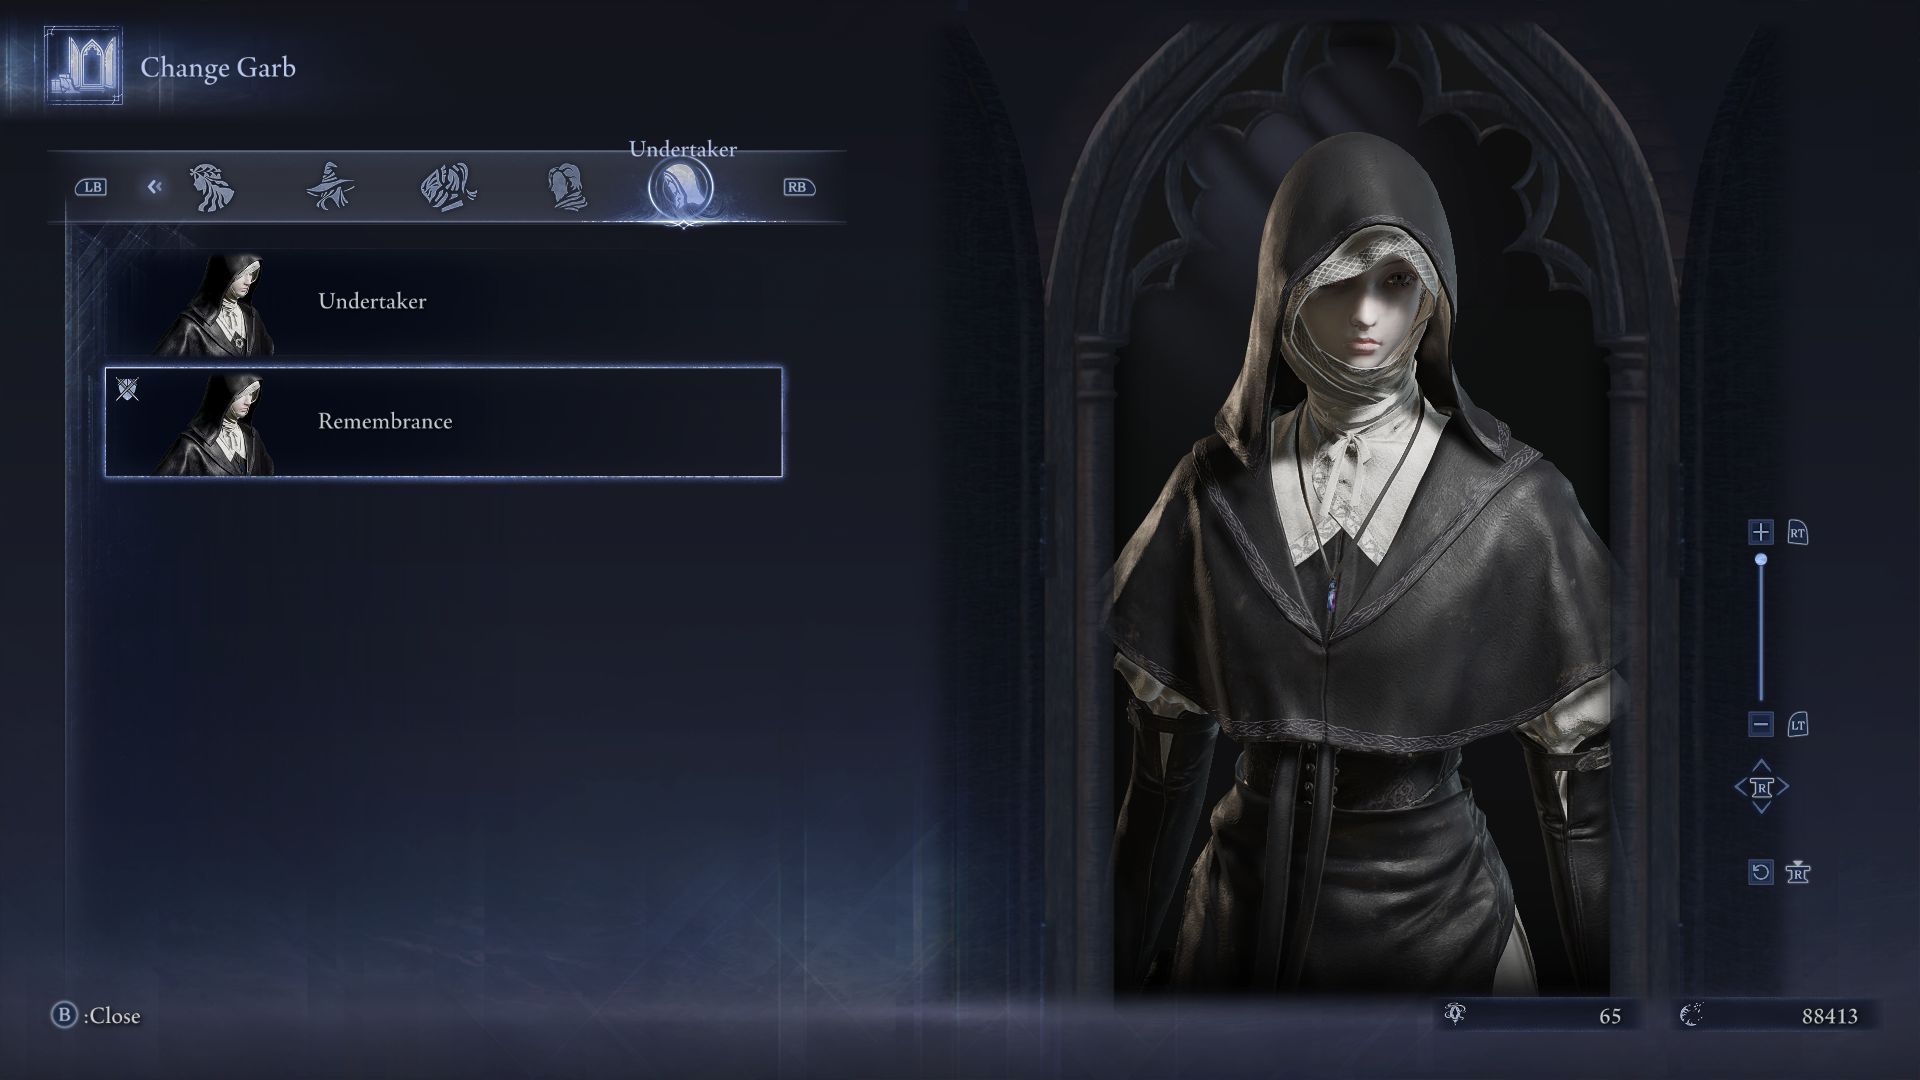
Once you finish this chapter, you’ll unlock the Remembrance Costume for the Undertaker. Take a close look – you’ll notice she’s wearing a new necklace with this outfit!
Additionally, you’ll receive the Glass Necklace, a Green Relic with the following bonuses:
- Activating Ultimate Art increases attack power
- Successive Attacks Boost Attack Power
- Ultimate Art Auto Charge +3
If you’re already using the Undertaker’s Chalice, you can also equip the Leather Monocle Case and another powerful yellow relic – like the Evergoal – along with the Stonesword key.
If you wish to unlock the other skins for the Undertaker, you’ll need to defeat the Dreglord first.
Read More
- When AI Teams Cheat: Lessons from Human Collusion
- 25 “Woke” Films That Used Black Trauma to Humanize White Leads
- From Bids to Best Policies: Smarter Auto-Bidding with Generative AI
- 20 Movies Where the Black Villain Was Secretly the Most Popular Character
- 22 Films Where the White Protagonist Is Canonically the Sidekick to a Black Lead
- Top 10 Coolest Things About Invincible (Mark Grayson)
- Silver Rate Forecast
- Top 20 Dinosaur Movies, Ranked
- Unmasking falsehoods: A New Approach to AI Truthfulness
- Gold Rate Forecast
2025-12-06 02:11