
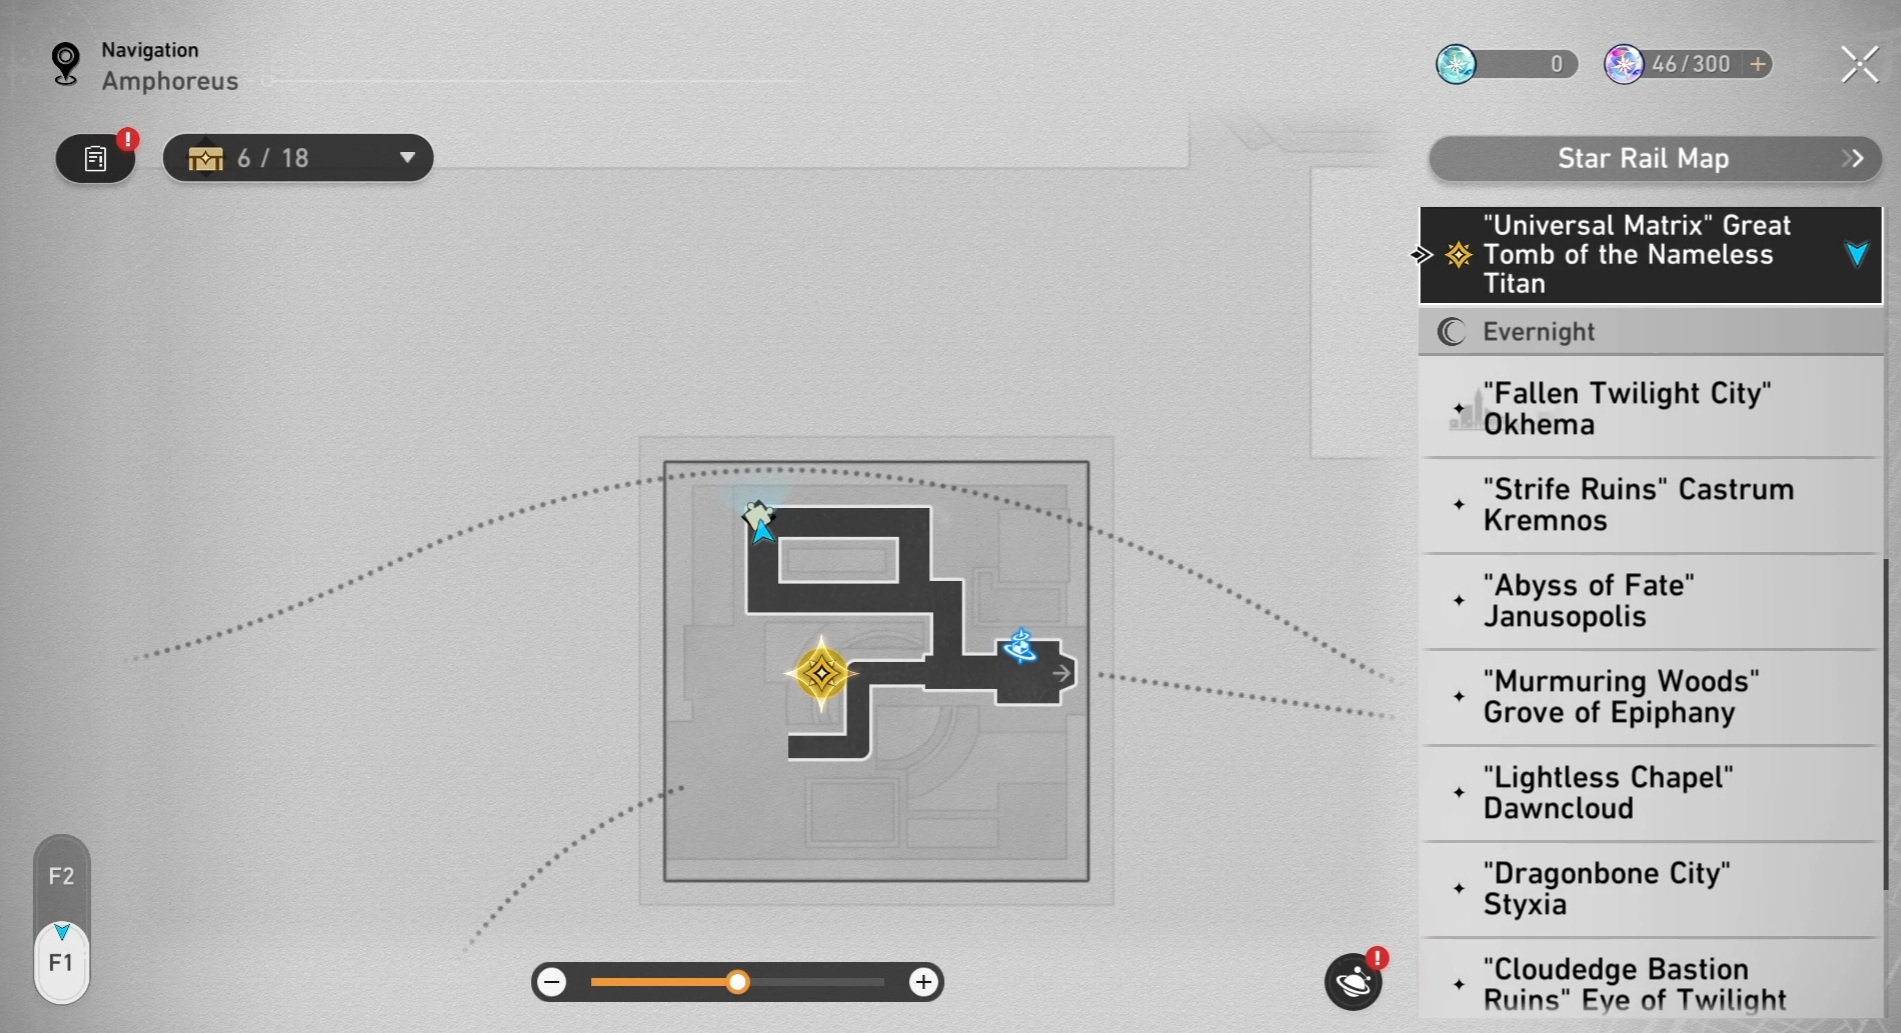
Honkai: Star Rail’s Version 3.6 update has added two new areas to explore on the planet Amphoreus. The Grove of Epiphany, also known as Radiant Scarwood, is a damaged landscape, and the Great Tomb of the Nameless Titan, called Universal Matrix, contains a major Amphoreus secret and a way to overcome the planet’s barriers.
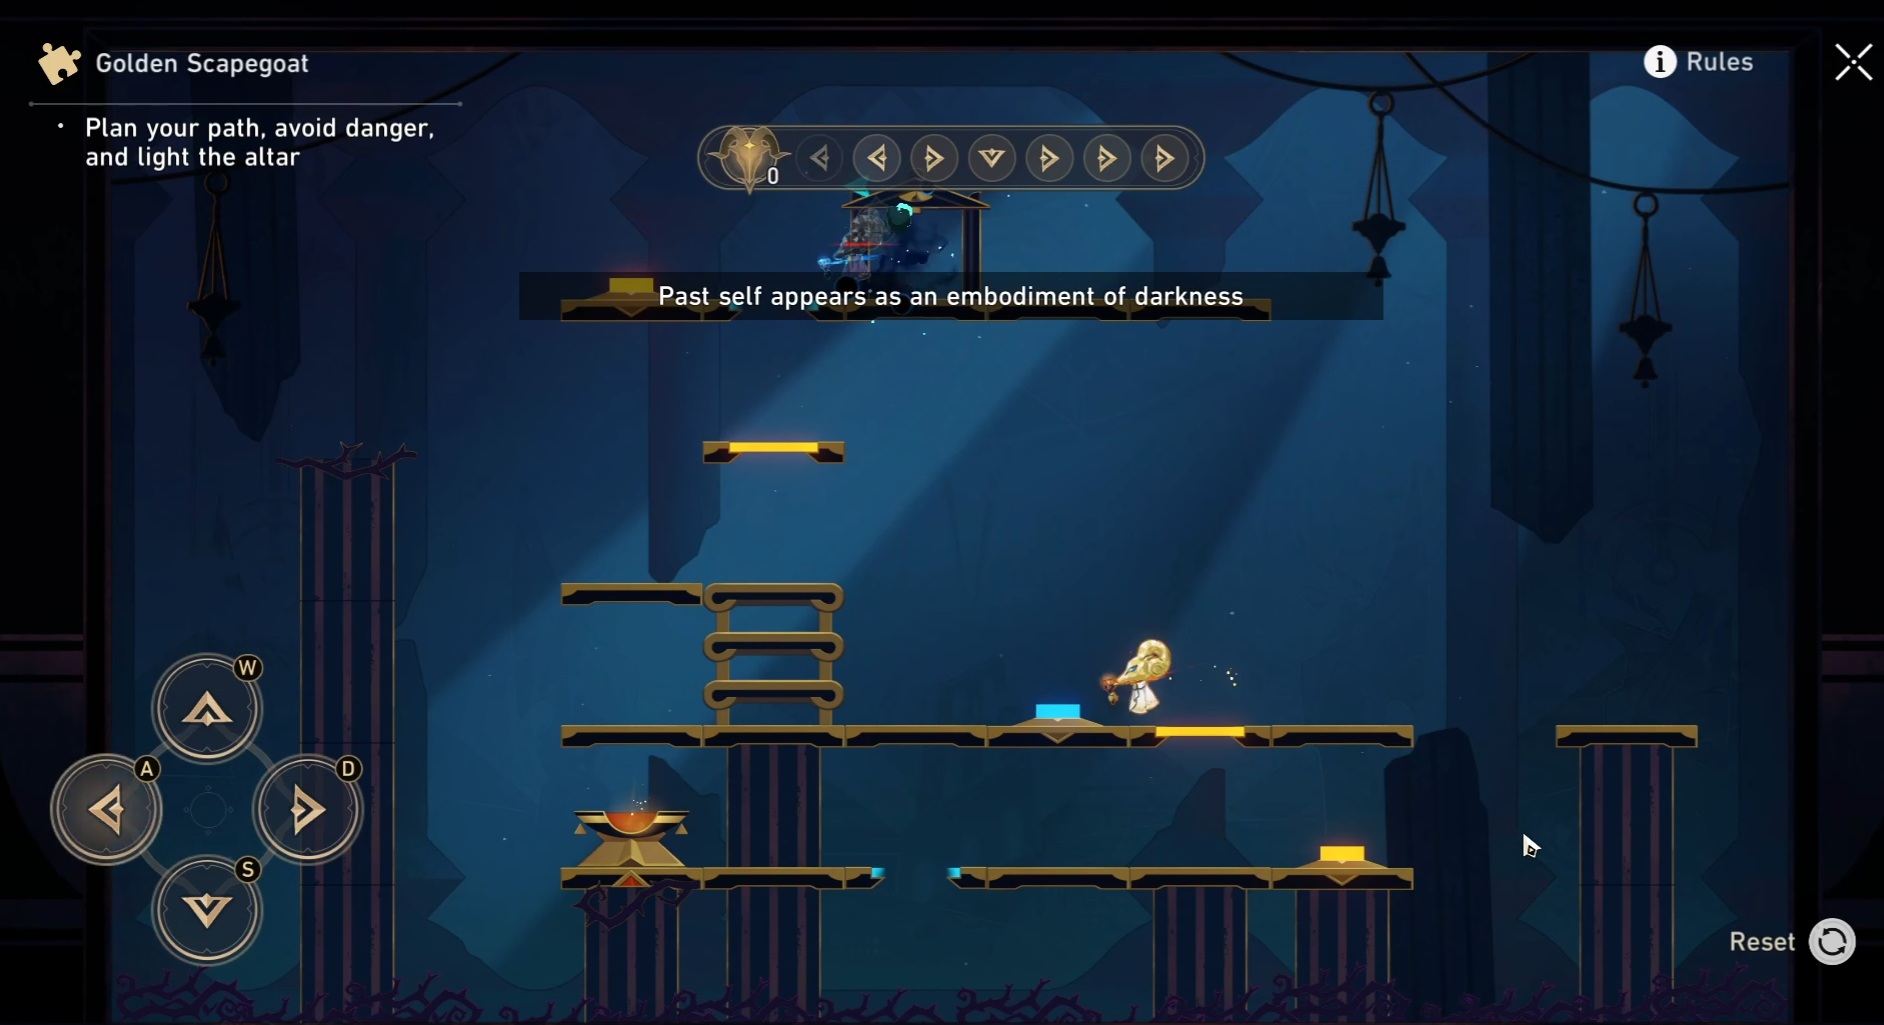
Following a long-standing tradition, each area features a Golden Scapegoat challenge. These challenges require you to guide a hapless goatman into a fiery sacrificial pit using the shadow he casts as your guide.
Find all HSR 3.6 Golden Scapegoat locations and solutions below.
Golden Scapegoats in Grove of Epiphany (Radiant Scarwood)
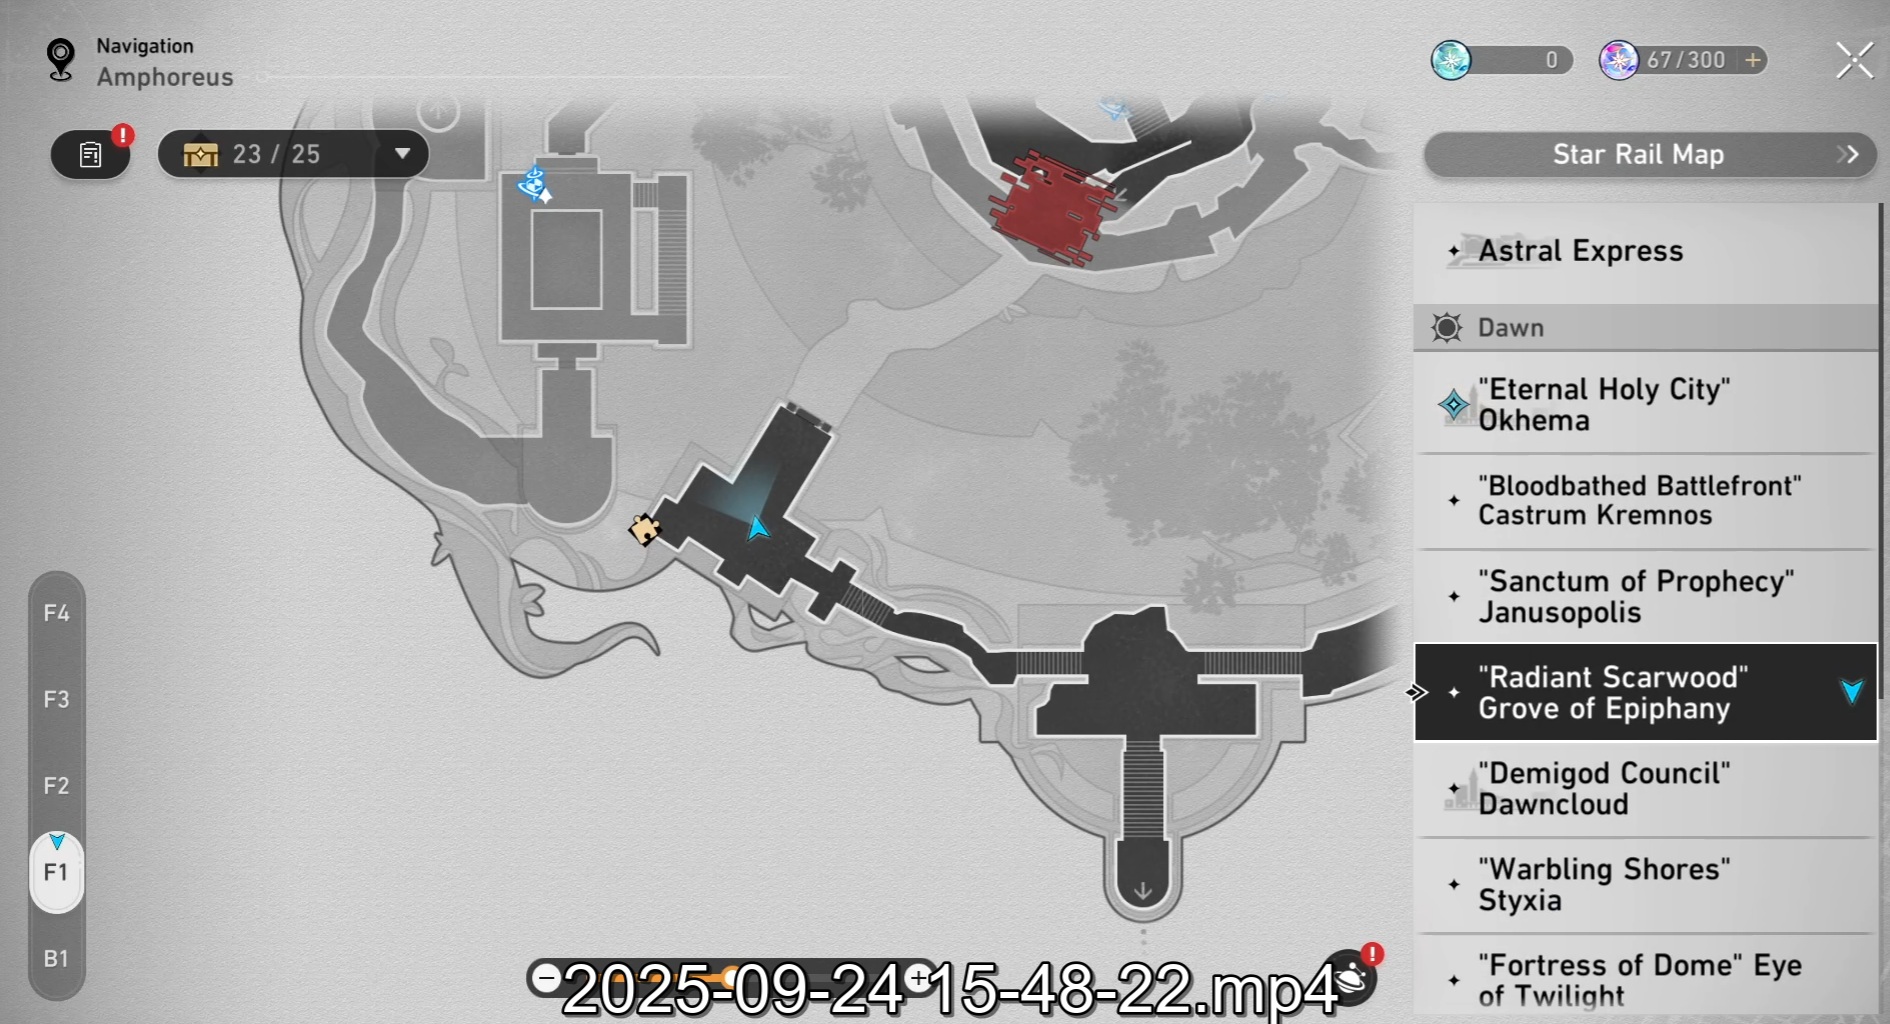
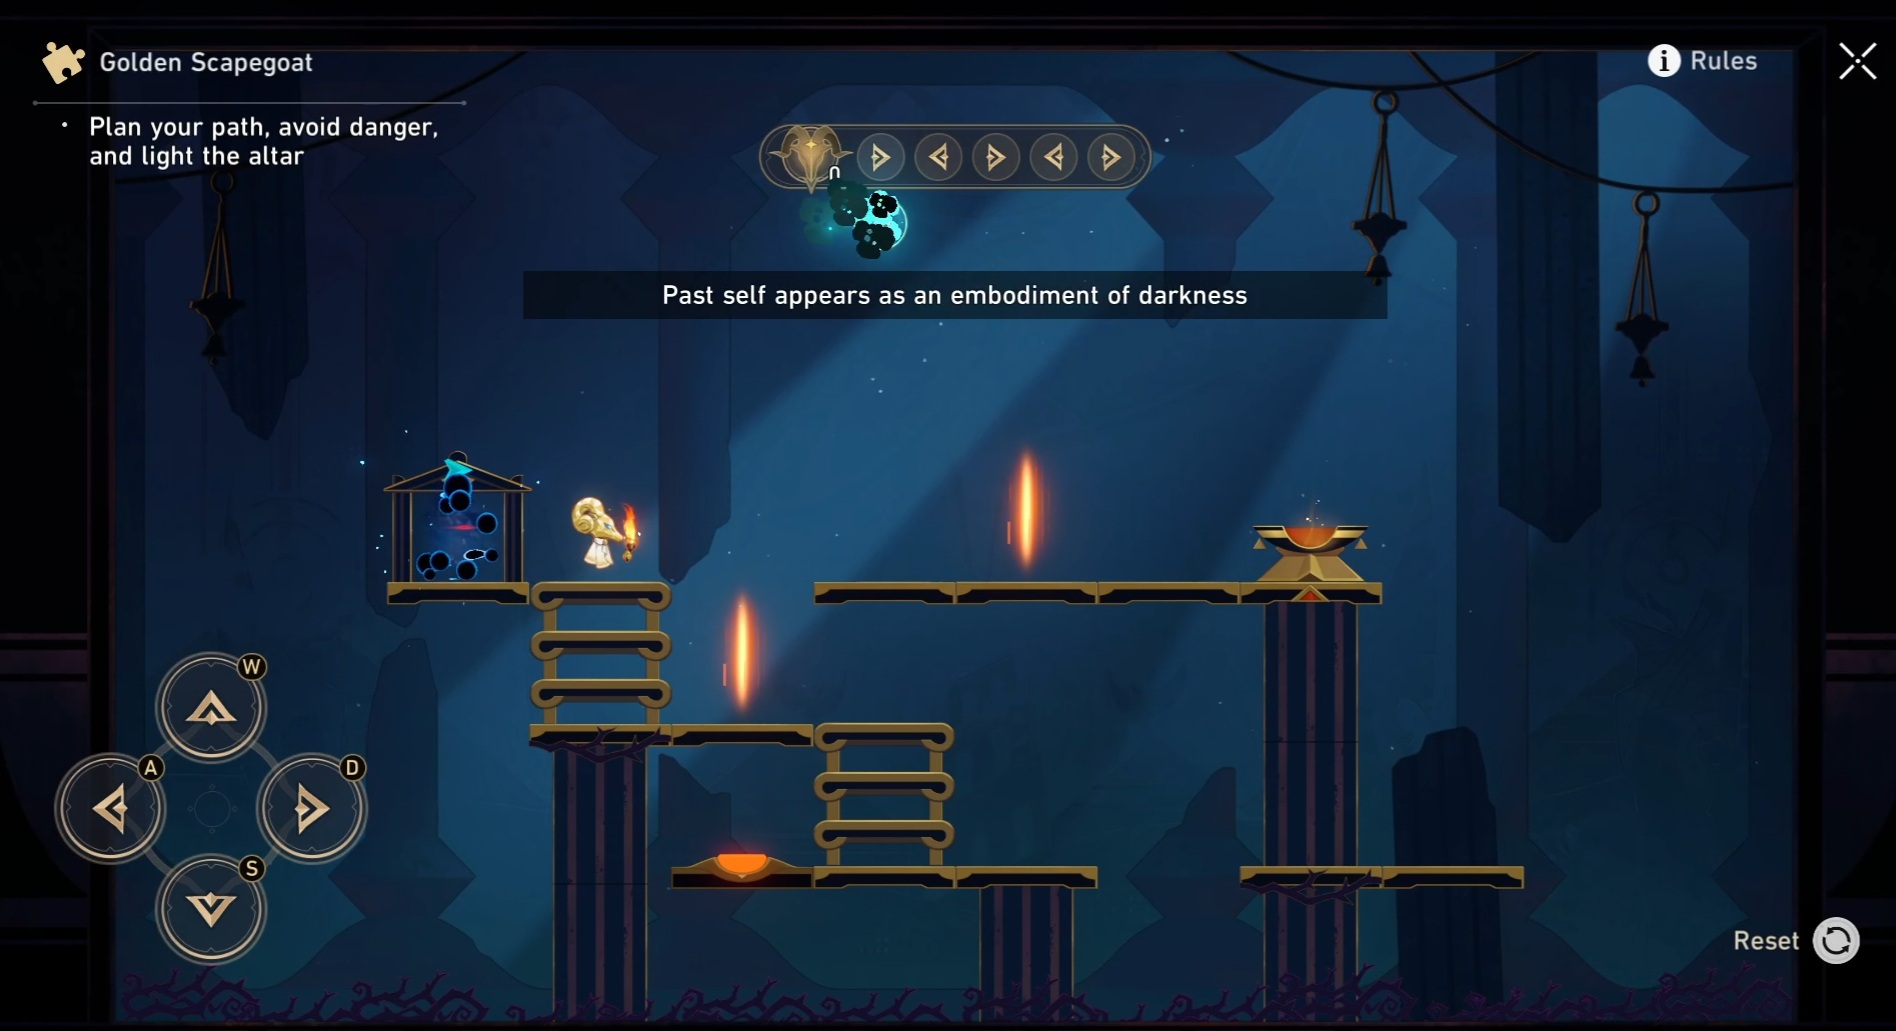
Golden Scapegoat #1
Location:
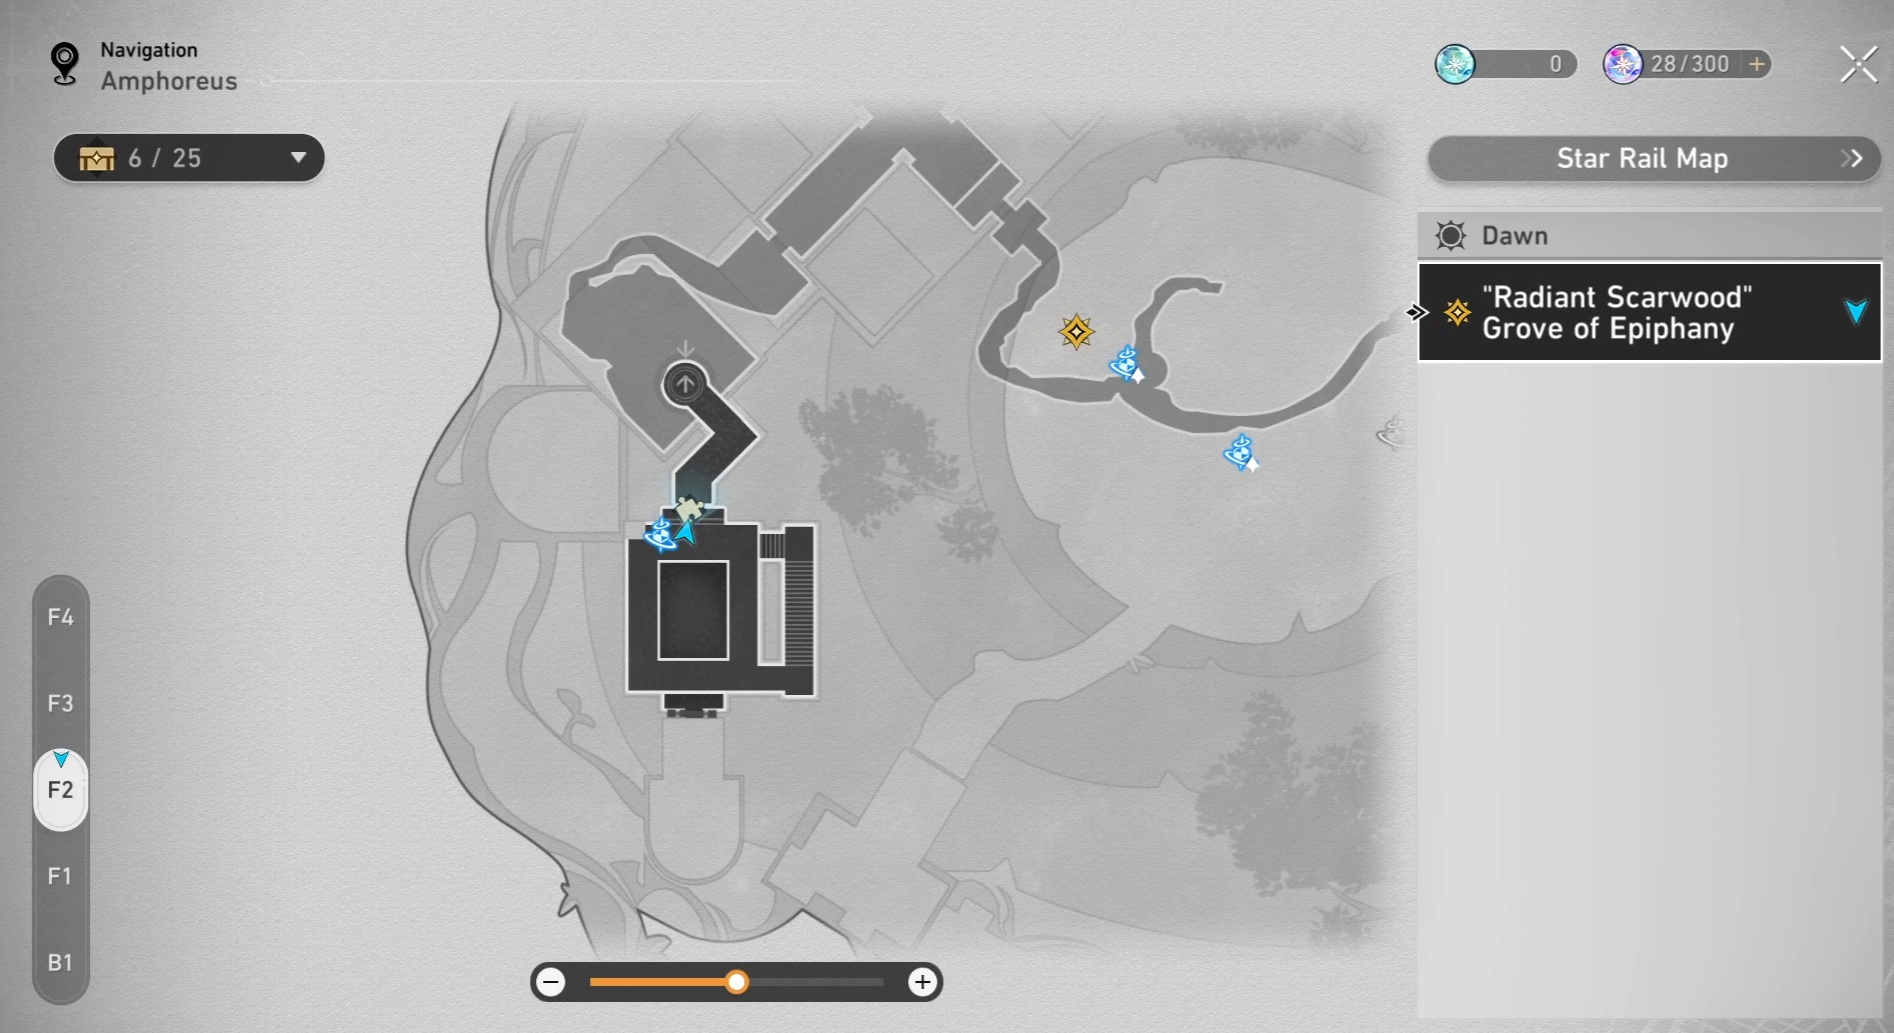
Solution: Right, Left, Right, Right, Left
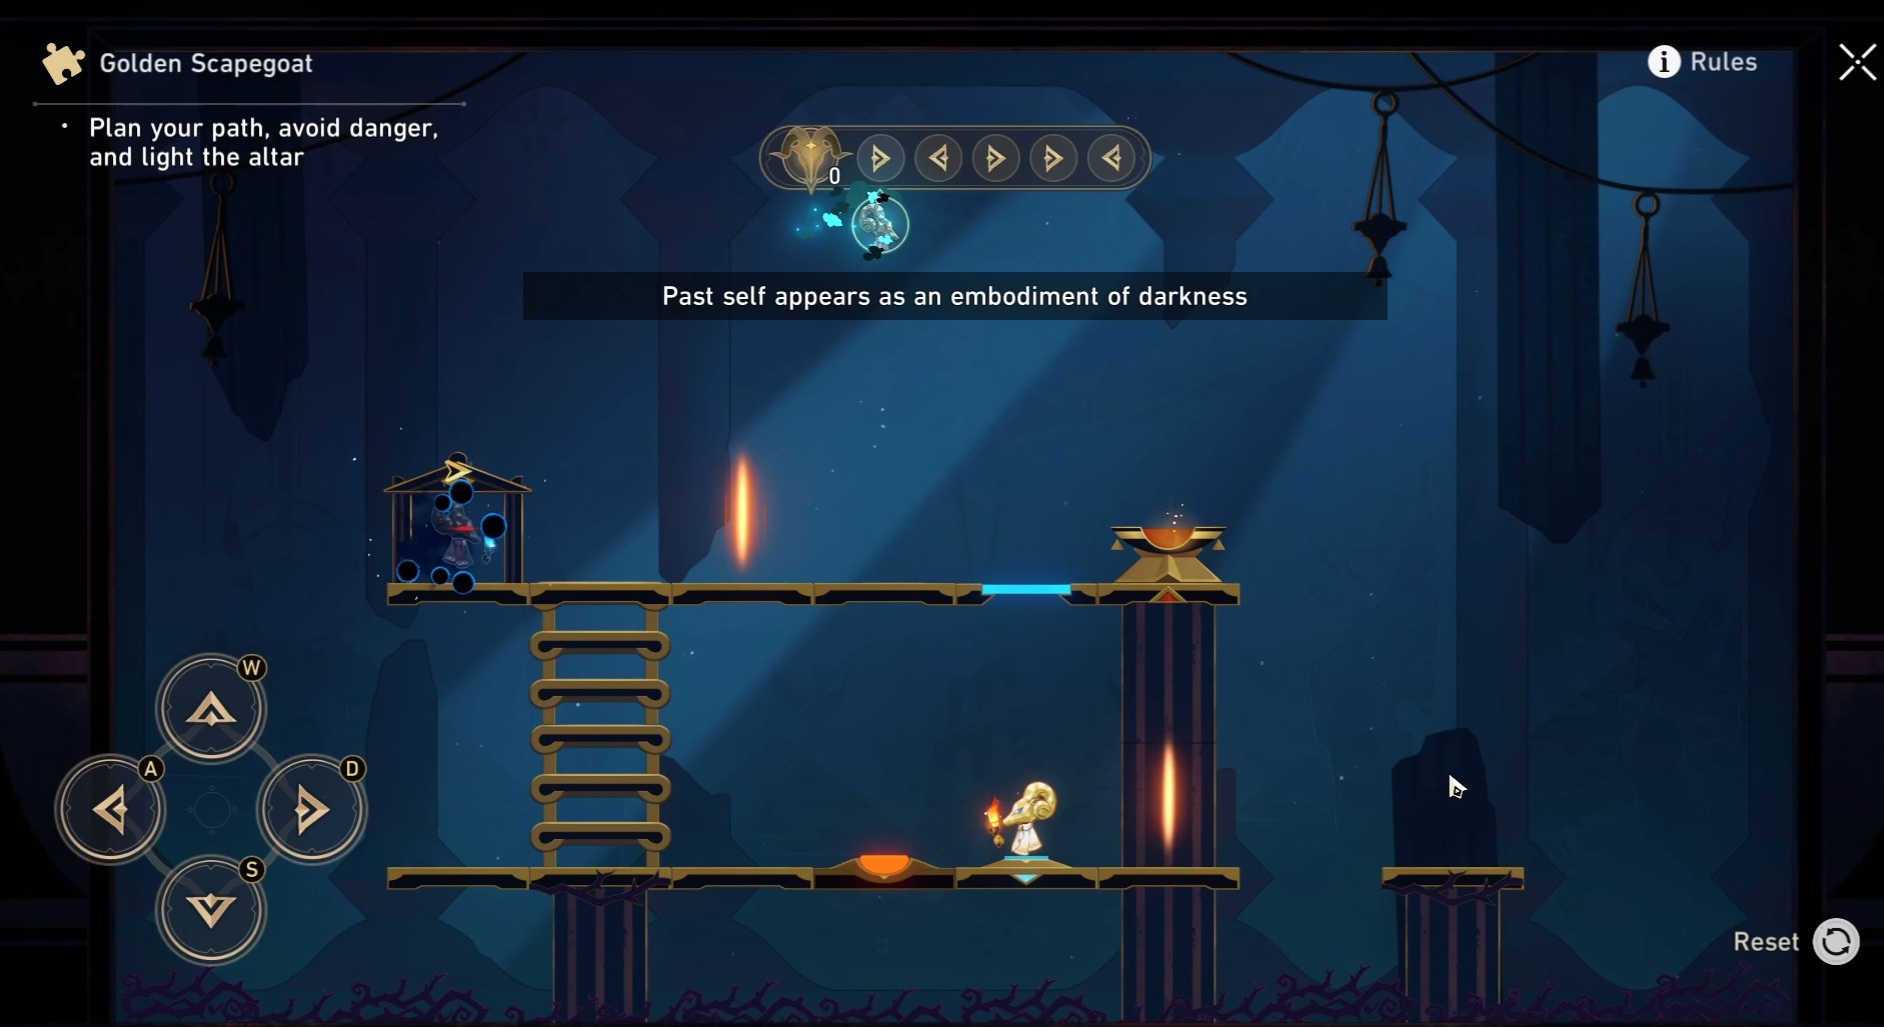
Right after leaving the starting area, turn around and step onto the teleporter. It will take you to the floor below. From there, just keep moving to the left – this will reset the teleporter and bring your shadow down to the same level. Your shadow will then be able to press the blue button for you. After that, go back up, past the teleporter (which will be inactive now), and jump into the fire.
Golden Scapegoat #2
You can only reach the Golden Scapegoat puzzle after finishing Bartholos’ side quest in this area. Completing the quest drains the water, giving you access to the lower levels where the puzzle is located.
Location:
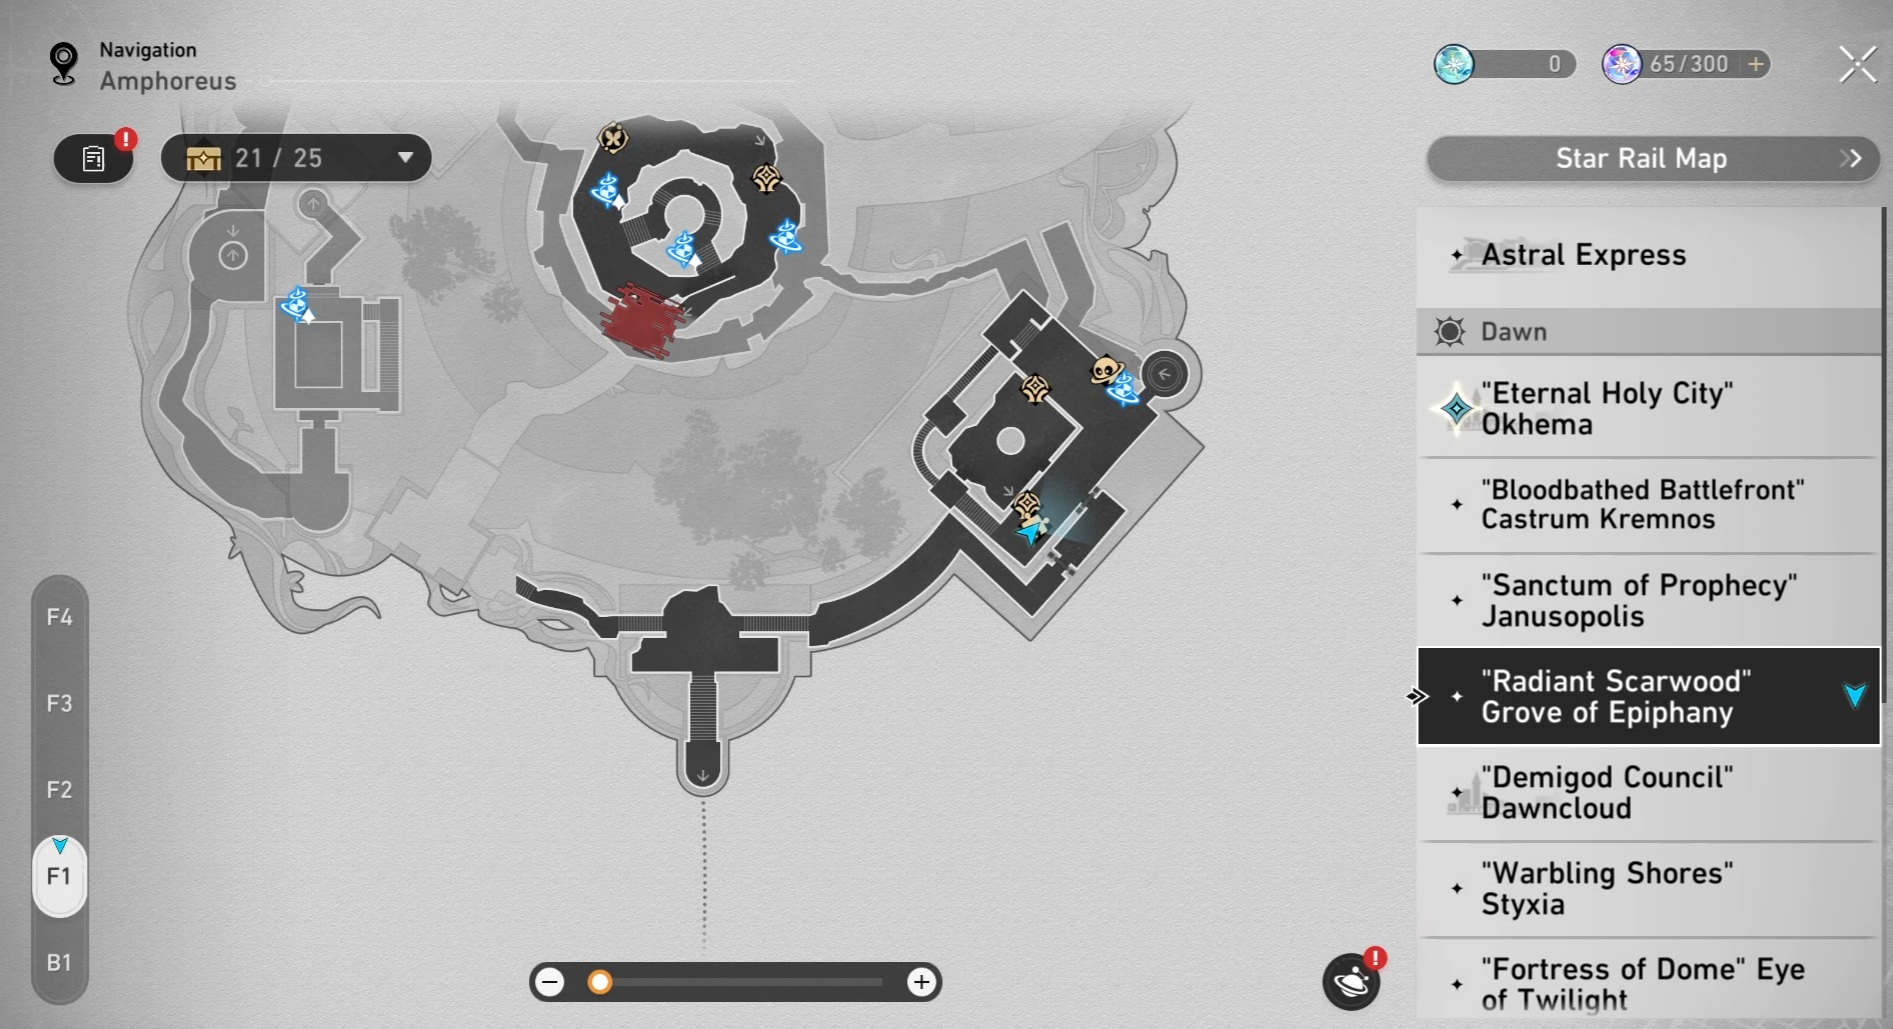
Solution: Right, Right, Left, Left, Right, Right, Right, Right, Right, Left
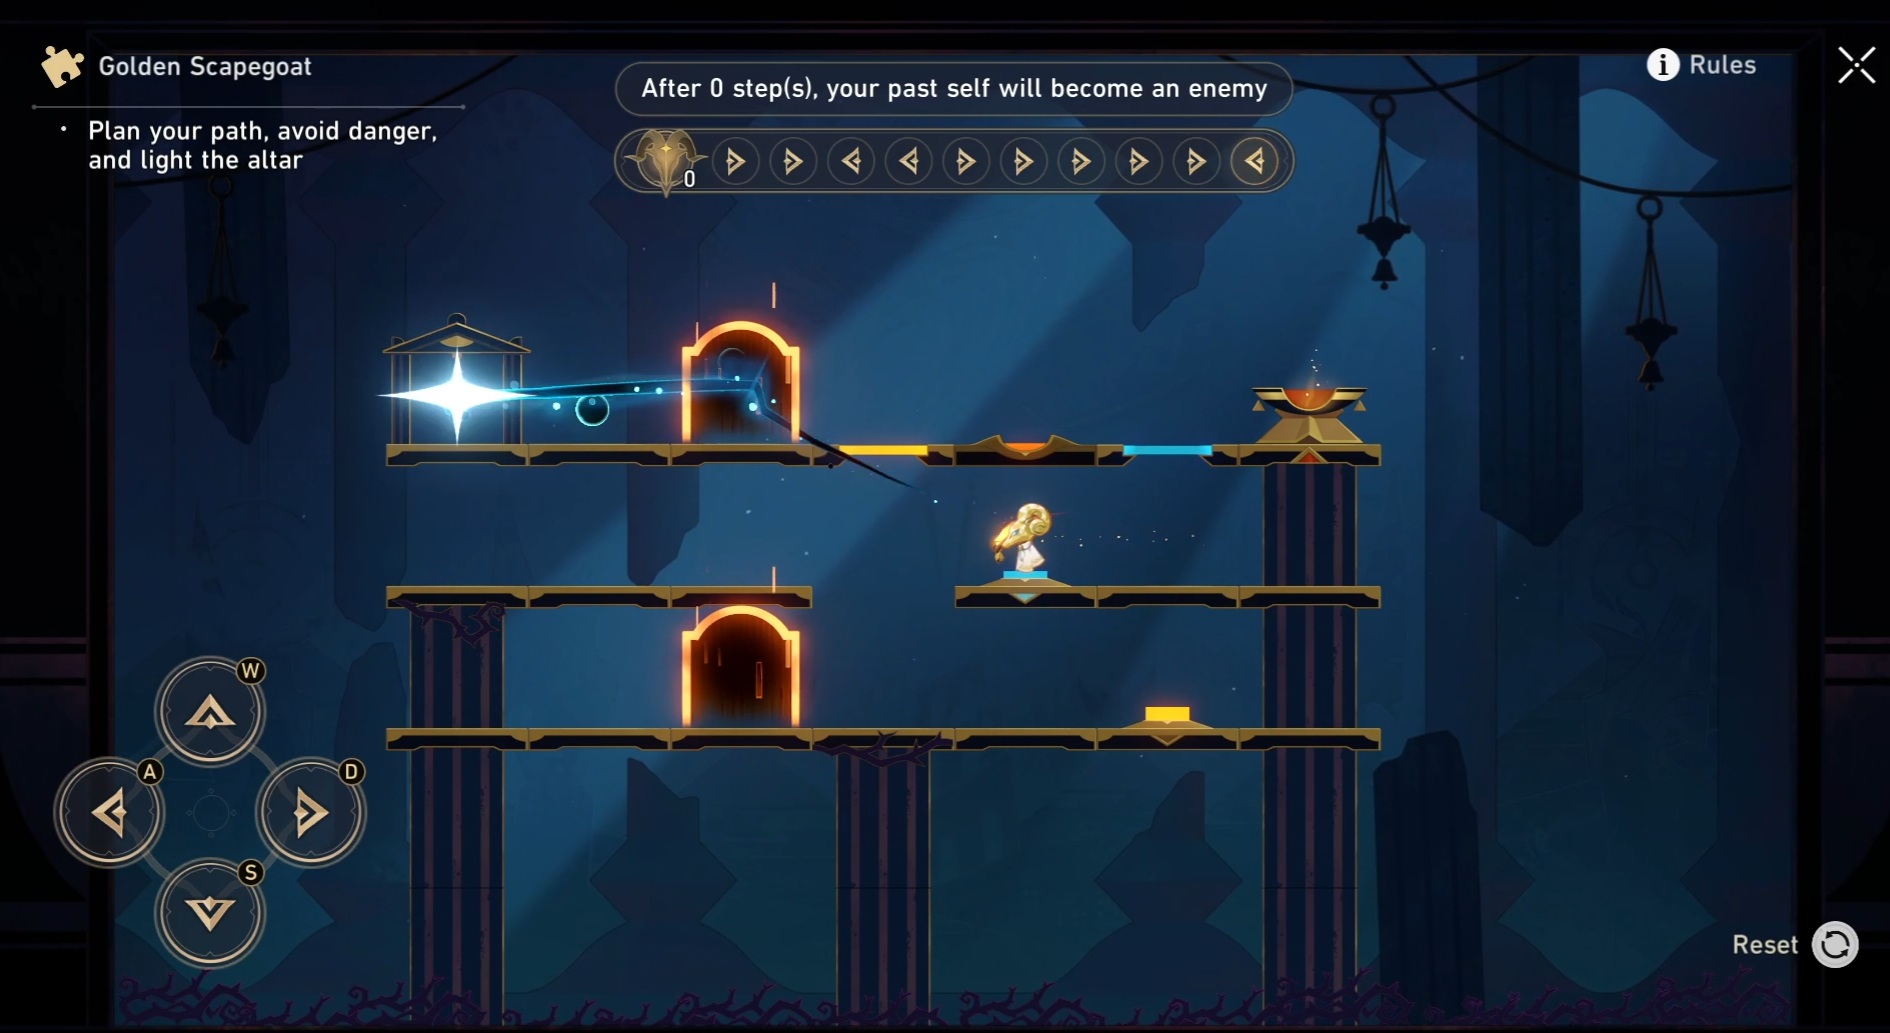
Okay, so I started by going right twice, then I turned around and went back the way I came. After that, I went right five times, and finally took one step to the left. If I did it right, I should be standing right on that blue button on the middle level now!
First, go to the teleporter on the lower level to swap places with your shadow. Then, return to the top level and move to the right to activate the teleporter again. Finally, go back and swap places with your shadow one more time.
Once the shadowy figure appears, it will automatically restart the teleporter, descend to the floor below, and press the blue button, opening the path to the pyre.
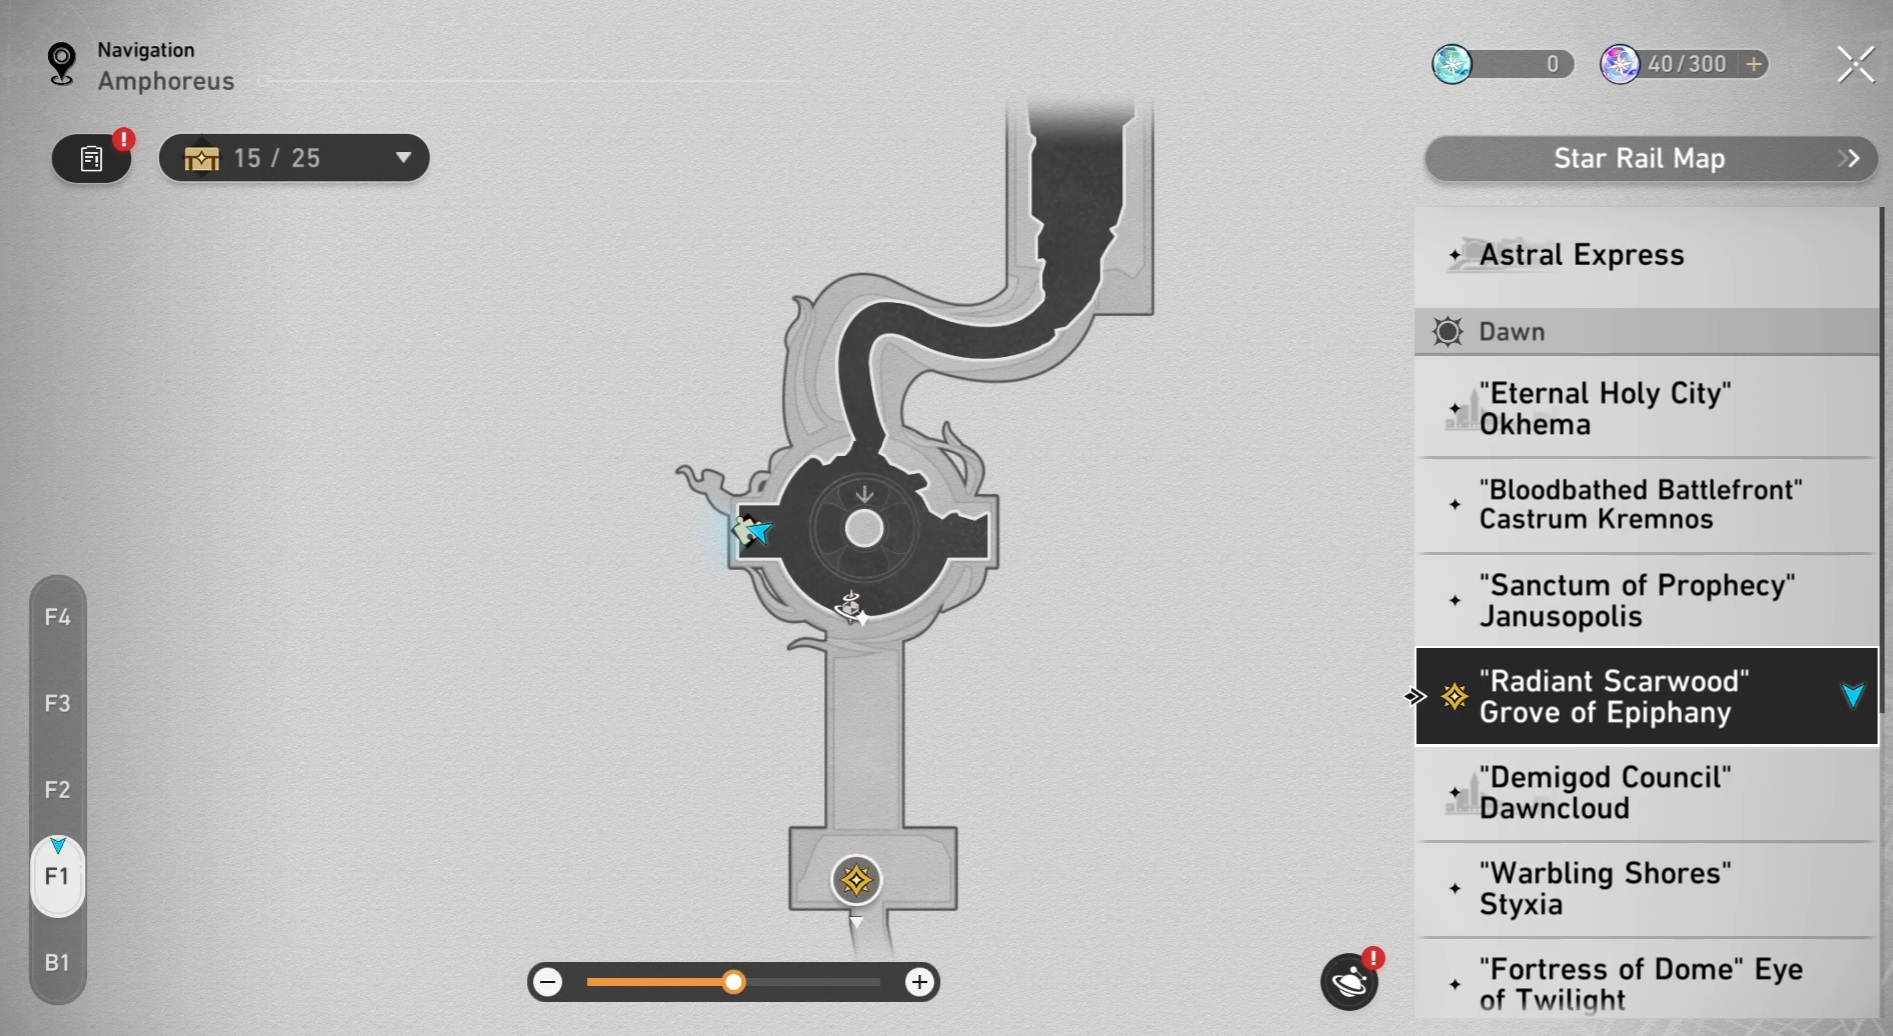
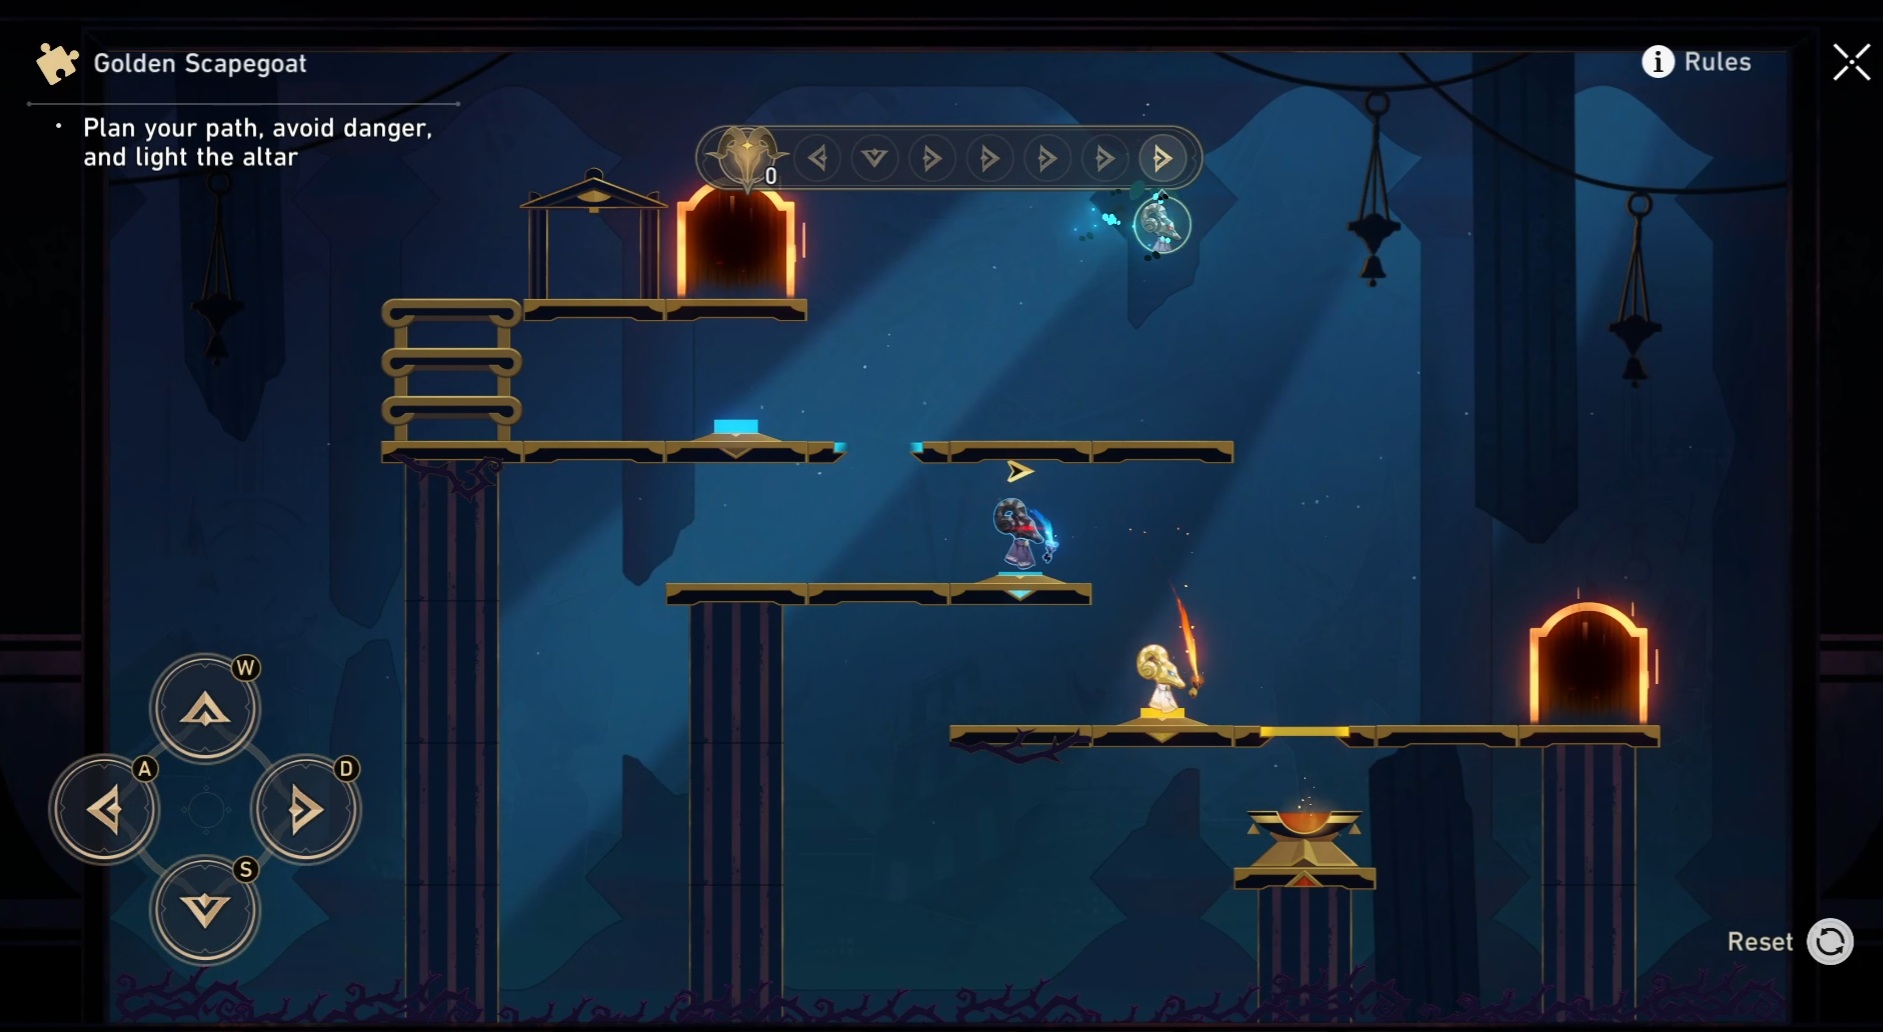
Golden Scapegoat #3
Location:
Solution: Right, Left, Right, Left, Right
The puzzle is complete! Now, just go to the orange button to activate the teleporter. To do that, you need to carefully move back and forth to keep your shadow from touching anything, keeping it within its starting area.
Golden Scapegoat #4
Location:
Solution: Left, Down, Right, Right, Right, Right, Right
Don’t use the teleporter. Instead, go left and climb down the ladder, then move to the edge of the second level. When your shadow appears, get one space ahead of it and keep that distance as you walk towards the pyre. Both you and your shadow will fall to the bottom level, allowing you to jump into the pyre.
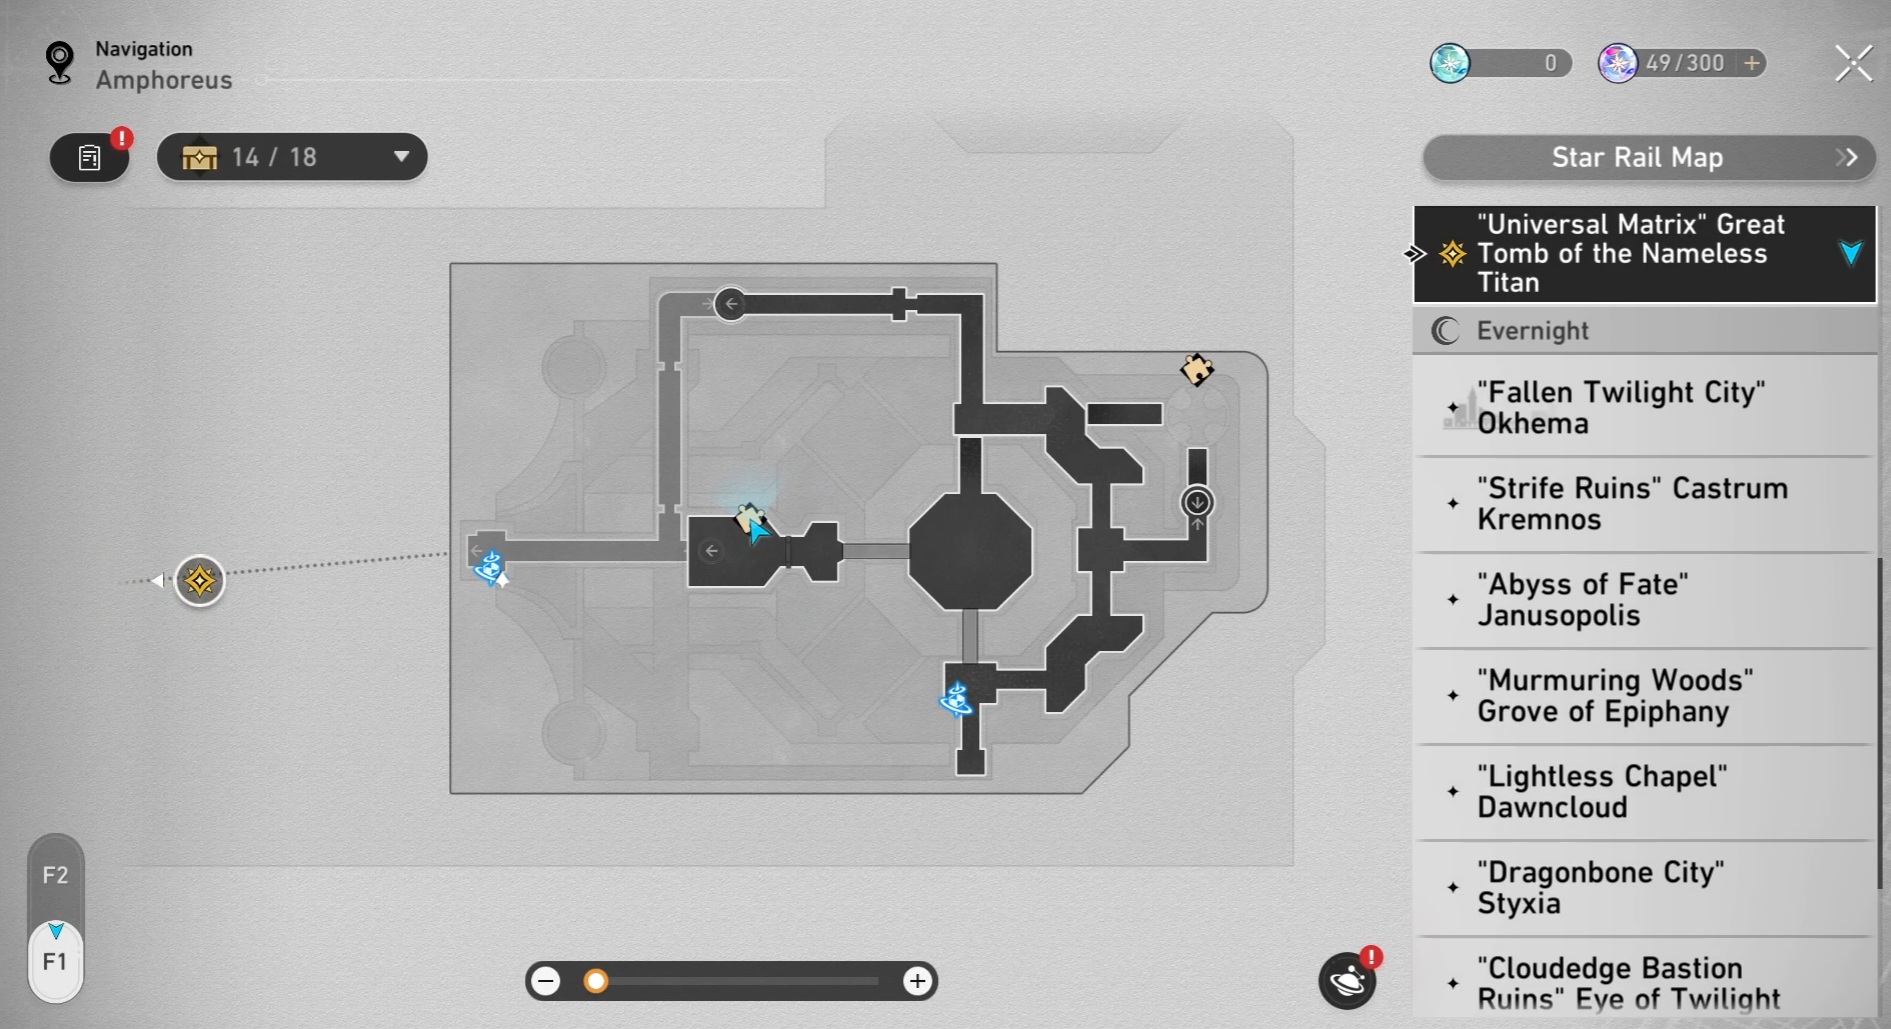
Golden Scapegoats in Great Tomb of the Nameless Titan (Universal Matrix)
Golden Scapegoat #1
Location:
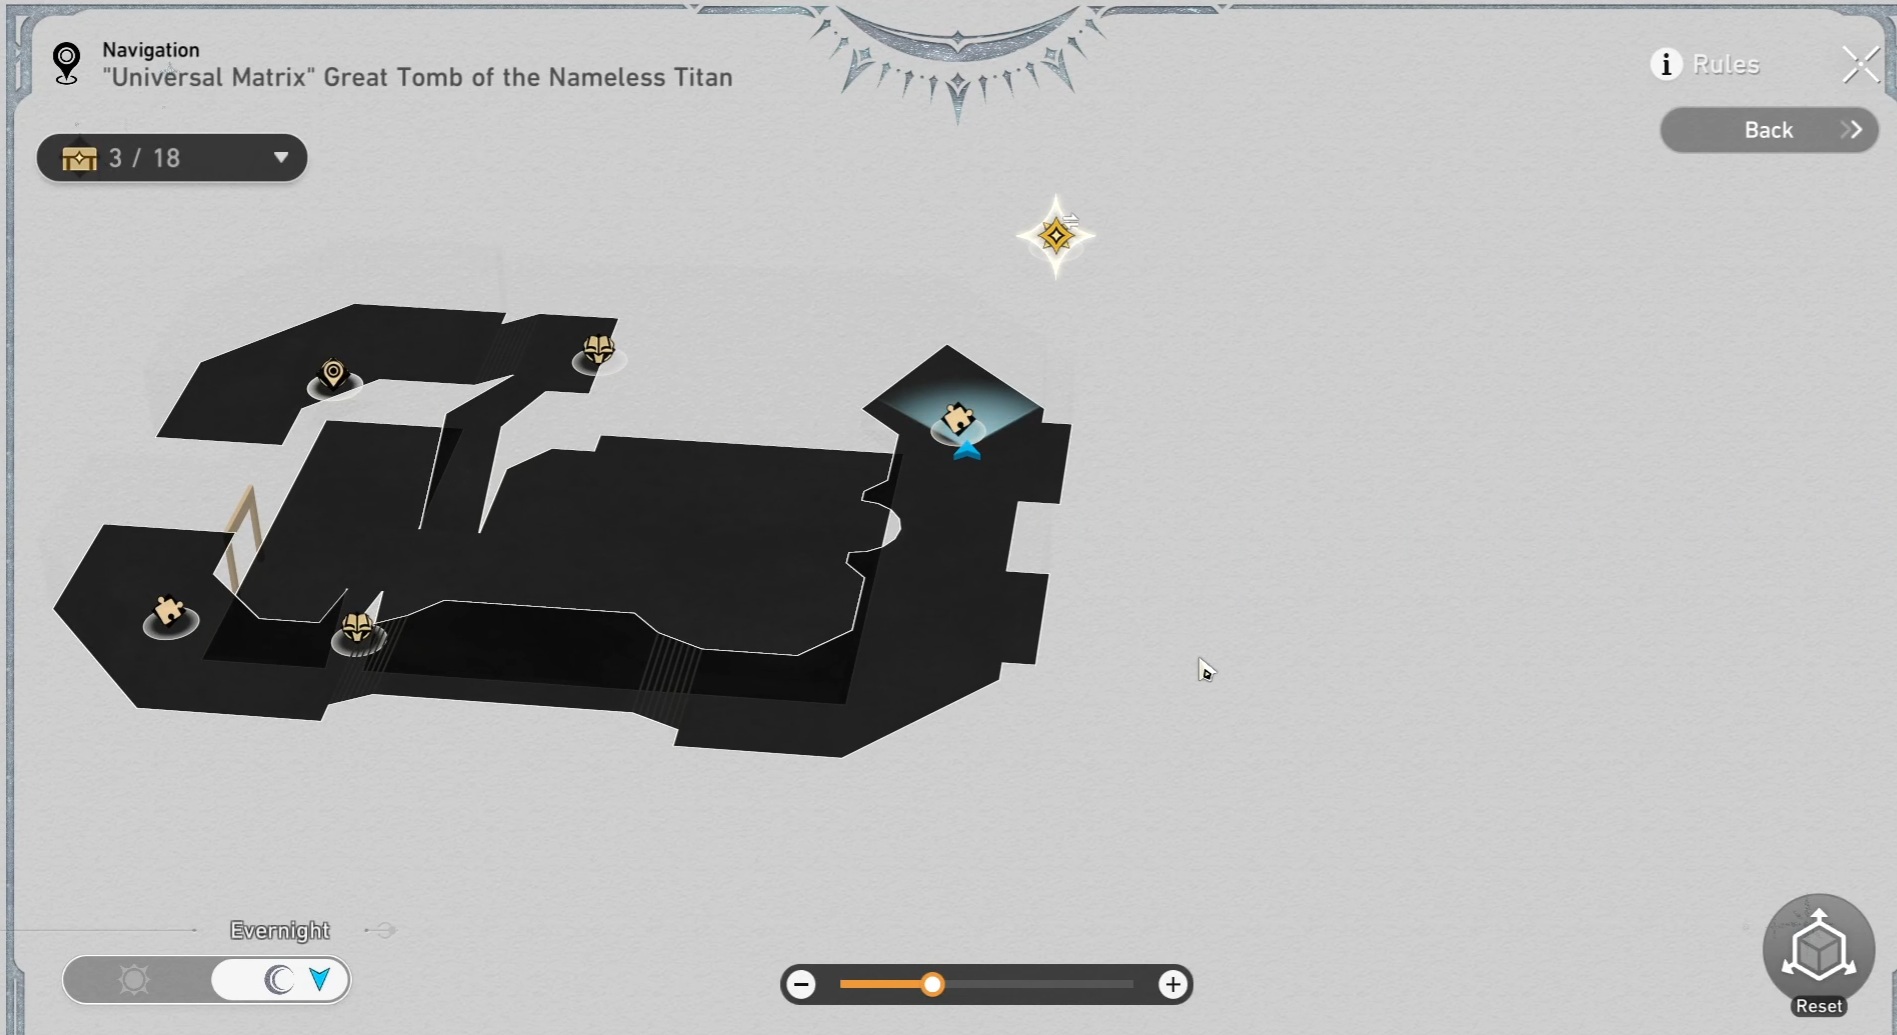
Solution: Left, Left, Right, Down, Right, Right, Left
Turn left twice, then climb back onto the ladder. Descend the ladder, jump to the lower level by moving right twice, and finally step onto the yellow button.
Keep heading left without hesitation to reach the blue trapdoors. As you move, your shadow will create bridges from them at the last moment. Continue left until you’ve crossed the gap, and your shadow will simultaneously extend a yellow bridge as well.
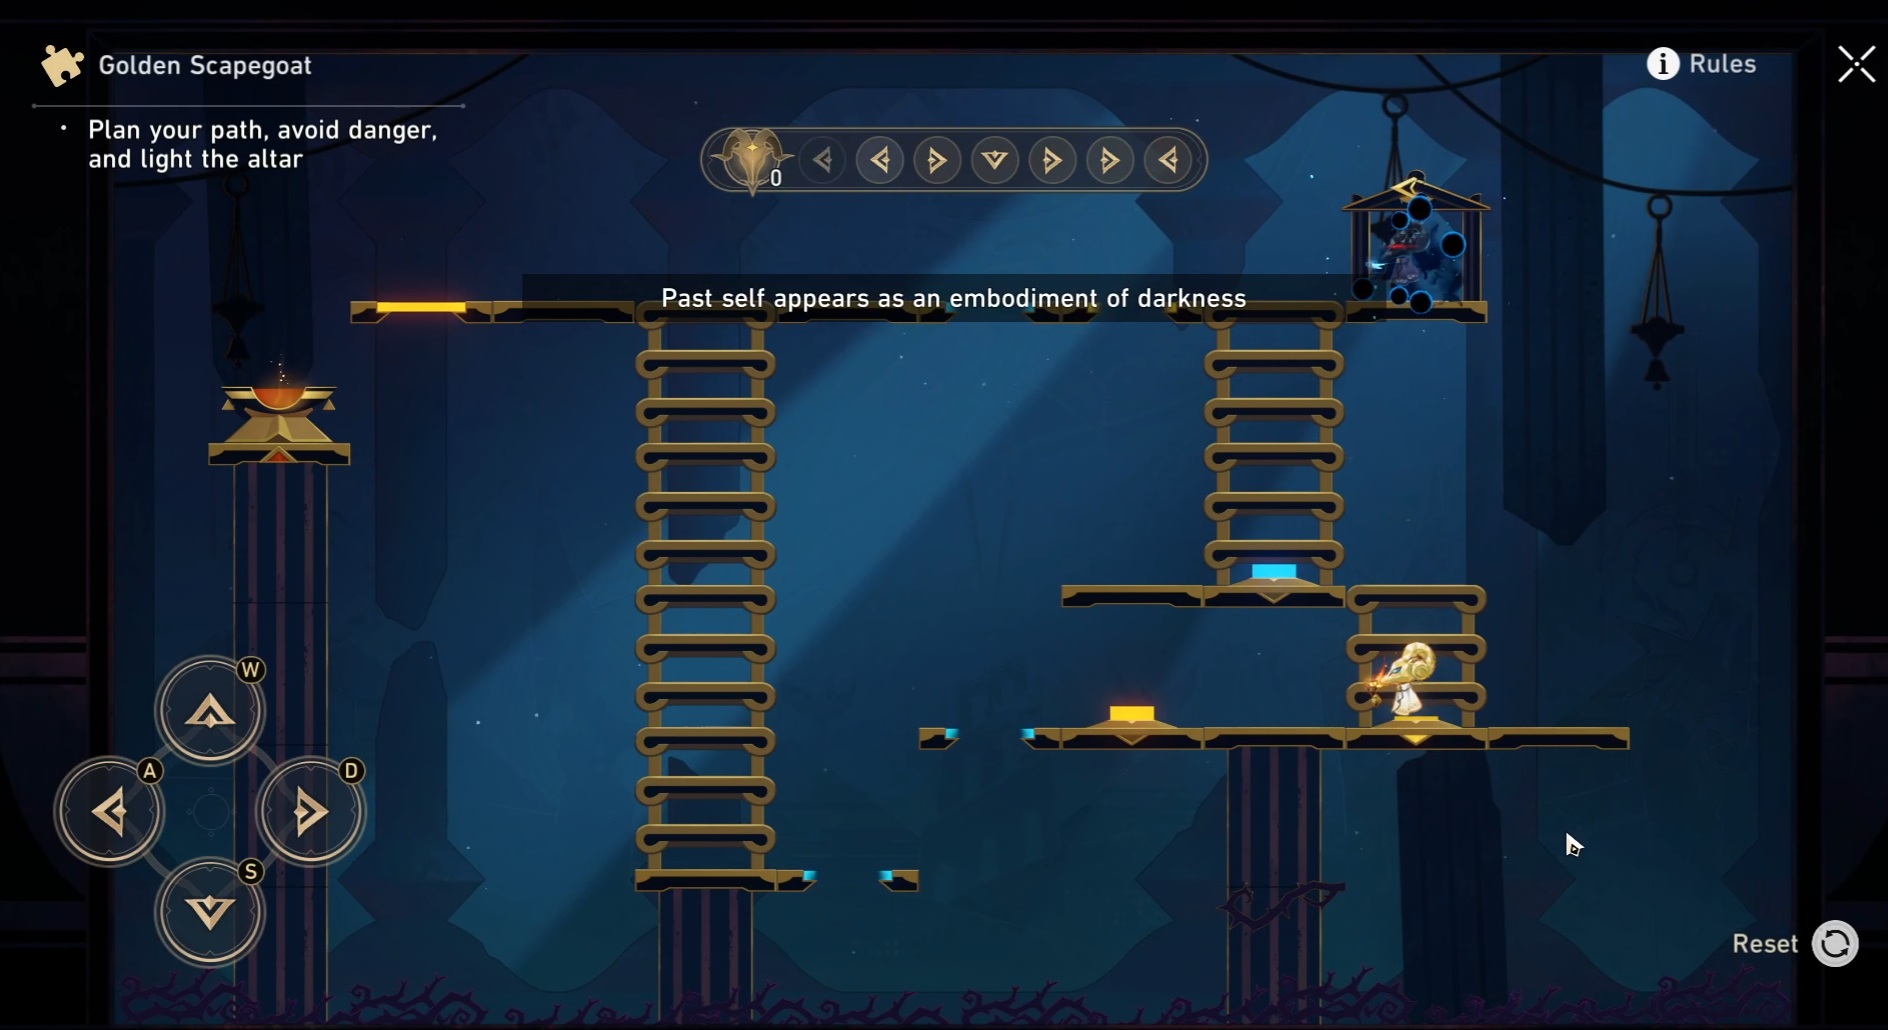
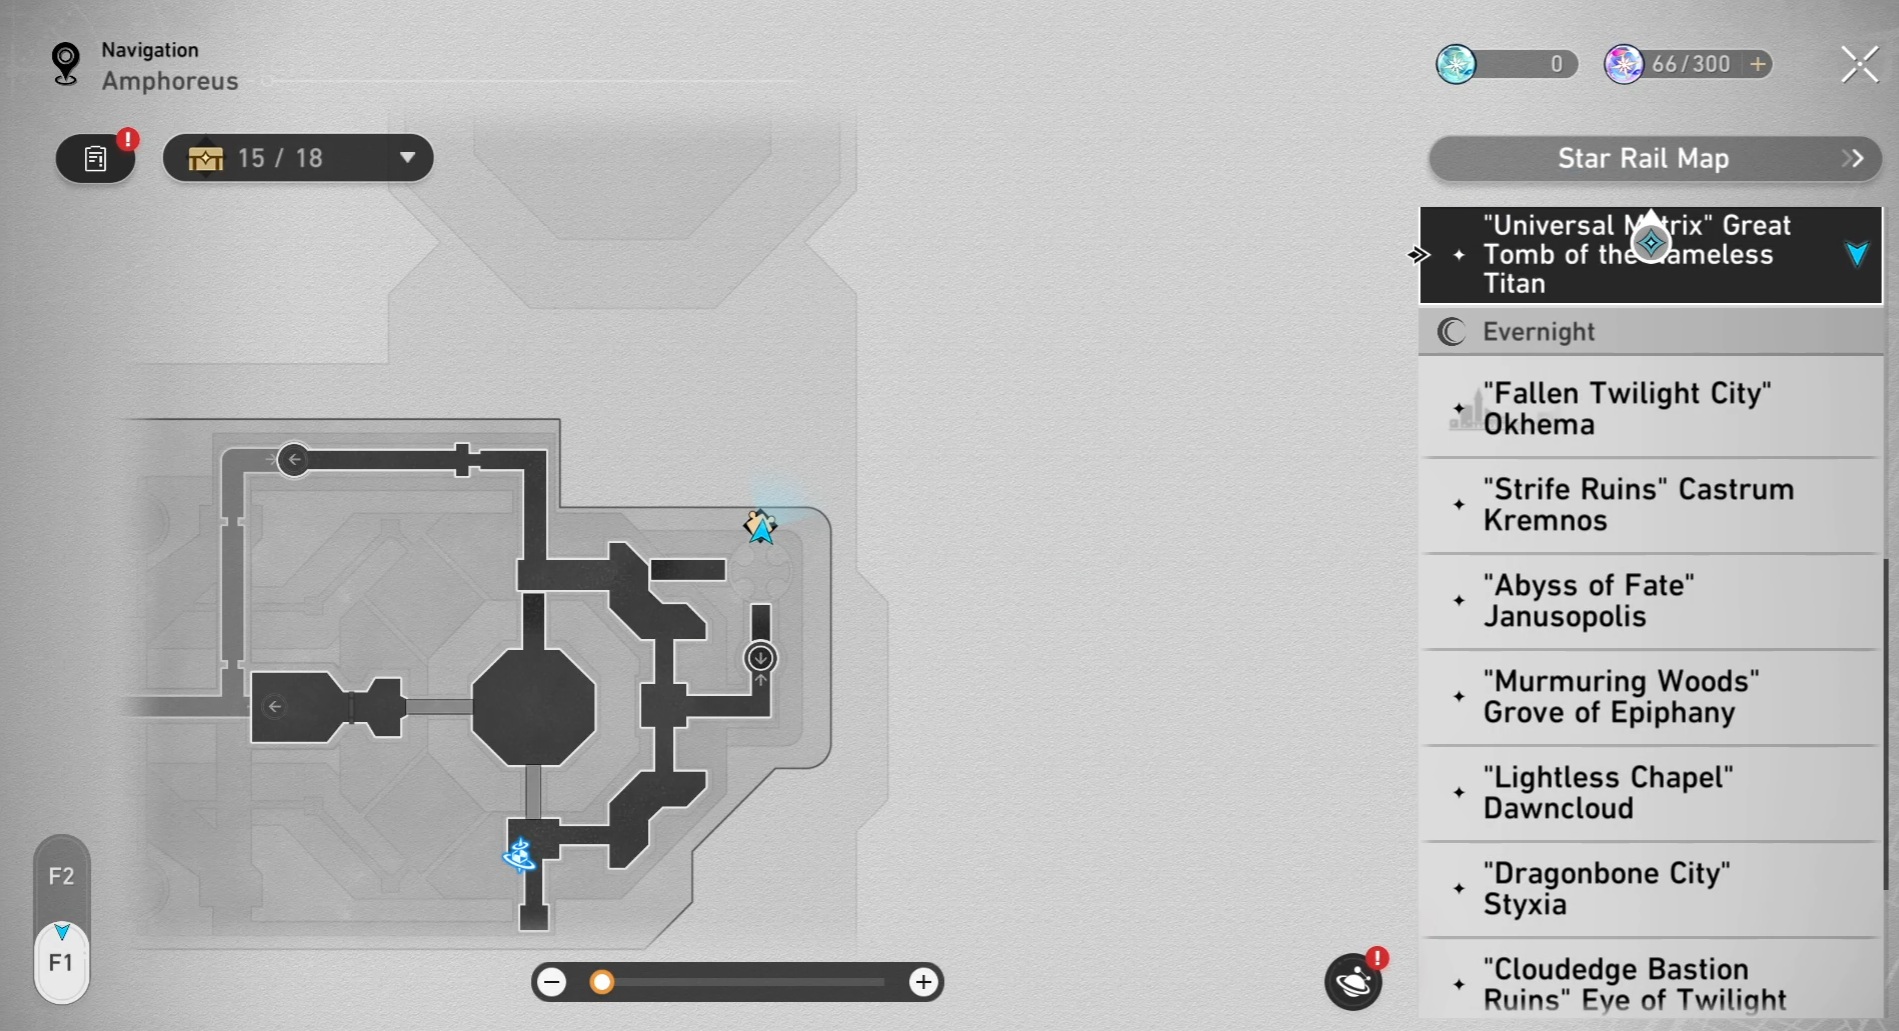
Golden Scapegoat #2
Location:
Solution: Left, Left, Left, Right, Left
Don’t use the teleporter. Instead, turn left three times in a row to reach the platform with the blue button. Step onto the button, then quickly run back to the teleporter and jump down onto the blue bridge. The bridge will appear as your shadow crosses over the button.
Golden Scapegoat #3
Location:
Solution: Left, Left, Right, Down, Right, Right, Right
Start by dropping down to the left side of the starting area. Climb the ladder to reach the platform with the blue button. Once you reach the yellow bridge, quickly turn left and press the blue button. This will make your shadow open the yellow bridge. Next, jump down to the lower level and activate the yellow button, which will cause your shadow to fall. This allows your shadow to move forward and activate the blue bridge that leads to the pyre.
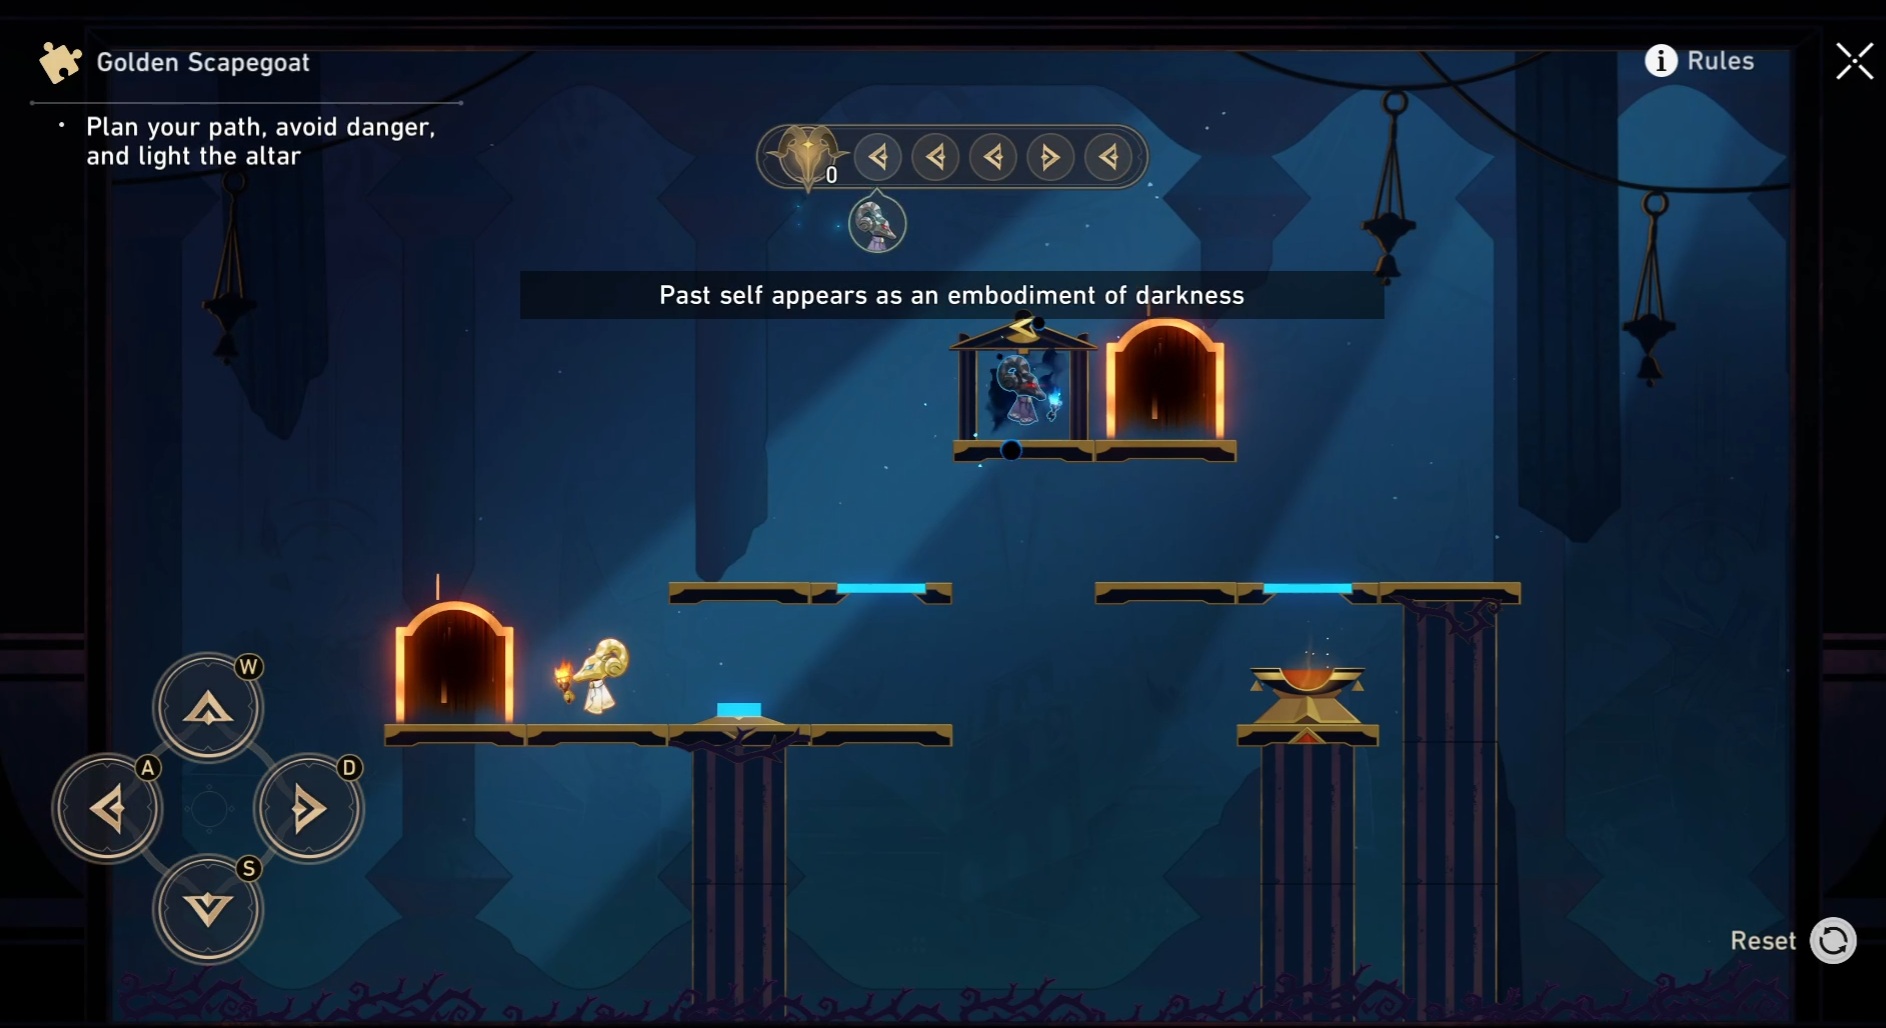
Golden Scapegoat #4
Location:
Solution: Left, Left, Left, Right, Left, Left, Right, Right

After you start, turn left three times. Then, briefly move back and forth before going to the area with the blue button. Once there, continue heading right – your shadow will appear and activate the yellow button right as you get to the bridge, opening the path to the pyre.
Need help with older puzzles? You can find solutions for the Golden Scapegoat challenges in Honkai: Star Rail versions 3.3, 3.4, and 3.5. We also offer a full guide for the Aedes Elysiae area.
Read More
- Invincible Season 4 Gender Swaps Tech Jacket As Fans Question Major Comic Change
- Gold Rate Forecast
- 22 Films Where the White Protagonist Is Canonically the Sidekick to a Black Lead
- Unveiling the Schwab U.S. Dividend Equity ETF: A Portent of Financial Growth
- Why Won’t It Just *Do* What You Ask? Unpacking the Quirks of AI Language
- Superman Flops Financially: $350M Budget, Still No Profit (Scoop Confirmed)
- The Best Former NFL Players Turned Actors, Ranked
- Silver Rate Forecast
- 14 Movies Where the Black Character Refuses to Save the White Protagonist
- New HELLRAISER Video Game Brings Back Clive Barker and Original Pinhead, Doug Bradley
2025-09-24 18:17