
Just like its previous editions, Monster Hunter Wilds recently launched its first joint venture. Since it’s developed and distributed by Capcom, the series has a history of internal collaborations, often incorporating characters from other popular franchises such as Devil May Cry and Resident Evil.
As a dedicated gamer in Monster Hunter Wilds, I’m thrilled about this partnership that brings an exciting event quest. This quest offers currency that lets me craft exclusive armor sets, inspired by the iconic characters from Street Fighter 6! The sets on offer are a lively Palico set modeled after the electrifying Blanka and a fearsome hunter set based on the notorious Akuma.
The full Akuma set, in particular, offers something extraordinary – a unique move set for my hunter, which can surprisingly serve as an effective playstyle and build. So, here’s a guide on how to obtain the Street Fighter-themed armor sets and the optimal build for the Akuma armor.
How to Get Street Fighter Armor Sets in Monster Hunter Wilds
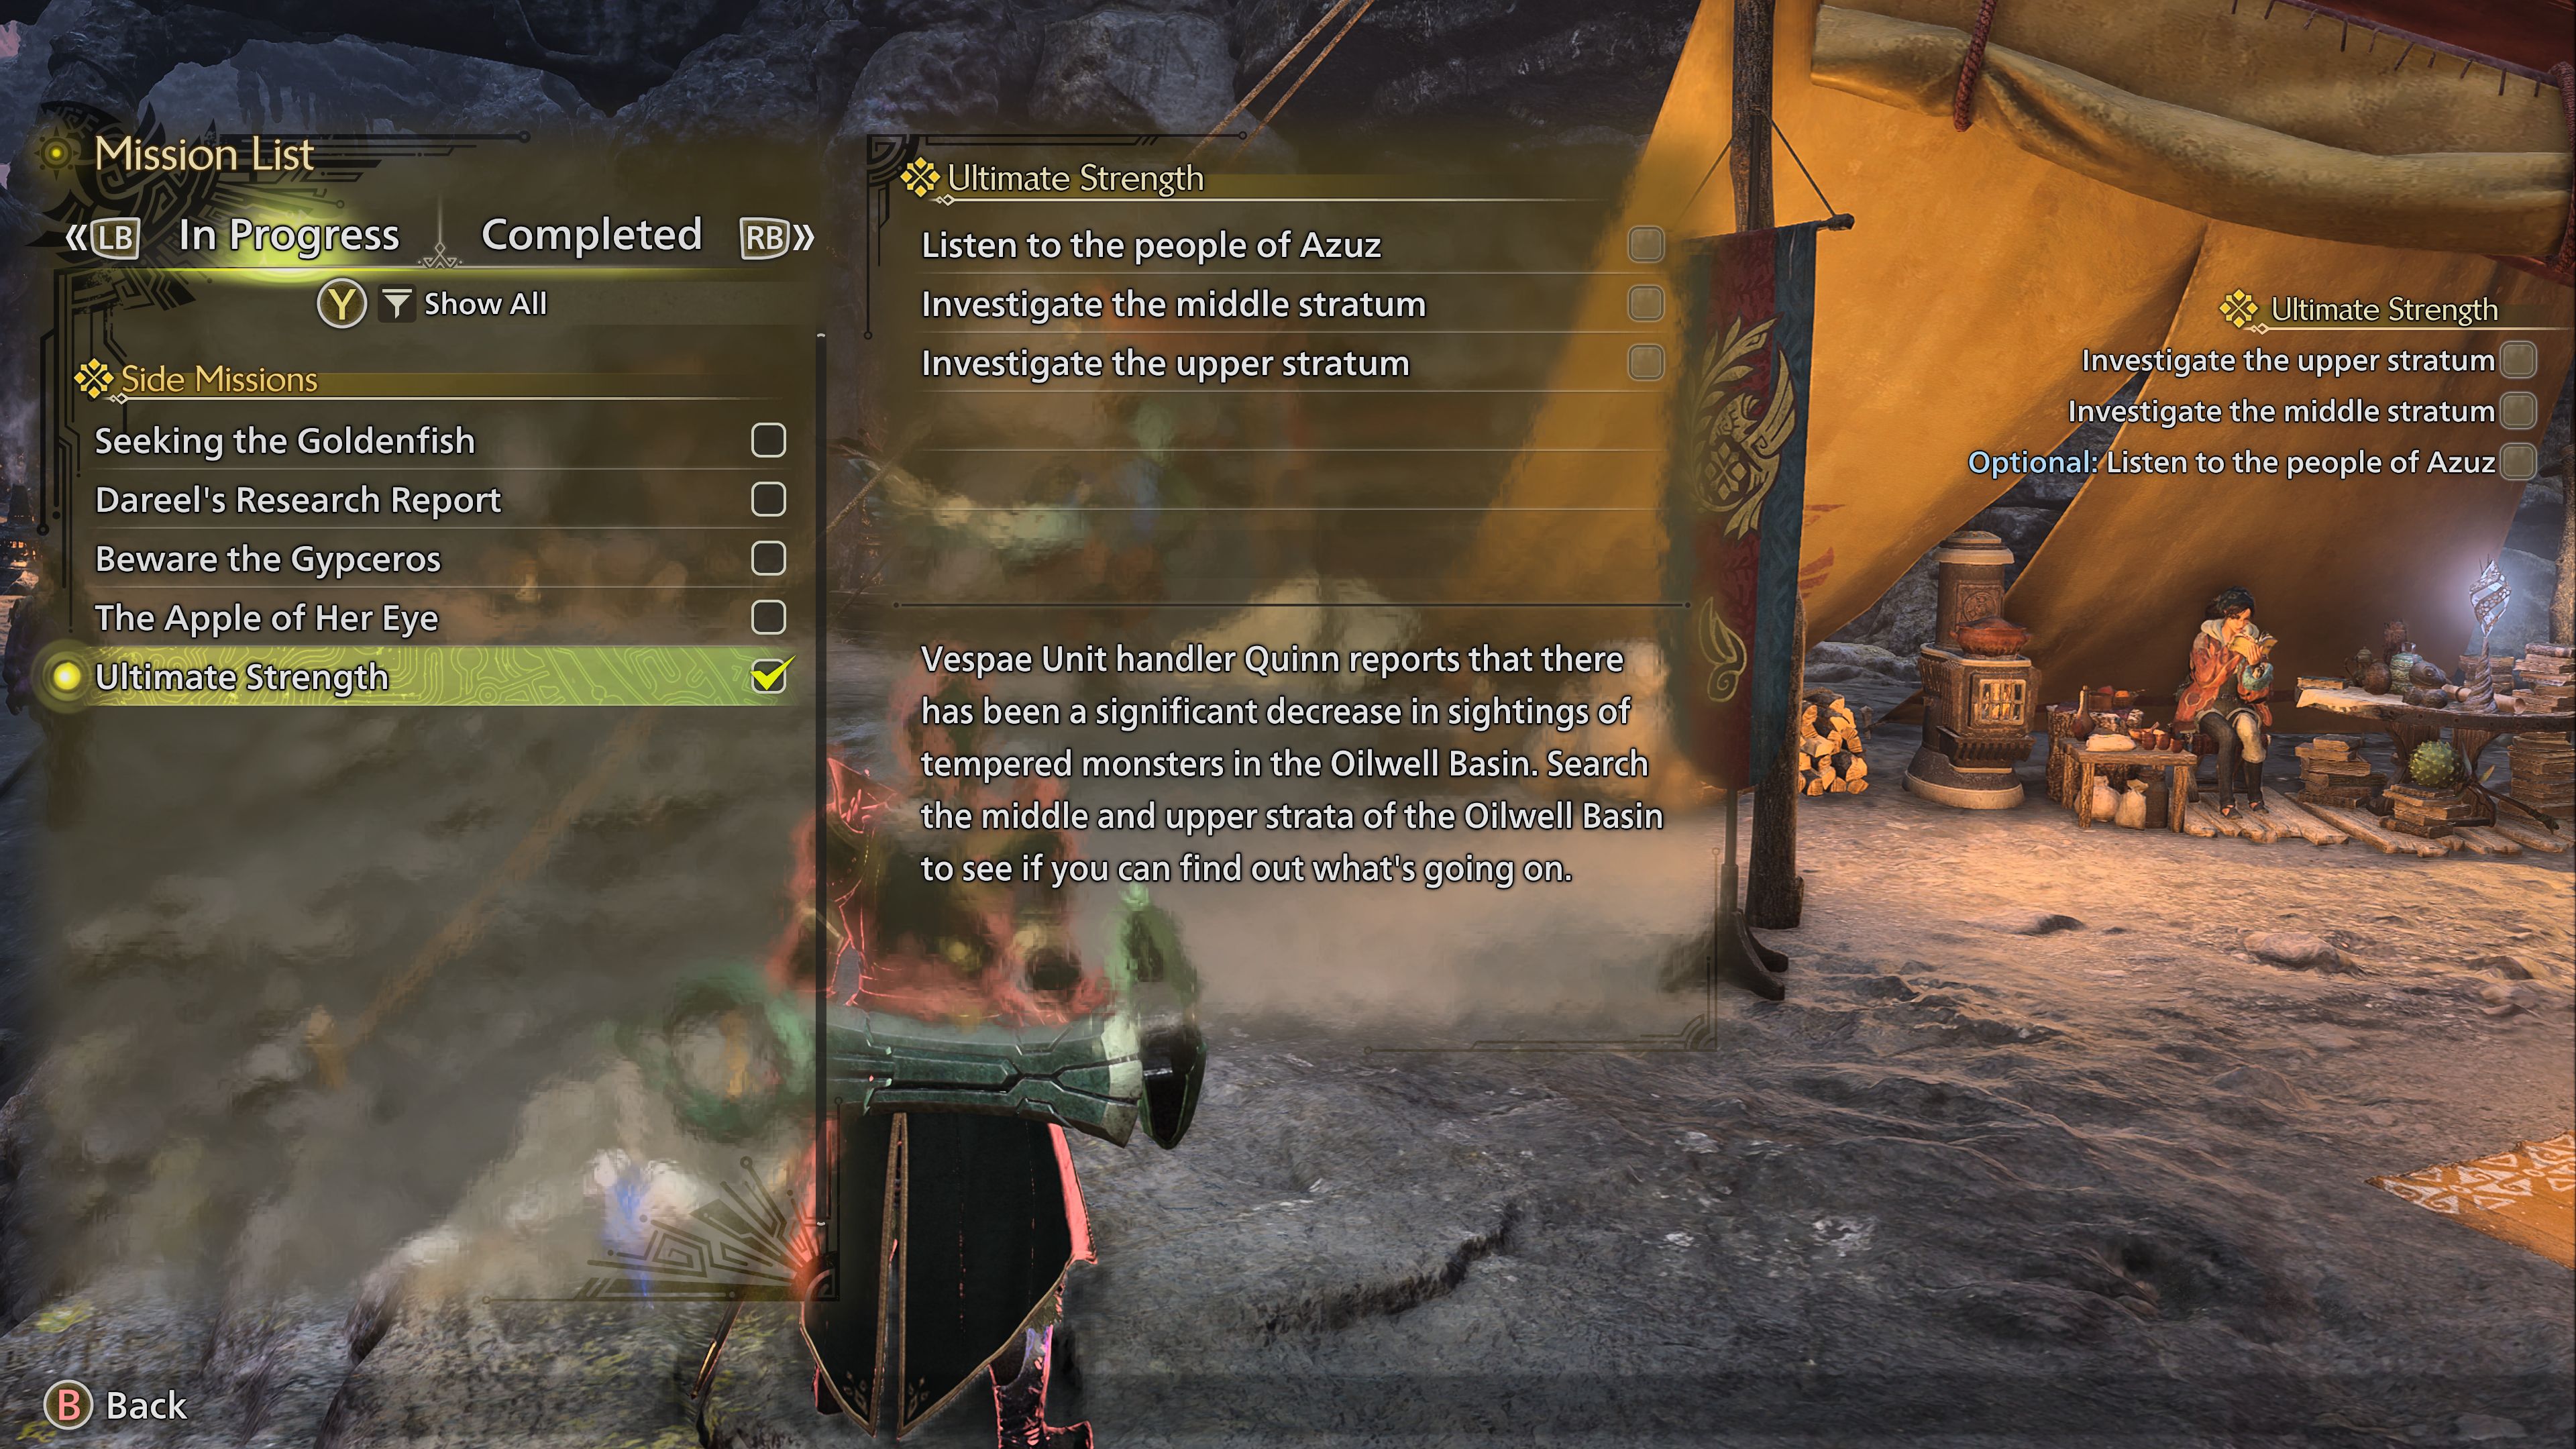
Once you’ve upgraded your game to its latest version, you’ll encounter an NPC in the Oilwell Basin who shares whispers about monsters being discovered lifeless around the region, with no traces of a fight. Following this conversation, the side quest titled ‘Ultimate Strength’ will commence.
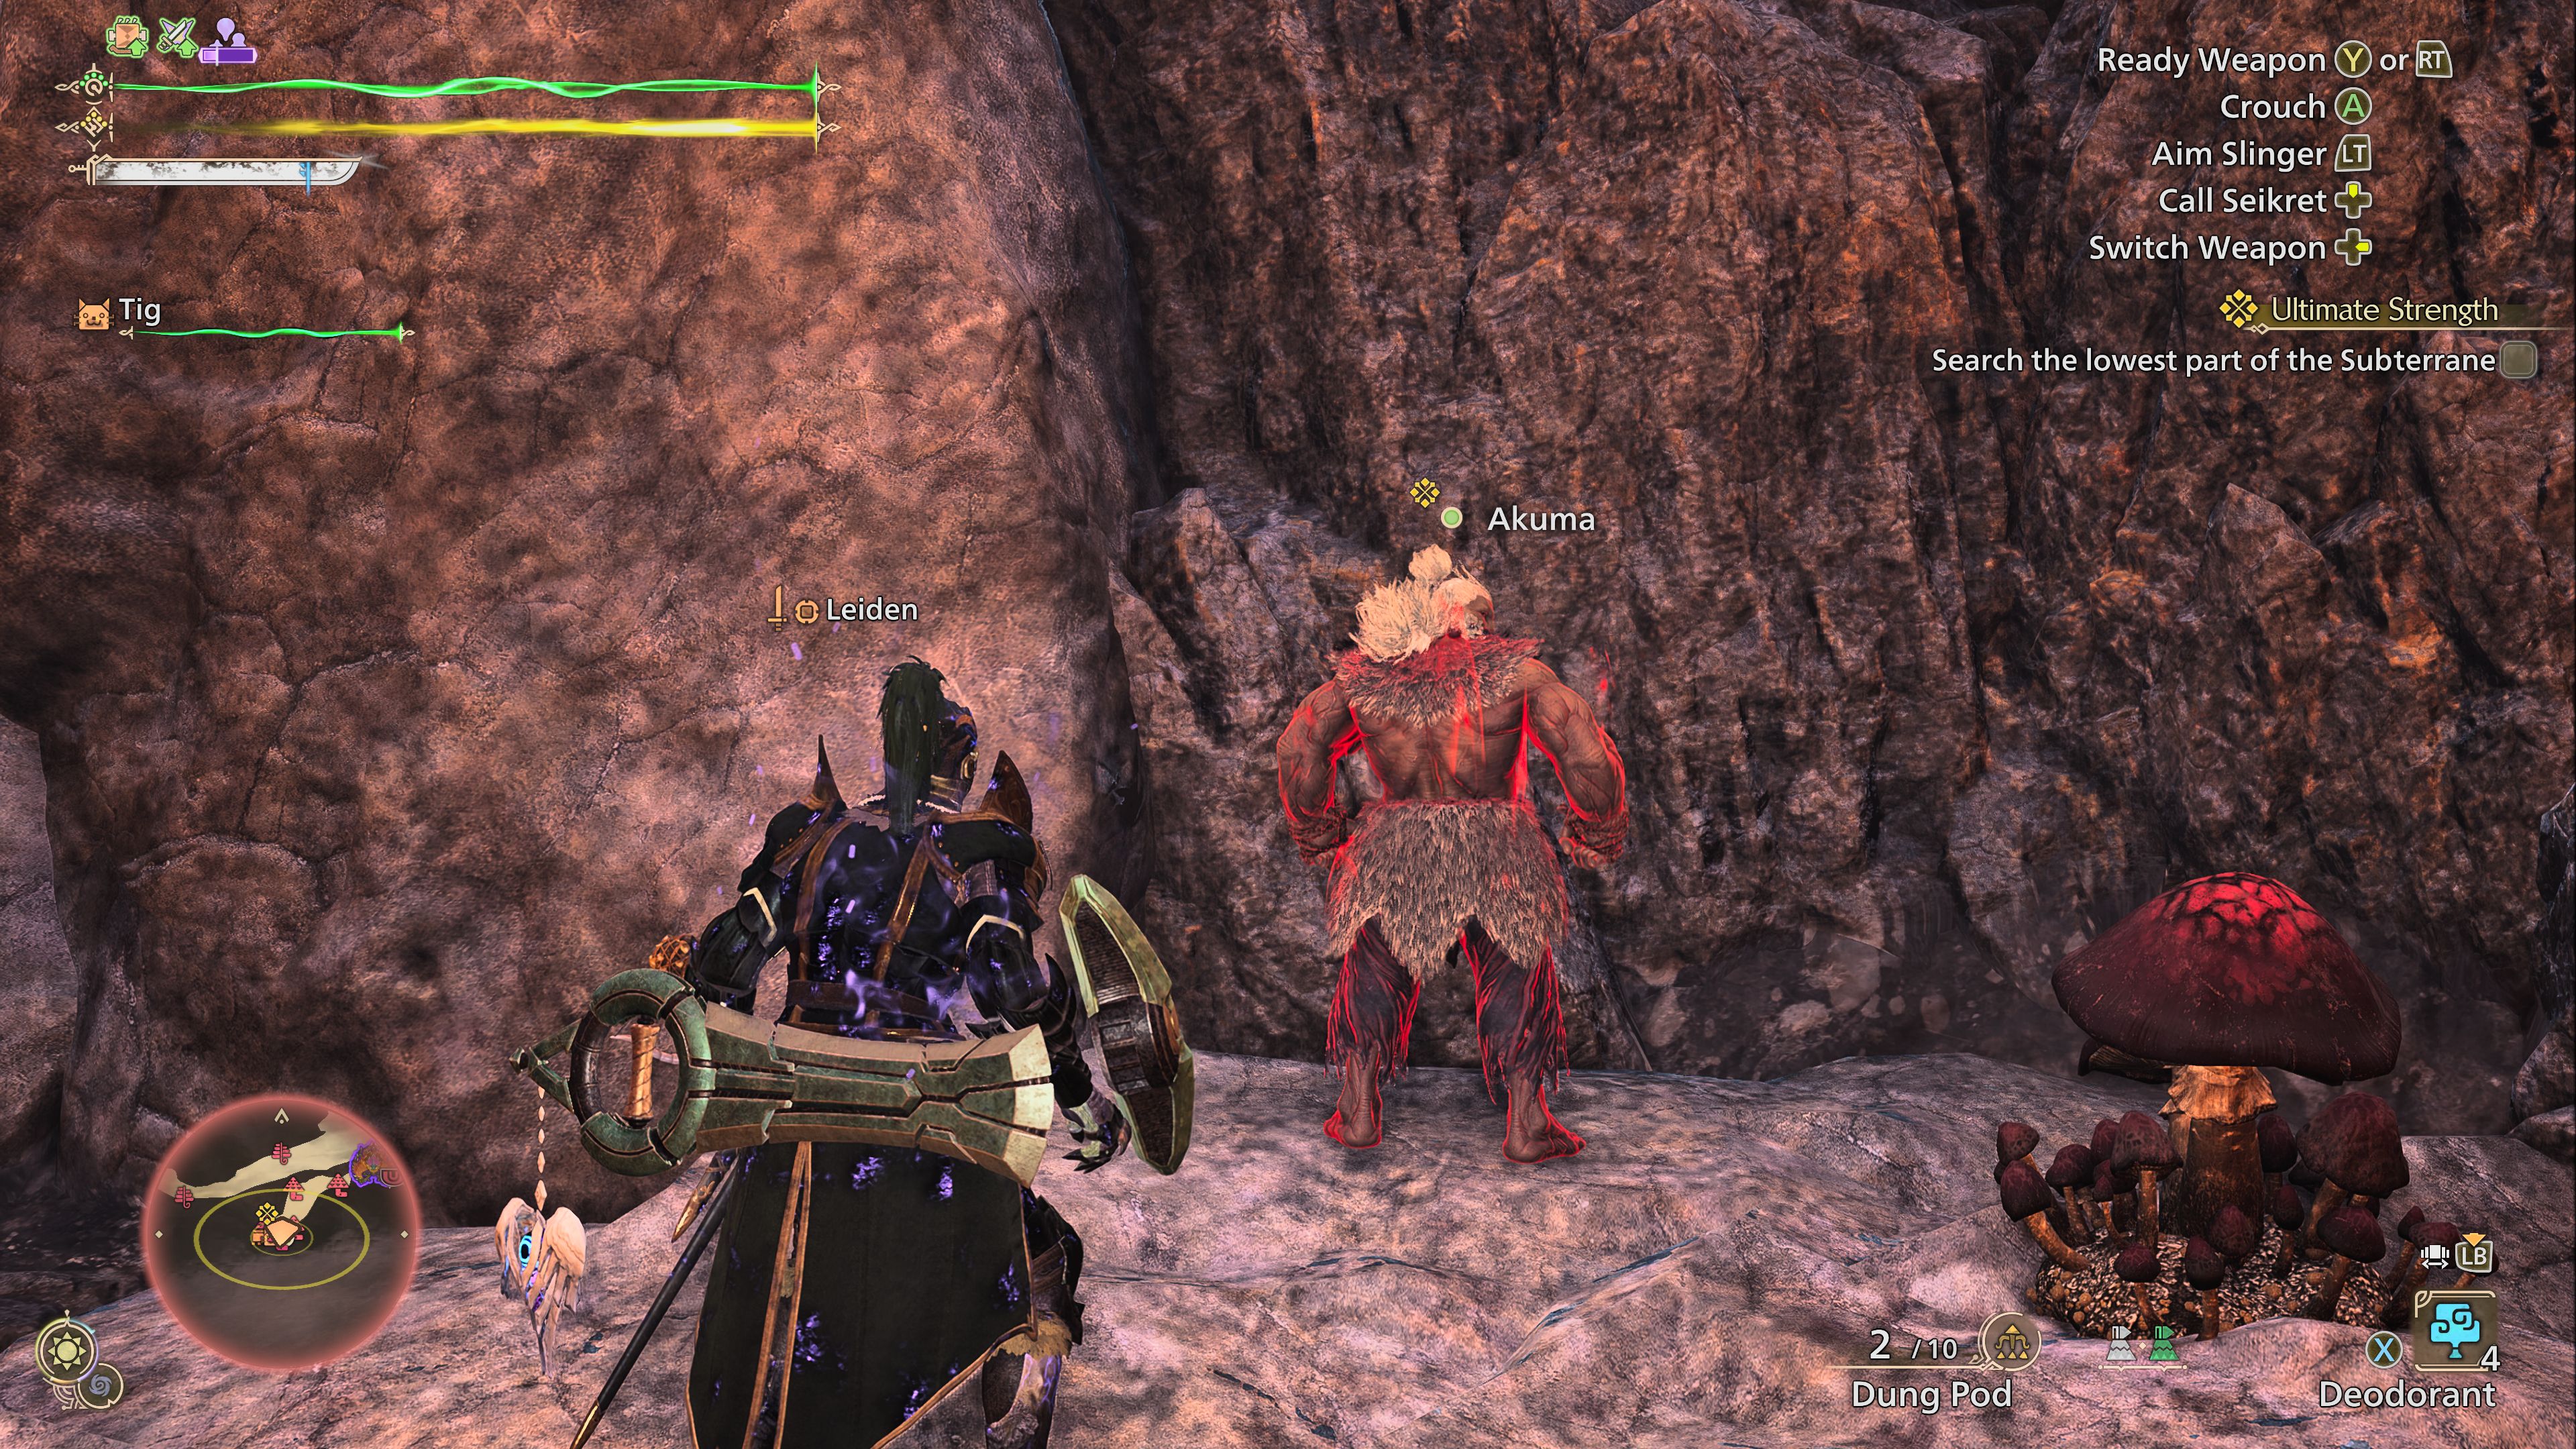
Initially, you should locate the bodies I referred to earlier; one is hidden near Zone 4 and the other is found within Zone 11. After finding them, make your way back to the Oilwell Basin and speak with another character about any unusual activities in the vicinity. They might share rumors that will guide you to the deepest level of the Oilwell Basin, where you can eventually encounter Akuma himself in a small area close to Zone 16.
Upon locating him, it’s crucial to speak with him, a conversation that might trigger an assault using his signature furious demon technique. Following this encounter, you’ll gain entry to the Arena Quest, which upon completion, will provide the currency necessary for crafting his armor set.
For this collaboration, the Arena Quest is named “True Strength.” This quest offers the possibility of obtaining various tokens essential for crafting the Akuma armor set for your hunter and the Blanka set for your palico. The mechanism is similar to other arena quests, as you’ll be given the option to select from three distinct loadouts to successfully complete a time-limited battle within the arena.
In this specific mission, you’ll start off wearing the Akuma armor right away. This means you’ve got immediate access to its distinctive move set. You can either utilize these special moves associated with the armor, or opt for the weapons at your disposal, depending on your preference.
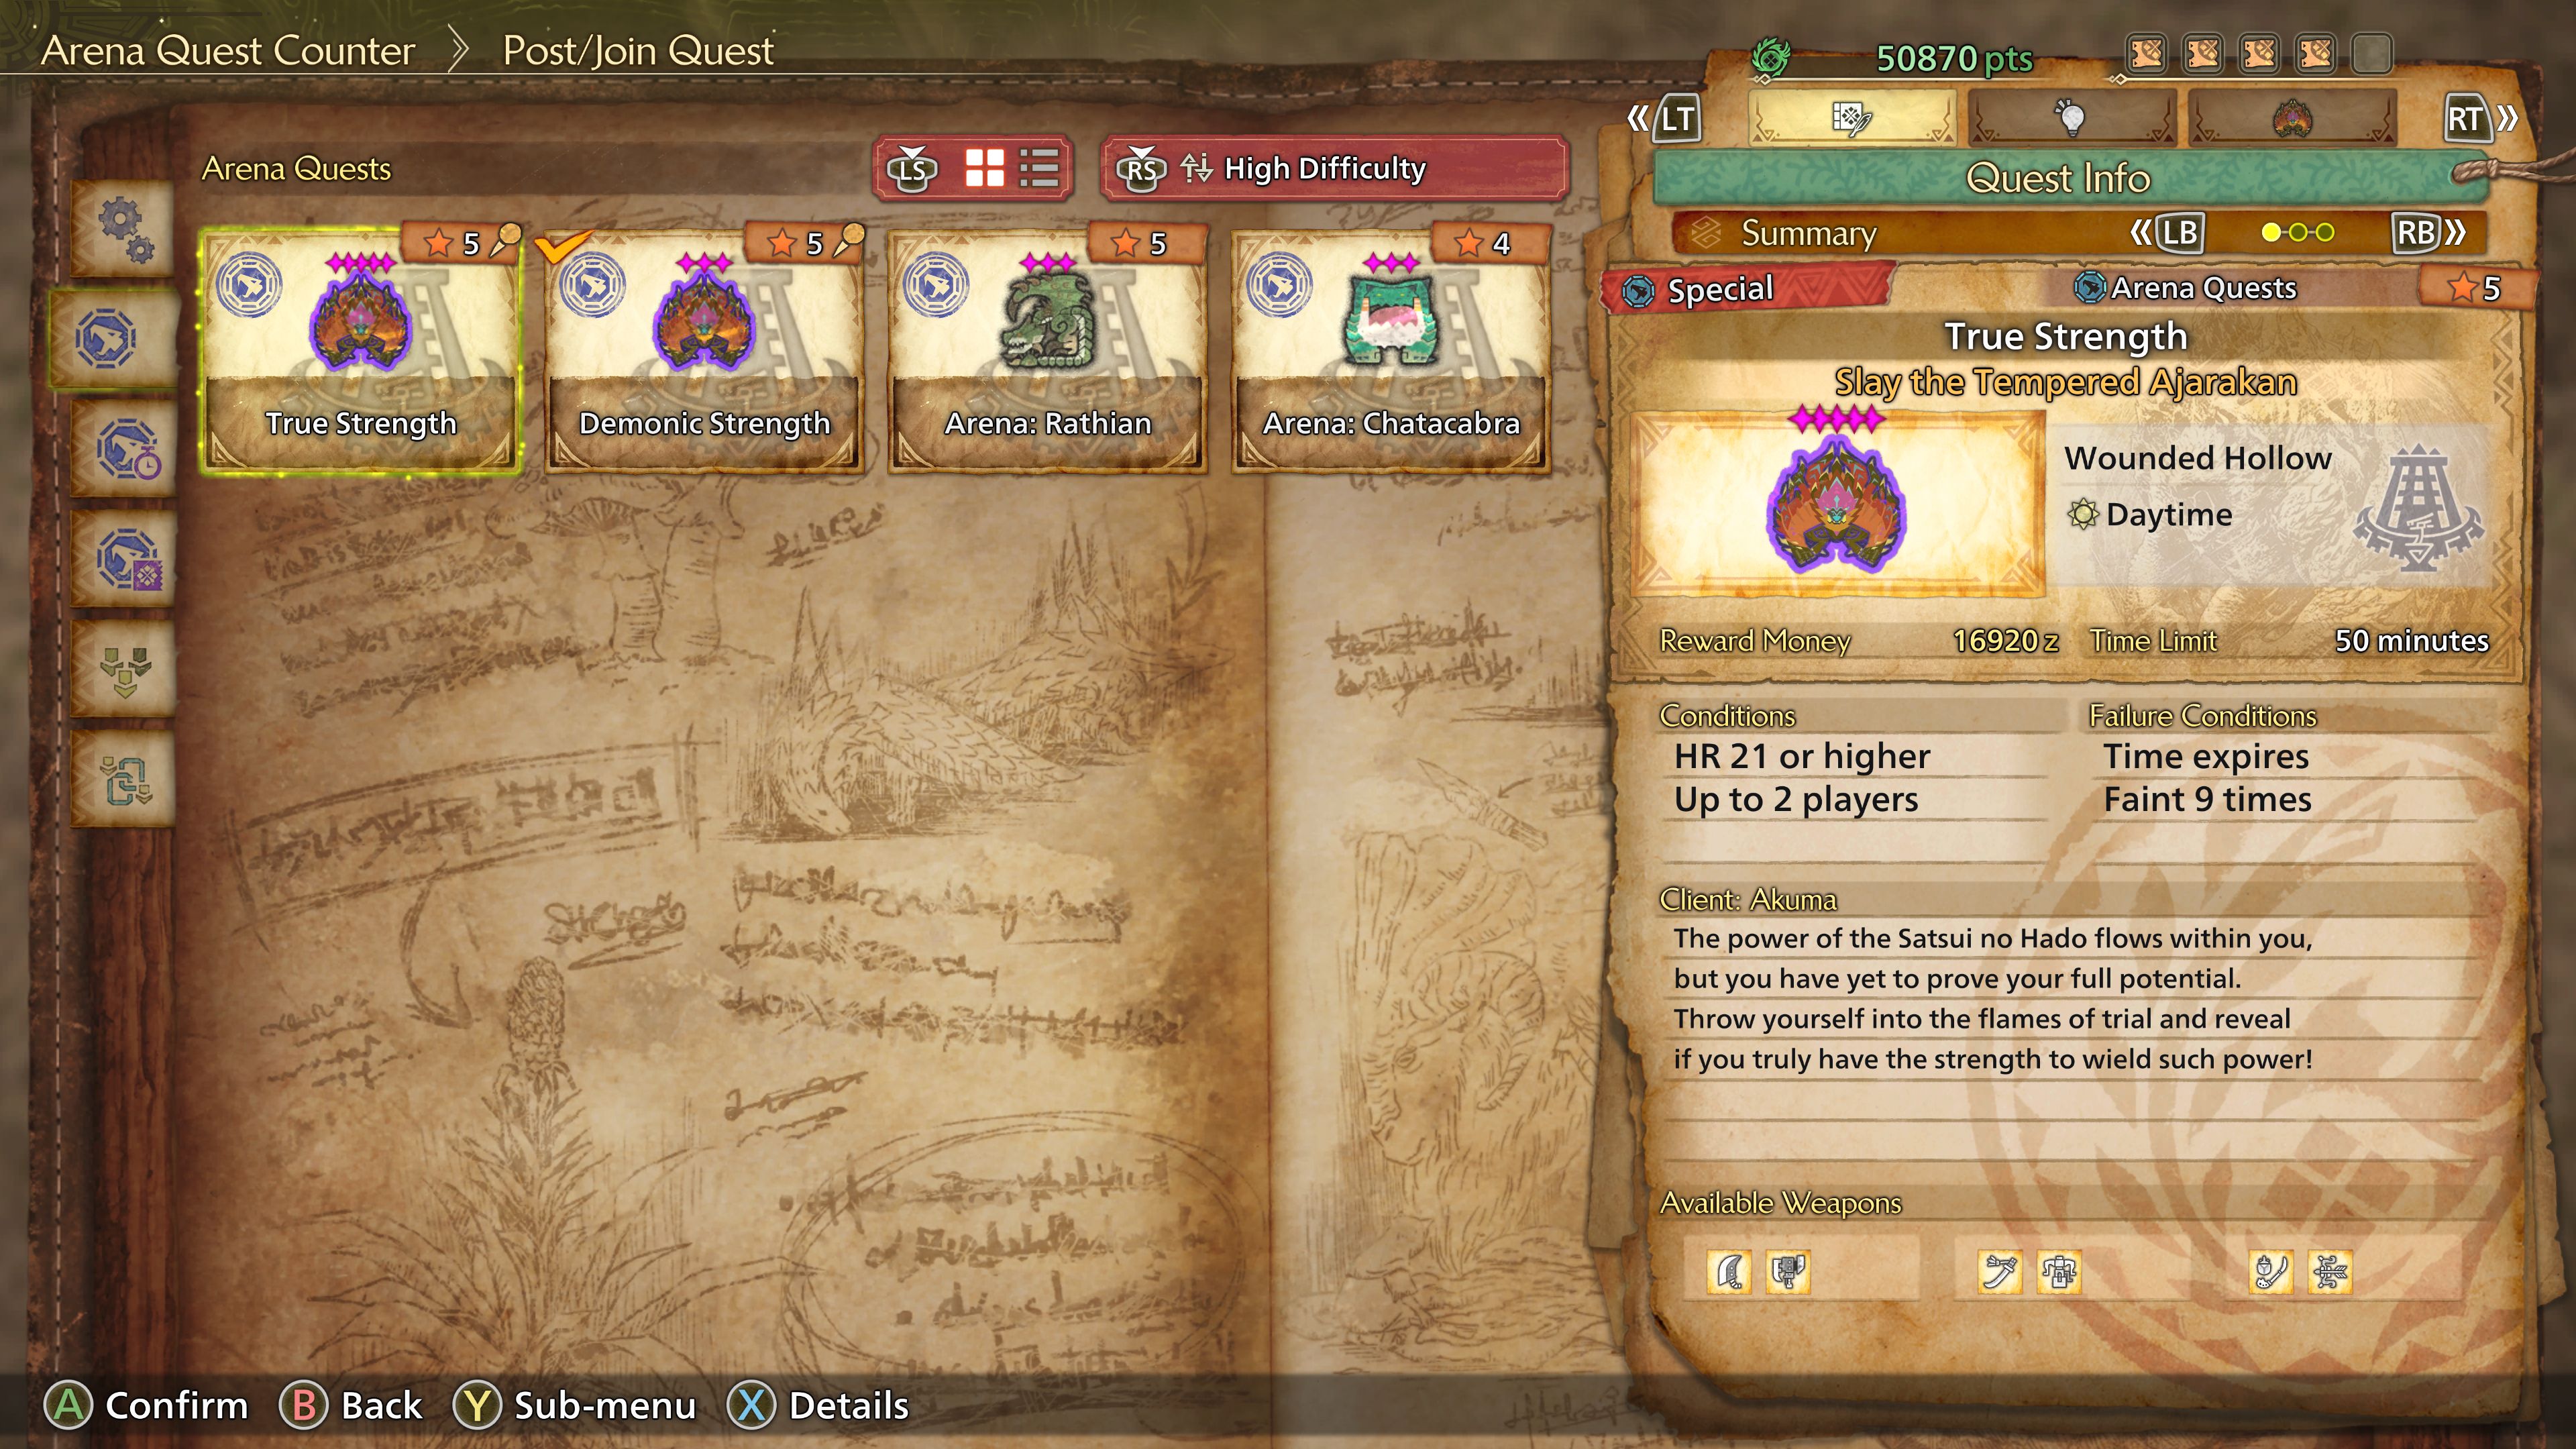
For both your hunter’s and palico’s armor sets, you’ll need five special tokens earned at the end of this event quest. Additionally, some Ajarakan materials will be awarded randomly upon completing the quest. Once crafted, the armor pieces will automatically get equipped to your hunter.
To maintain a consistent appearance for your characters that undergo significant changes, it’s recommended to wear them all together without any exceptions. Yet, once these items are made, they can be utilized as layered armor, allowing you to use any armor you prefer while preserving the Akuma and Blanka aesthetic.
Best Akuma Build in Monster Hunter Wilds
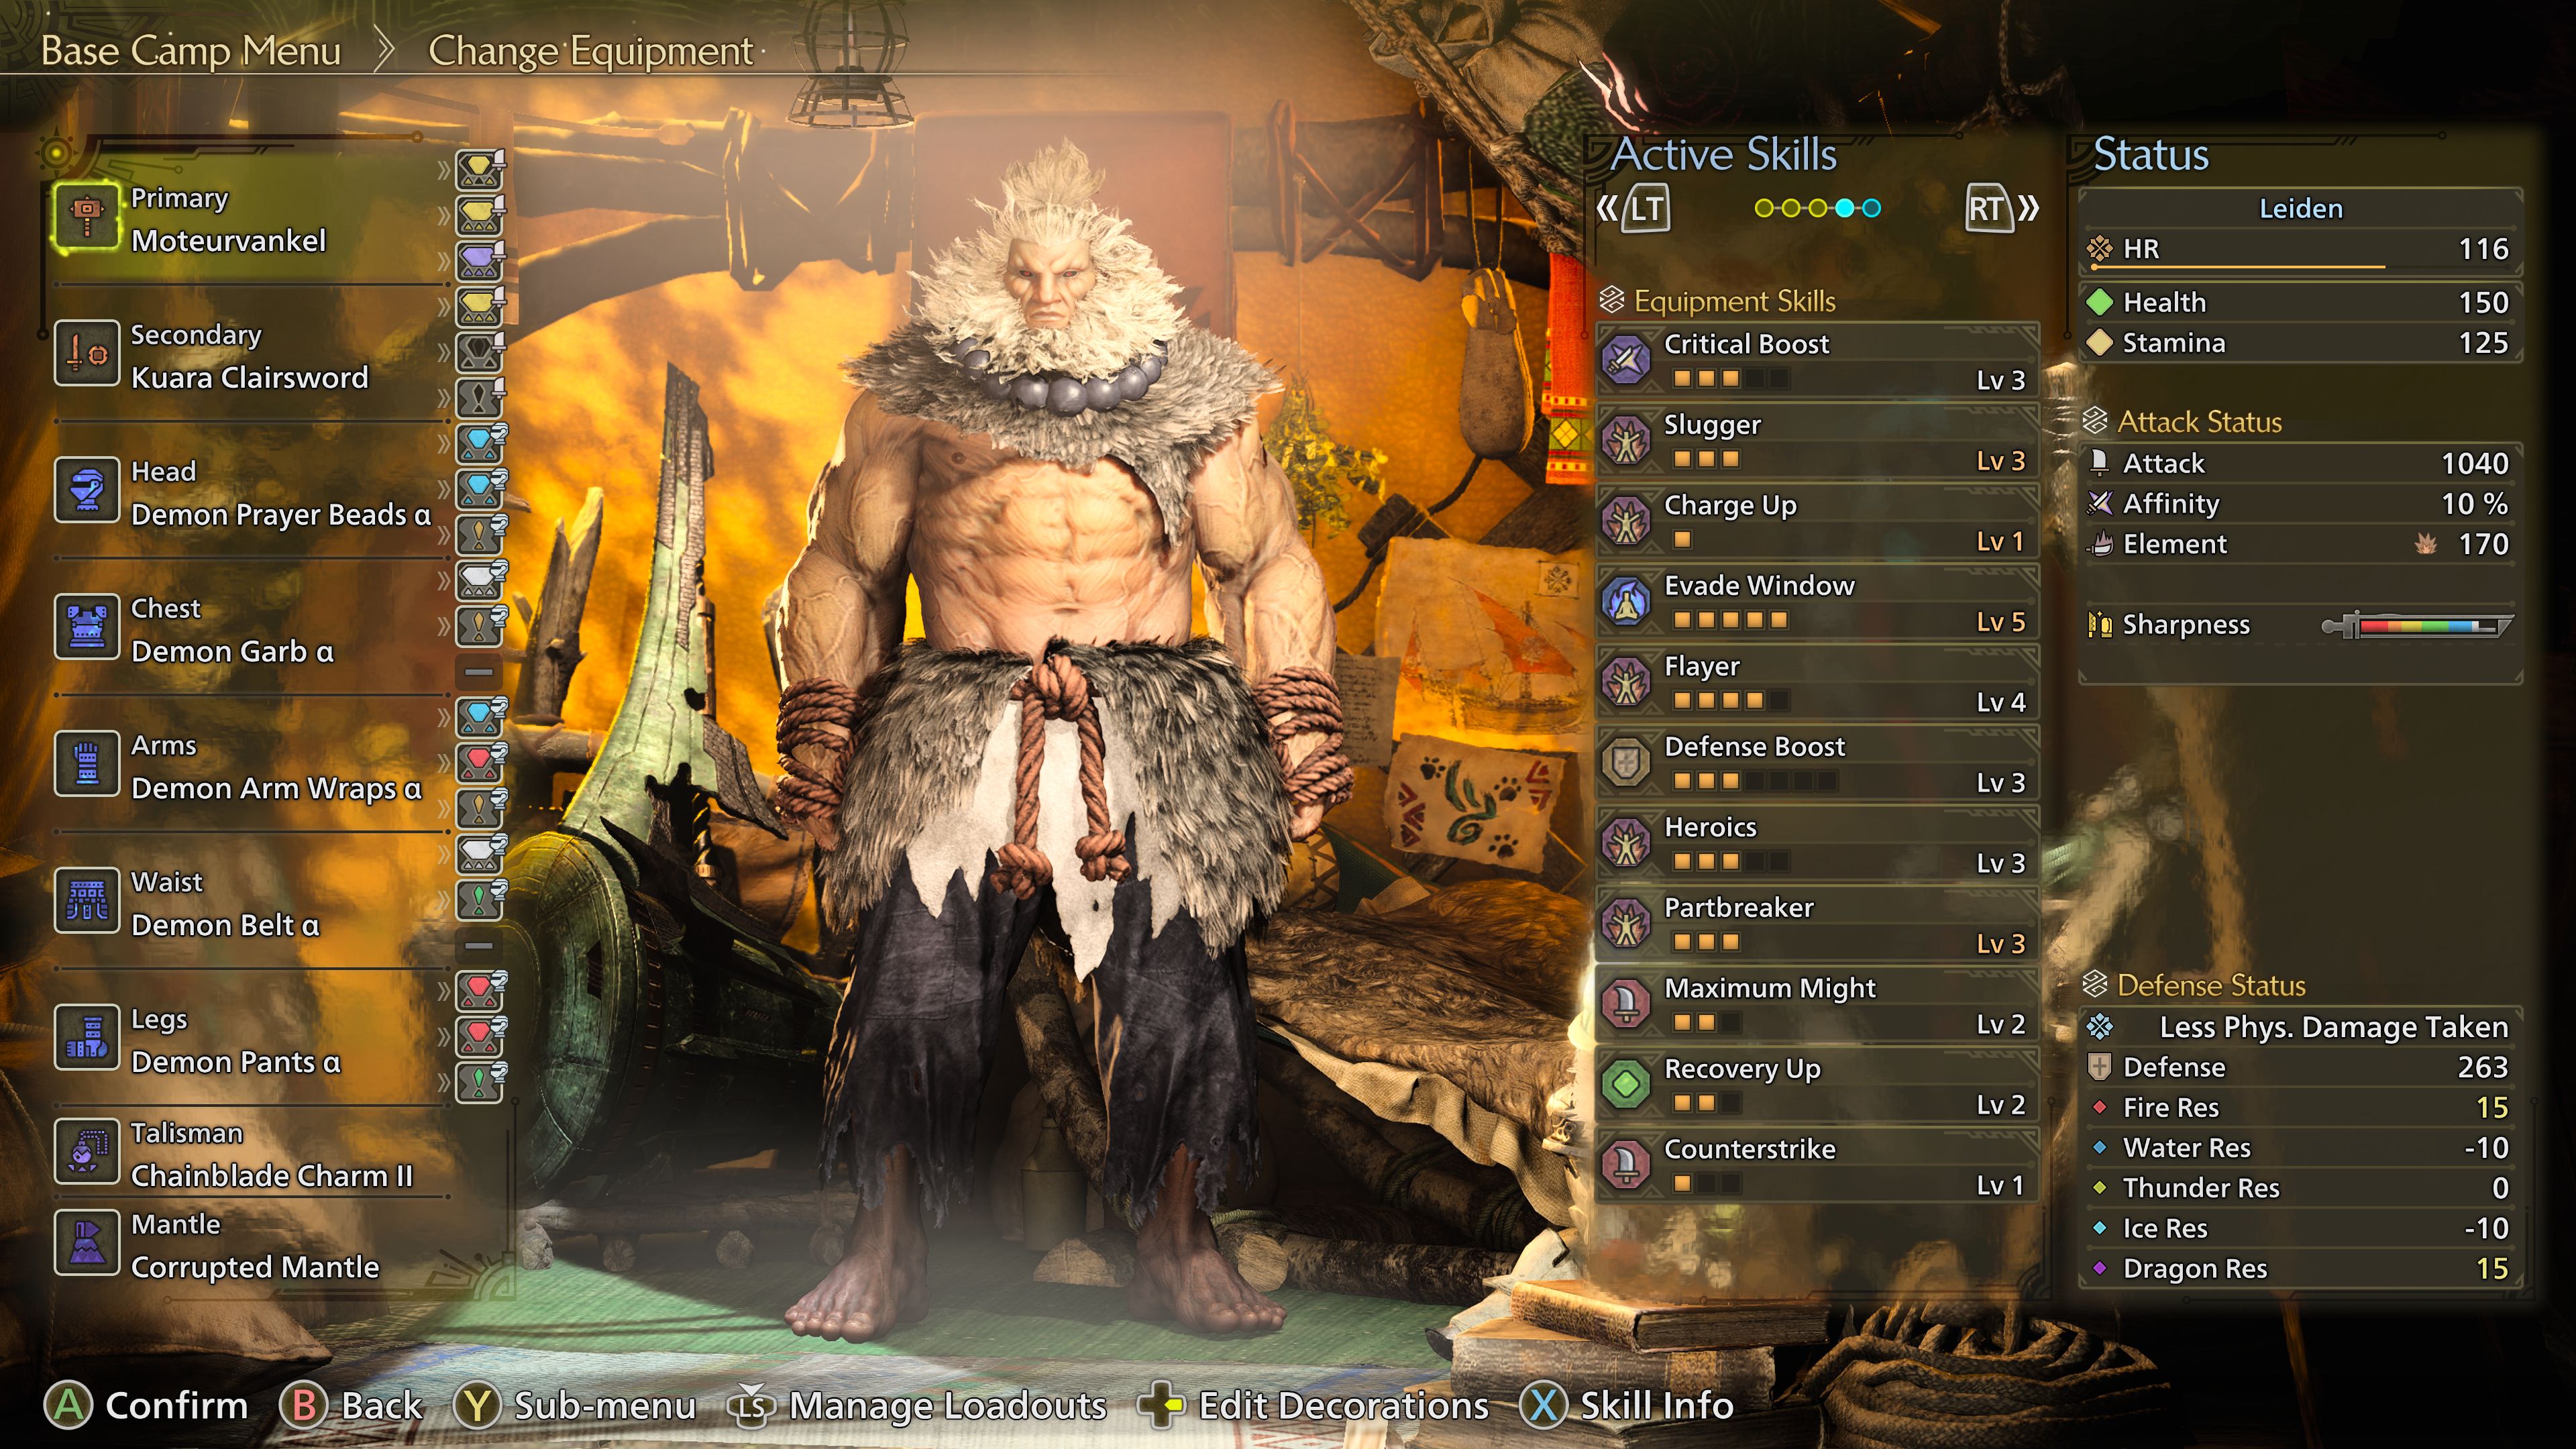
With this latest armor set for your hunter, you’ll find plenty of opportunities to customize your build. This is thanks to the multiple decoration slots, which include several level two slots and a few level three ones. The complete armor set provides you with these abilities and their respective levels:
* Level 2 Slots: Skill A, Skill B, Skill C
* Level 3 Slot: Skill D
(Note that Skills A, B, C, and D are placeholder names for the actual skills granted by the armor set.)
- Partbreaker Level 3
- Heroics Level 3
- Evade Window Level 2
Akuma’s abilities are robustly suited to his swift and fierce personality, with the armor allowing for additional emphasis through ornaments. When creating Akuma’s move set, the damage you inflict and affinity percentage will grow in accordance with your selected weapon. Consequently, choosing a weapon such as a hammer or greatsword that boasts a high base attack stat and affinity percentage would be optimal for this build.
The following is a list of top-priority skills to emphasize through decoration, along with explanations for their selection:
1. Creativity – This skill is essential because it allows us to think outside the box and come up with unique and captivating ideas that will make our decorations stand out.
2. Attention to Detail – Having a keen eye for detail ensures that every aspect of our decorations is polished and perfect, from the smallest ornament to the overall design scheme.
3. Sustainability – Prioritizing eco-friendly materials and practices not only helps reduce our carbon footprint but also demonstrates a commitment to environmental responsibility.
4. Cultural Awareness – Understanding and respecting diverse cultural backgrounds allows us to create decorations that are inclusive and meaningful for a wide range of audiences.
5. Collaboration – Working together with others fosters creativity, encourages new ideas, and ensures that the final product is a collaborative masterpiece rather than just an individual effort.
6. Storytelling – Incorporating elements that tell a story or convey a message through our decorations makes them more engaging and memorable for viewers.
7. Flexibility – Being adaptable to changing circumstances, such as budget constraints or unexpected challenges, allows us to find creative solutions and produce high-quality decorations even under challenging conditions.
- Slugger: Akuma’s entire move set can deal stun damage to a monster. Doubling down on that trait can make it easier to stun monsters consistently due to how fast moves can come out.
- Flayer: One of the other moves Akuma can use is his Drive Rush ability, similar to the Street Fighter 6 mechanic. It is instead incorporated to be a resource used to attack a wound on a monster, which can then trigger a raging demon attack. Being able to do this as often as possible is a great way to deal massive amounts of damage within a short interval, so having as many wounds to hit is extremely beneficial.
- Critical Boost: Maximizing damage is always a staple with any build. Critical Boost has proven to be one of the best ways to do that with how damage is calculated upon landing a critical hit. If you have a weapon with higher affinity, this will maximize that benefit.
- Evade Window: Using some of the slots to cap off the Evade Window skill already present on the armor set is beneficial due to the unique dash you get while wearing it. While there is no drastic benefit in using this particular dash, it helps with the flow of the move set and how you need to reposition yourself in the middle of a fight.
When it comes to talismans, the chainblade charm is highly recommended if you want to maximize the Flayer skill and make use of available decoration slots at the same time. If you’re aiming for maximum damage output, the corrupted mantle could be a good option, but keep in mind that it increases the risk of taking more damage. On the other hand, the evasion mantle is a safer bet due to its Evade Window advantage, and it’s particularly suitable for those who prioritize consistency within their armor set.
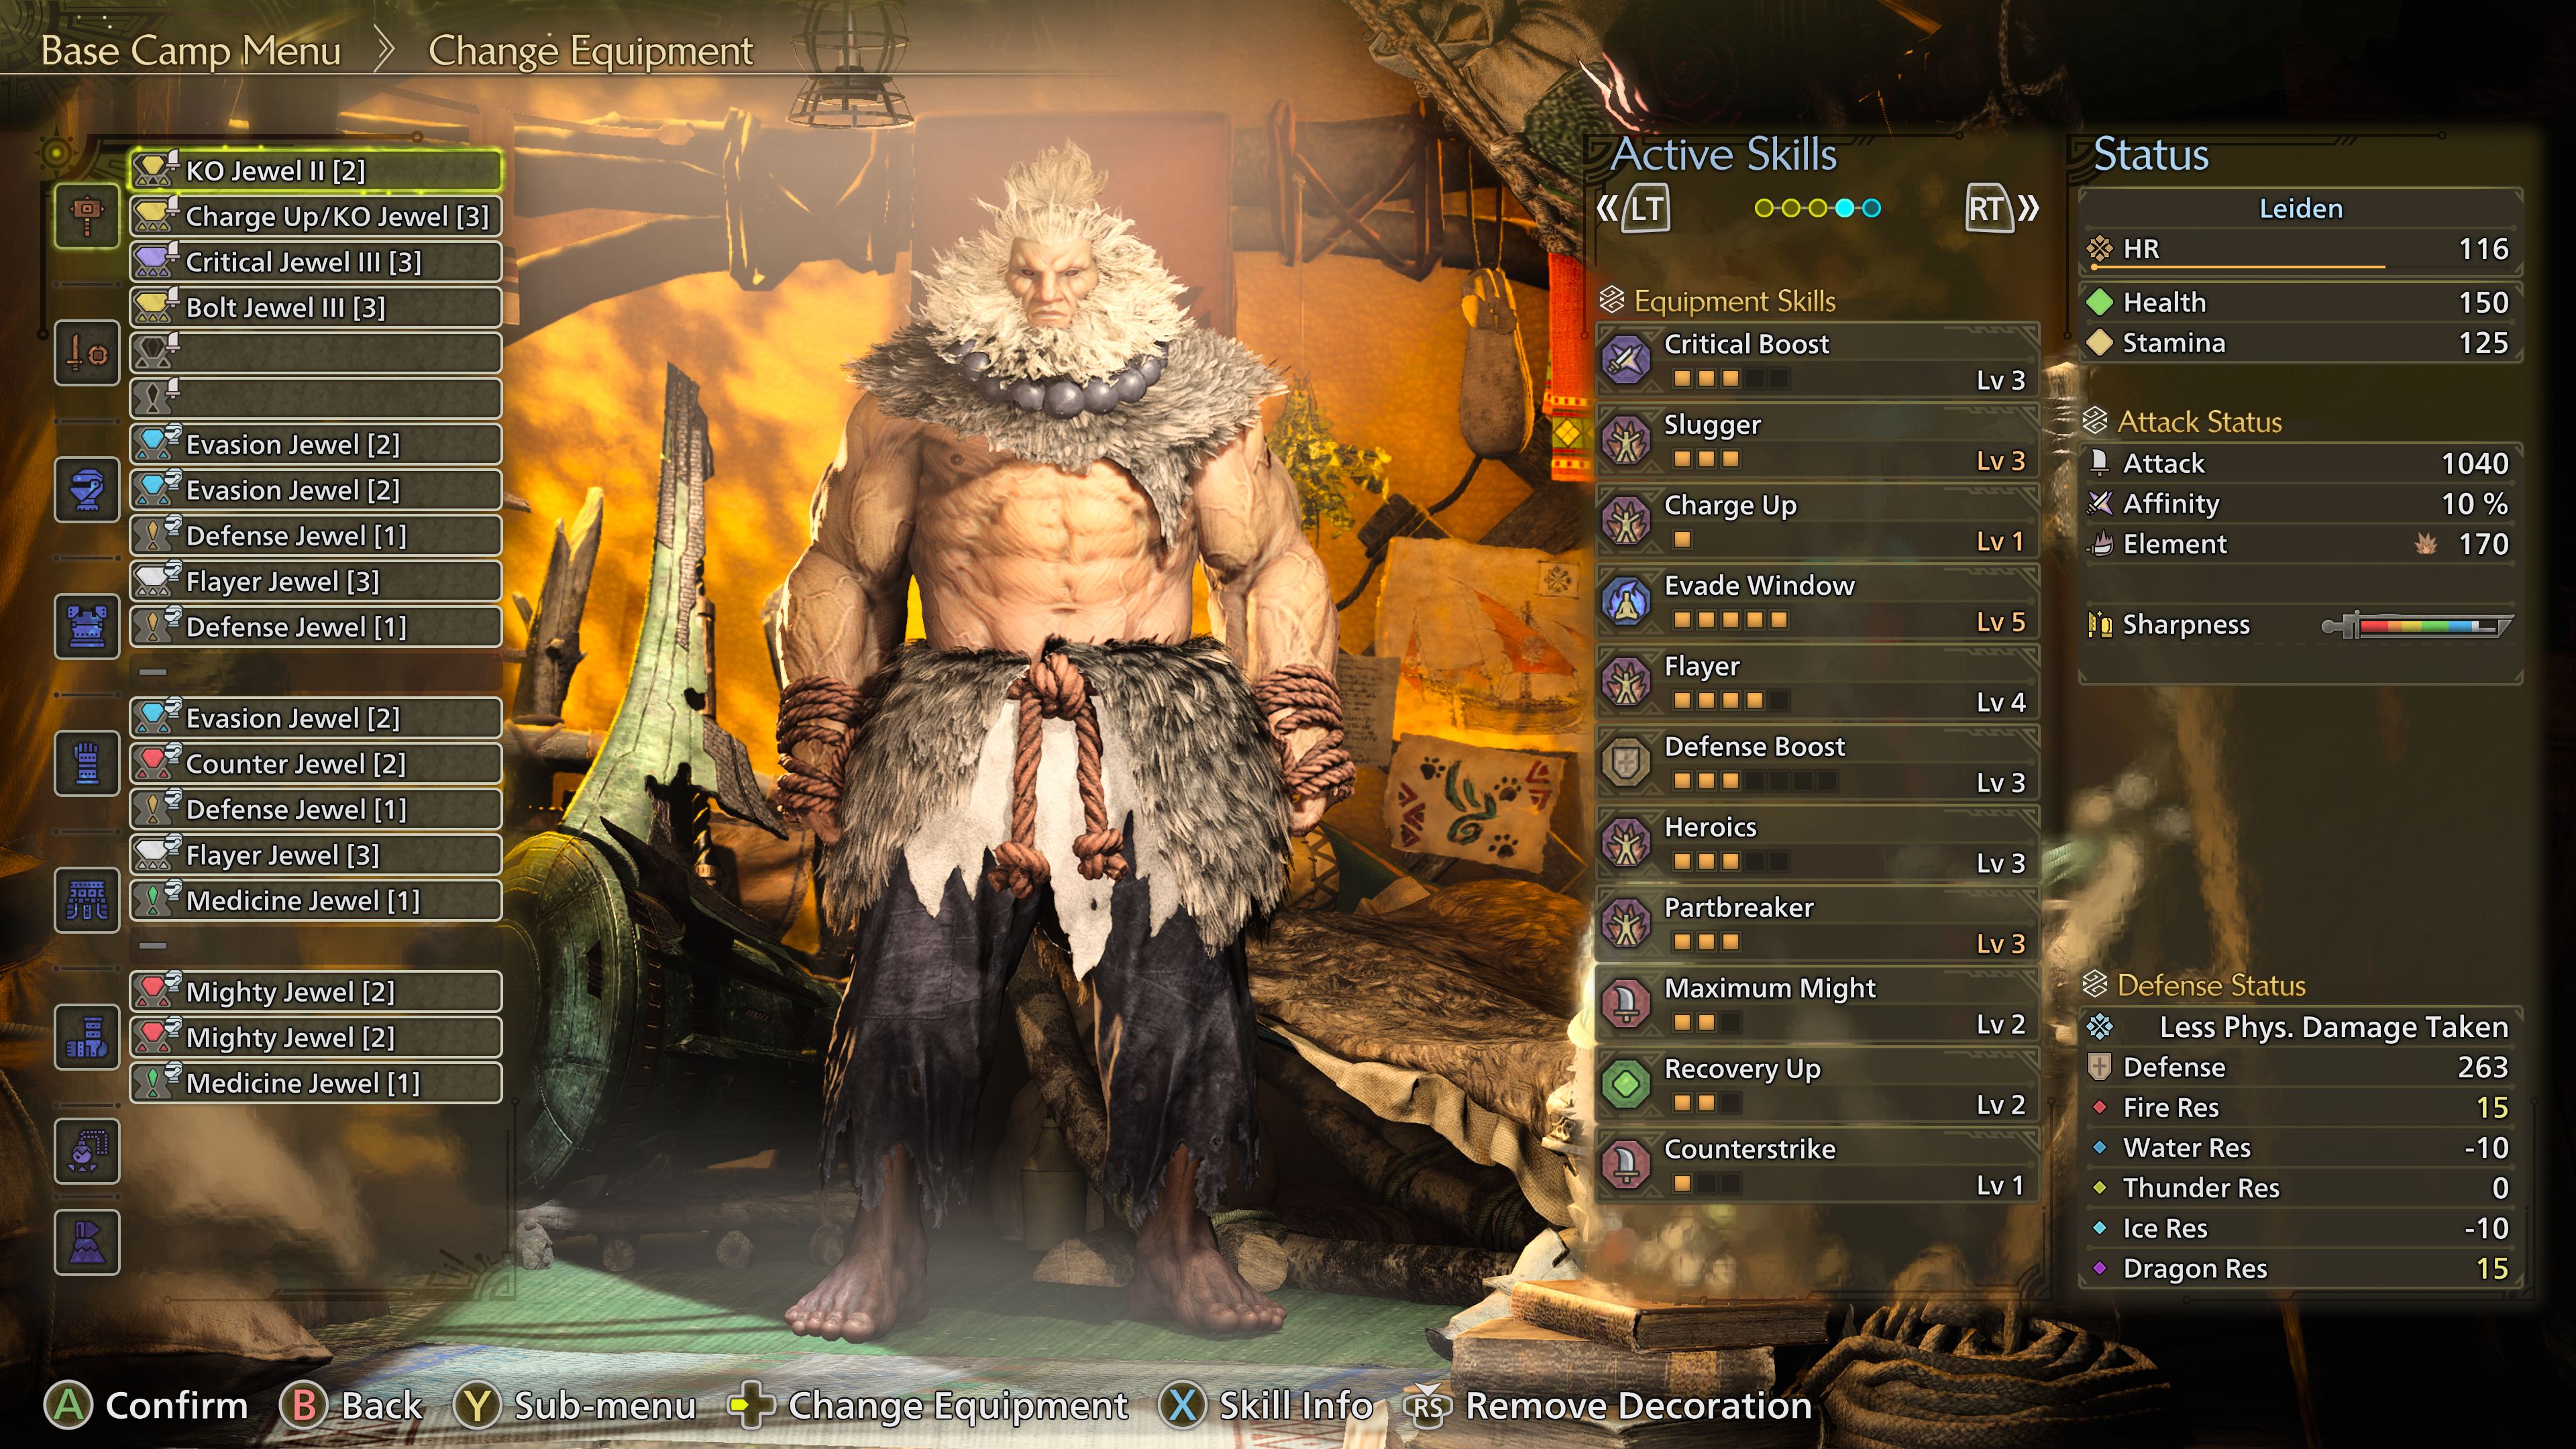
From a fan’s perspective, I recommend utilizing Level 1 decoration slots to enhance gameplay experience with skills such as Recovery Up or Defense Boost. However, feel free to customize them according to your personal taste and playstyle. For reference, here’s an illustration of how the decorations should appear in order to reap the intended benefits.
Read More
- Apothecary Diaries Ch.81: Maomao vs Shenmei!
- 30 Best Couple/Wife Swap Movies You Need to See
- Gachiakuta Chapter 139: Rudo And Enjin Team Up Against Mymo—Recap, Release Date, Where To Read And More
- Netflix’s ‘You’ Season 5 Release Update Has Fans Worried
- Ncuti Gatwa Exits Doctor Who Amidst Controversy and Ratings Crisis!
- DC: Dark Legion The Bleed & Hypertime Tracker Schedule
- Every Minecraft update ranked from worst to best
- Zenless Zone Zero 2.0 – release date, events, features, and anniversary rewards
- All 6 ‘Final Destination’ Movies in Order
- Summoners War Tier List – The Best Monsters to Recruit in 2025
2025-05-29 02:34