
Key Points
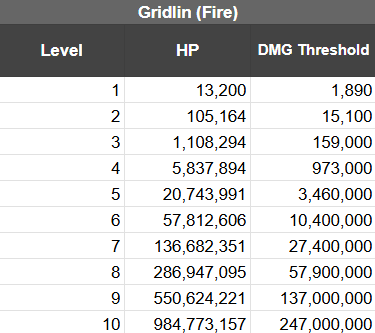
- Level 10 DMG Threshold — 247M.
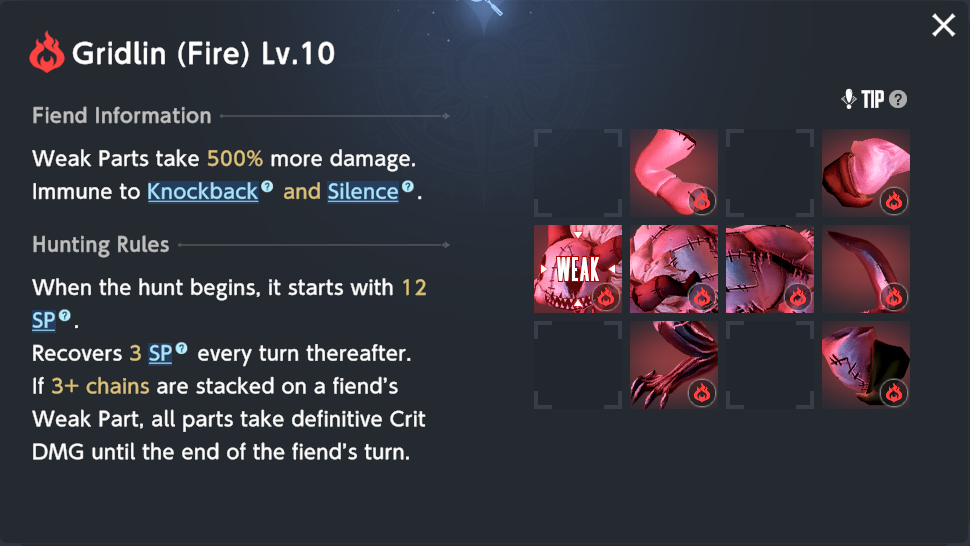
- 0 DEF & MRES, 100 Fire DMG, 50 Wind RES
- 12 Initial SP, 3 SP gained per turn.
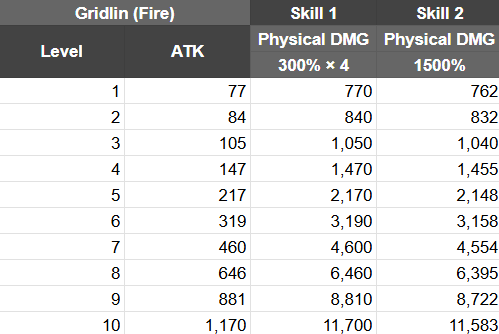
- Skill Sequence: C1 → S1 → S2 → S3 → S4.
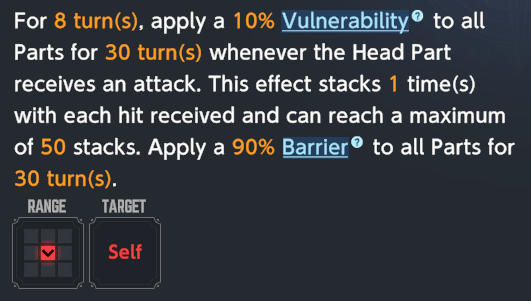
- Stack vulnerability on the Fiend after C1, and then dispel its barrier buff!
- Bring DEF gear.
Skill Rundown
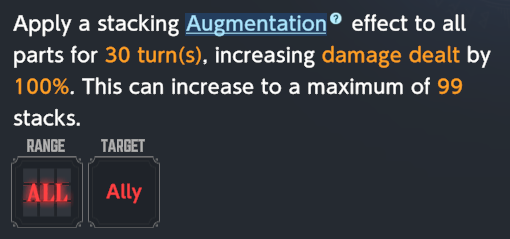
Fatal Temptation
Trigger: Apply 10 stacks on any tile.
Activate this ability at the outset of combat, followed by a series of attacks focusing on the enemy’s main square throughout the fight, to accumulate weakness progressively.
To inflict the maximum possible damage, consider removing the barrier protection at a later time using either Rafina or Scheherazade.
Death☆Punch

For the Fiend’s generic abilities, both S1 and S2 cause damage. No need to fret if you’re equipped with Defense gear.
Rampage Blow

Creepy Bubble
On the next turn, the fiend’s instant-kill ability will activate, making the situation puzzling. Instead, let’s consider that turn as if the fiend doesn’t act or make a move.
Merry Bad Ending
The current team steps aside, making room for the next one to perform. Meanwhile, the Fiend returns to Start 1 and resets its ability based on certain conditions.
Hunting the Fiend
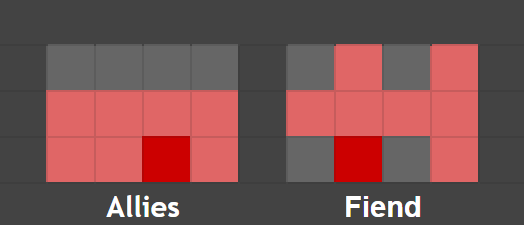
C1 → S1 → S2 → S3 → S4
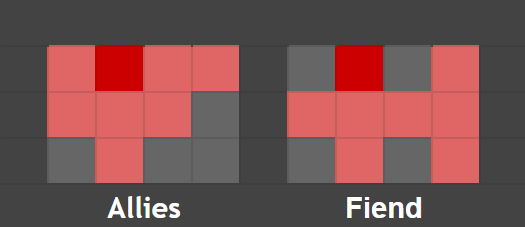
Initiate C1 at the beginning of combat, followed by continually targeting the Fiend’s head area to build up its vulnerability.


Rafina and Schera have the ability to clear the defensive buff on the Fiend, but it’s important to note that while Rafina merely removes barriers, Schera also takes away a beneficial buff called “Wrath” which makes the Fiend vulnerable to stacking up to 50 points of vulnerability. To maximize this effect with Schera, ensure the Fiend has reached the maximum vulnerability stack (50) before dispelling, as it won’t be able to accumulate additional stacks after being dispelled. If you choose Rafina instead, there will be no such concern regarding vulnerability stacks.


Hikage and Luvencia are two exceptional stackers of chains. For those who have reached level 6 or higher, it might be beneficial to assign your initial team to building vulnerabilities on the Fiend, as well as removing its shield. Subsequently, switch to your second team for inflicting damage.
DPS Review


This fiend hunt specifically caters to Wilhelmina, due to her ability to swiftly accumulate vulnerability stacks against Fiends. Moreover, her single-target damage output is extraordinarily high.
In this hunt, Yumi might not disappoint due to her ability to apply up to 20 stacks of damage over time (DoT) and vulnerability stacks on the Fiend.
Unfortunately, Sylvia may struggle to make optimal use of her area-of-effect abilities, resulting in a less effective damage output over time.
With only a few spaces in the central column for stacking vulnerability on the Fiend’s head, it might prove challenging to effectively use Morpeah’s personas due to their multiplier of 6/8 AoE (Area of Effect).
Scheherazade (×8 AoE) — Schera can dispel the Fiend’s barrier, and her damage output is decent.
Roxy (AoE 11 tiles) — Although Roxy’s territory is extensive, she might find the Fiend hunt challenging because of her 50% damage infliction frequency, combined with her relatively low damage output.
Read More
- Apothecary Diaries Ch.81: Maomao vs Shenmei!
- Gold Rate Forecast
- Batman and Deadpool Unite: Epic DC/Marvel Crossover One-Shots Coming Soon!
- Who was Peter Kwong? Learn as Big Trouble in Little China and The Golden Child Actor Dies at 73
- Mobile MOBA Games Ranked 2025 – Options After the MLBB Ban
- Hunter Schafer Rumored to Play Princess Zelda in Live-Action Zelda Movie
- 30 Best Couple/Wife Swap Movies You Need to See
- Netflix’s ‘You’ Season 5 Release Update Has Fans Worried
- Gachiakuta Chapter 139: Rudo And Enjin Team Up Against Mymo—Recap, Release Date, Where To Read And More
- Every Minecraft update ranked from worst to best
2025-04-14 13:37